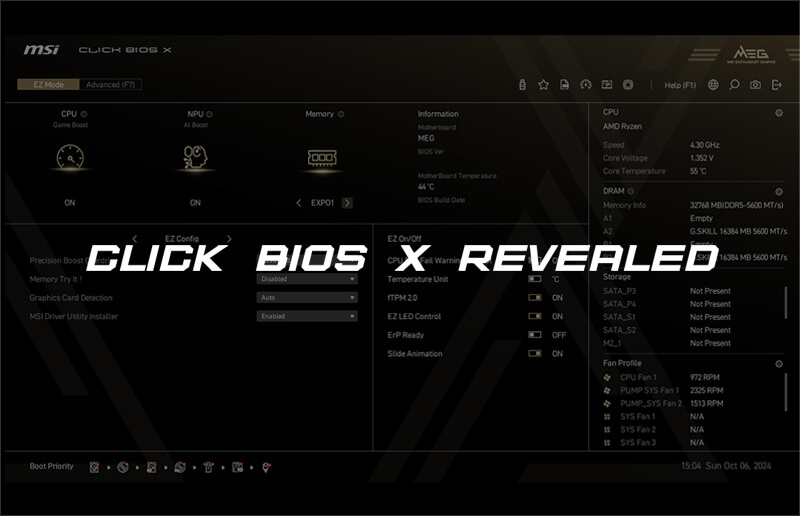
msi Bios - CLICK BIOS X


Tema unico:
Design distintivo, pensato per ogni linea di prodotto.
Overclock con un clic
La via più semplice per ottimizzare le prestazioni.
Architettura ESA:
BIOS ottimizzato per massima espandibilità ed efficienza.
Interfaccia ottimizzata:
Trova tutto al primo colpo, senza complicazioni
Adattamento automatico:
La risoluzione si regola da sola, senza che tu debba fare nulla
CLUB386
"L'azienda ha voluto sottolineare l'impegno profuso nello sviluppo di Click BIOS X... posso dire con soddisfazione che il risultato rappresenta un netto miglioramento rispetto al passato."
FUNKY KIT
"Il nuovo CLICK BIOS X di MSI offre un’esperienza visiva accattivante e facile da usare."
GCC GAMERS
"Il nuovo Click BIOS X di MSI ridefinisce l’esperienza utente con un'interfaccia piacevole e un layout intuitivo."
GURU3D
"Questo aggiornamento introduce la nuova ESA (Enhanced System Architecture), con miglioramenti significativi in termini di interfaccia e usabilità."
KITGURU
"Il nuovo layout del BIOS di MSI è davvero ben fatto."
OC3D
"Il BIOS di MSI è un vero passo avanti... Nulla batte la chiarezza delle impostazioni per trasmettere fiducia all’utente."
PC GUIDE
"Il BIOS è semplice da usare e ottimo per l’overclocking."
POKDE.NET
"La nuova interfaccia CLICK BIOS X migliora notevolmente la facilità d'uso della scheda madre..."
TWEAKTOWN
"It's easily MSI's best BIOS interface to date and quite possibly the most intuitive of all the major motherboard players."
Prestazioni al Top con un Solo Click
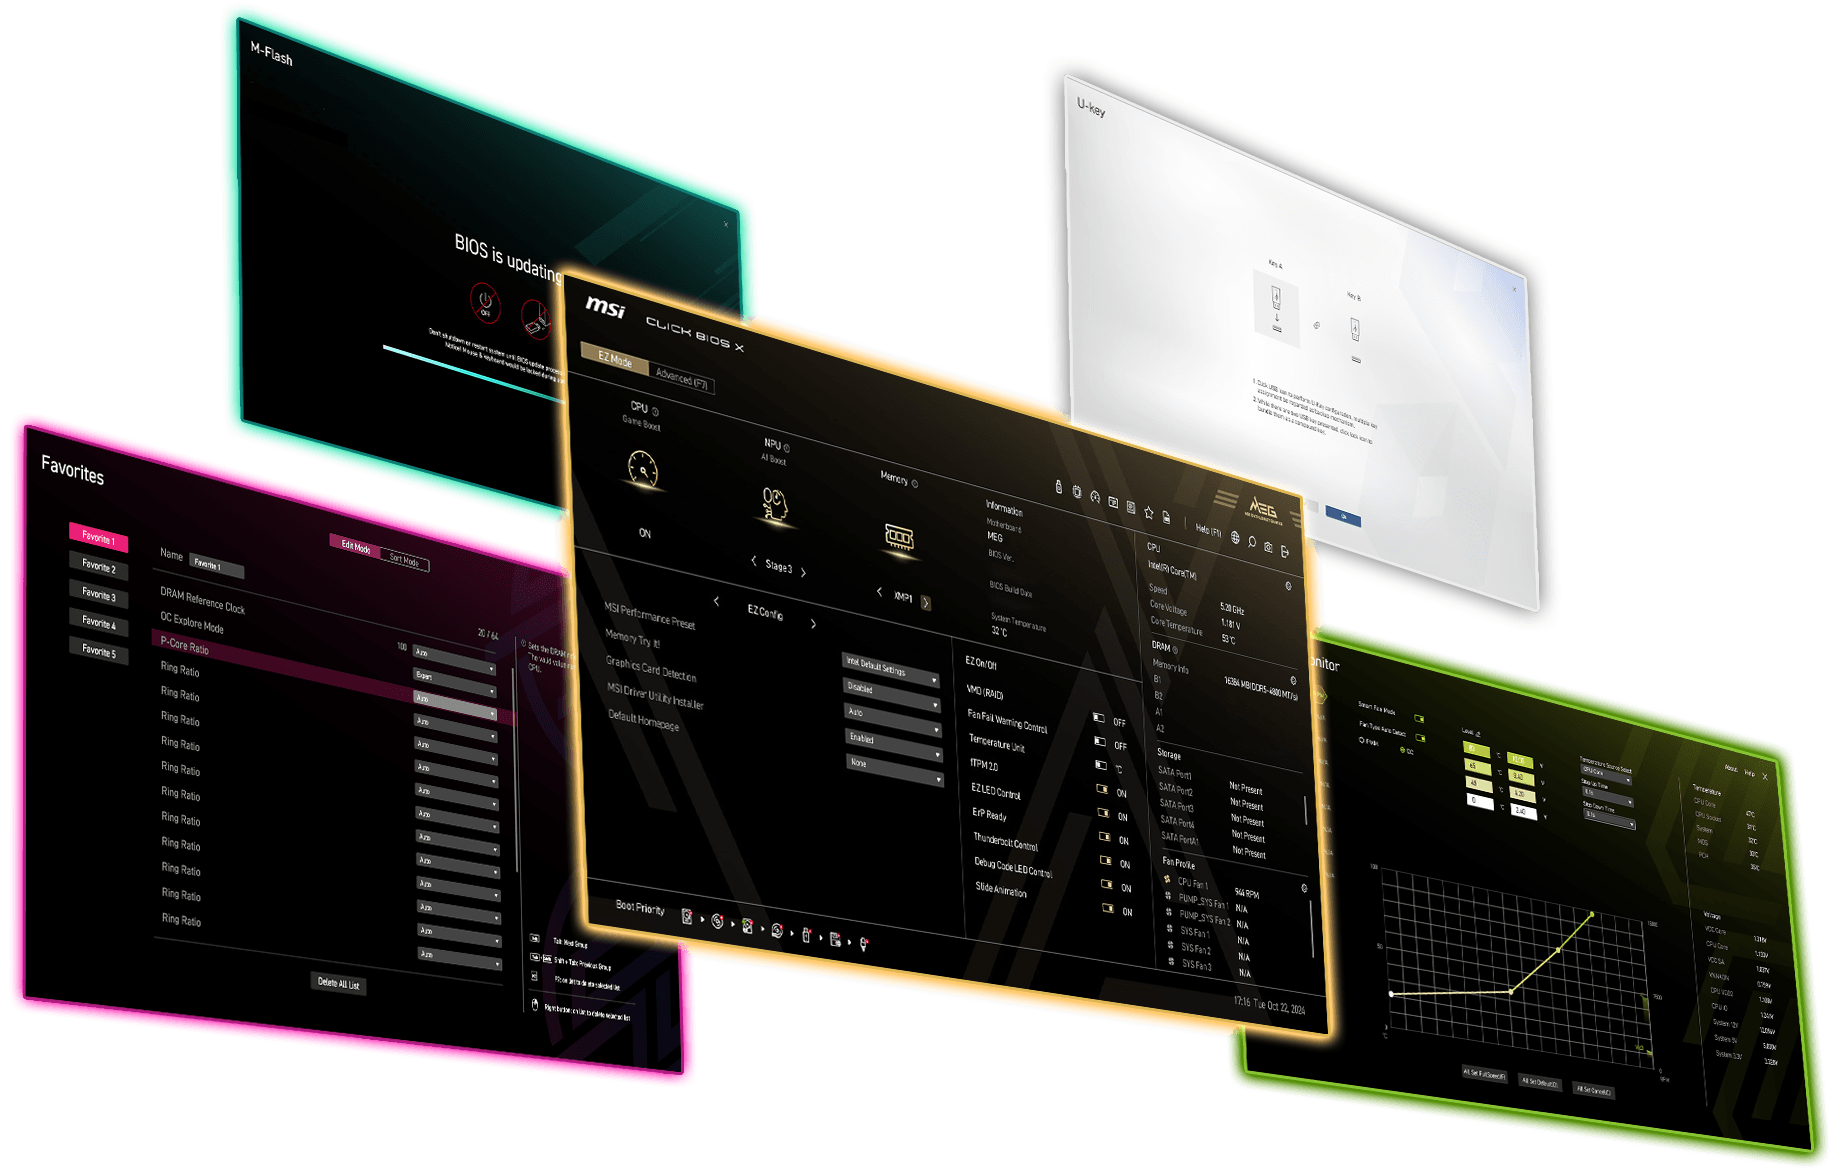
Il BIOS (Basic Input/Output System) è il firmware integrato nella scheda madre che gestisce la comunicazione tra hardware e sistema operativo. MSI CLICK BIOS X offre un’interfaccia elegante e intuitiva che rende semplice la configurazione del sistema e l’ottimizzazione delle prestazioni. Grazie a funzionalità avanzate e a esclusive tecnologie MSI, ottenere il massimo dal tuo PC non è mai stato così facile.
COME ACCEDERE A CLICK BIOS X
01


STEP 1. Boot! :
Fai il boot al tuo PC
02


STEP 2. Premi “Canc” :
Premi “Canc” per aprire il setup BIOS
03

STEP 3. Accedi a MSI Click BIOS X :
Accedi a MSI Click BIOS X
01
STEP 1. Boot! :
Fai il boot al tuo PC
02
STEP 2. Premi “Canc” :
Premi “Canc” per aprire il setup BIOS
03
STEP 3. Accedi a MSI Click BIOS X:
Accedi a MSI Click BIOS X
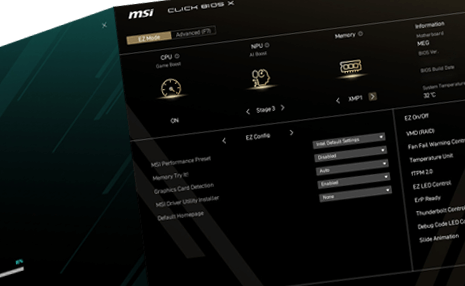
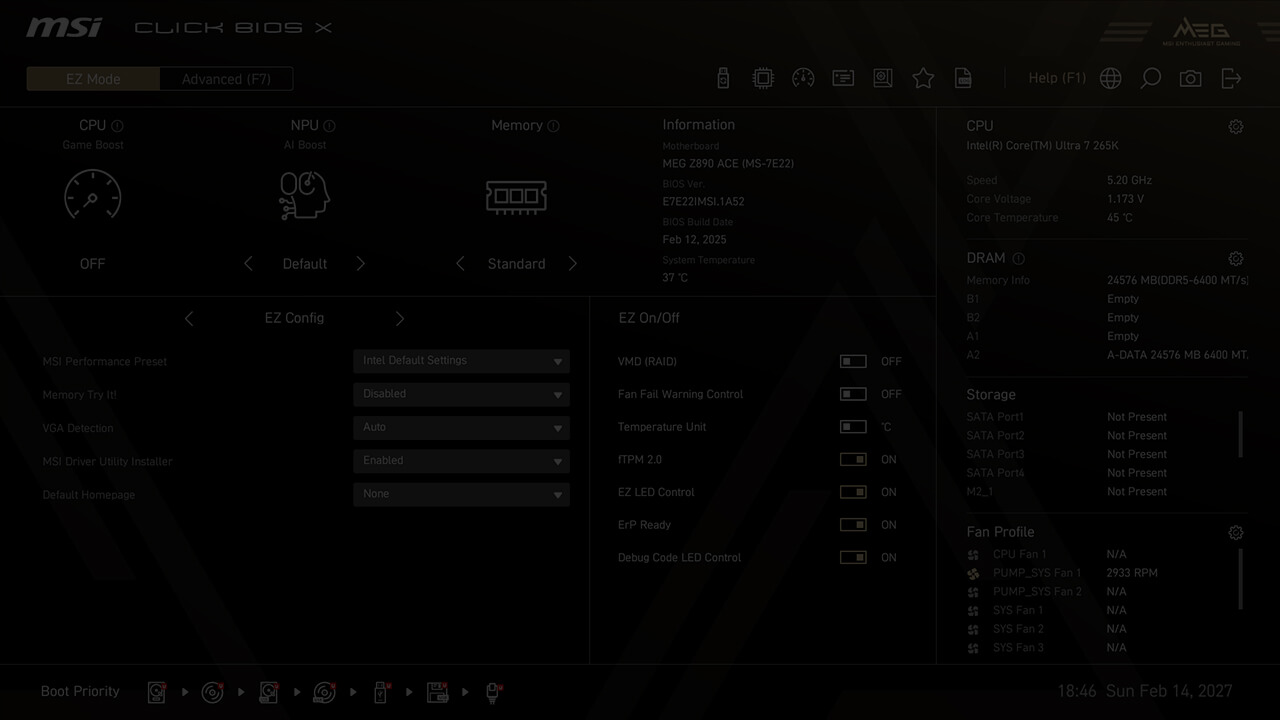
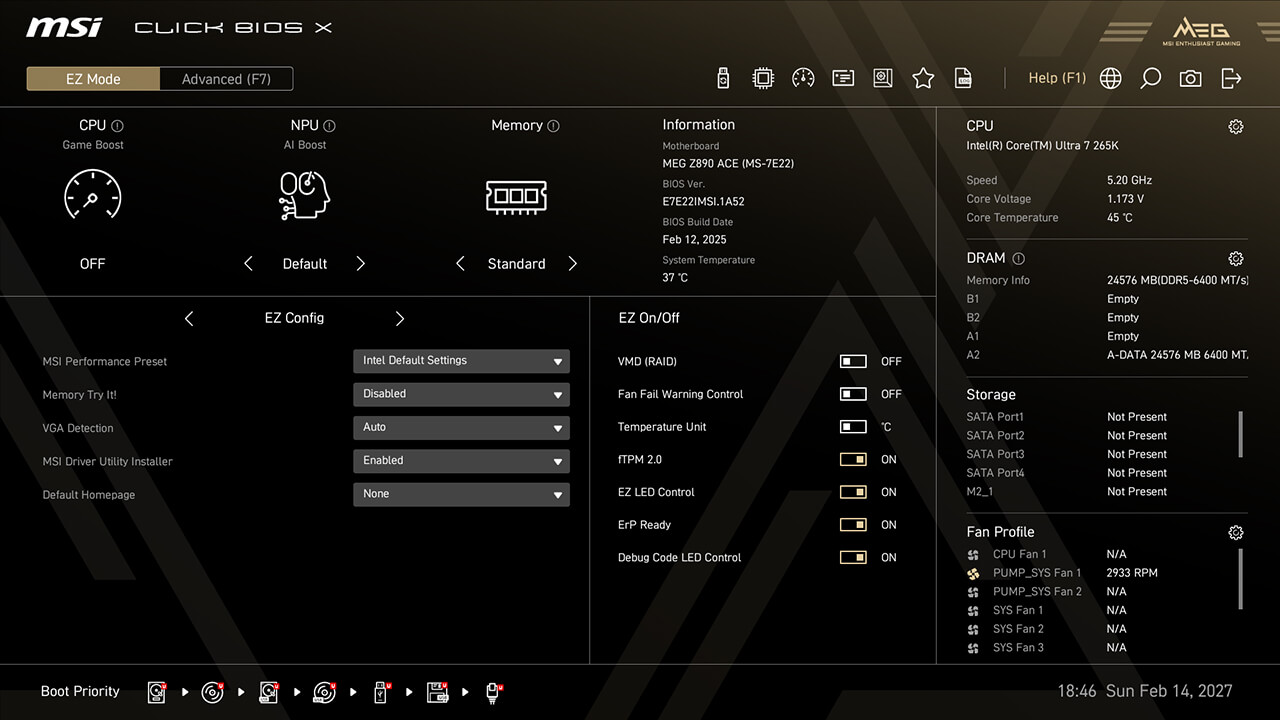
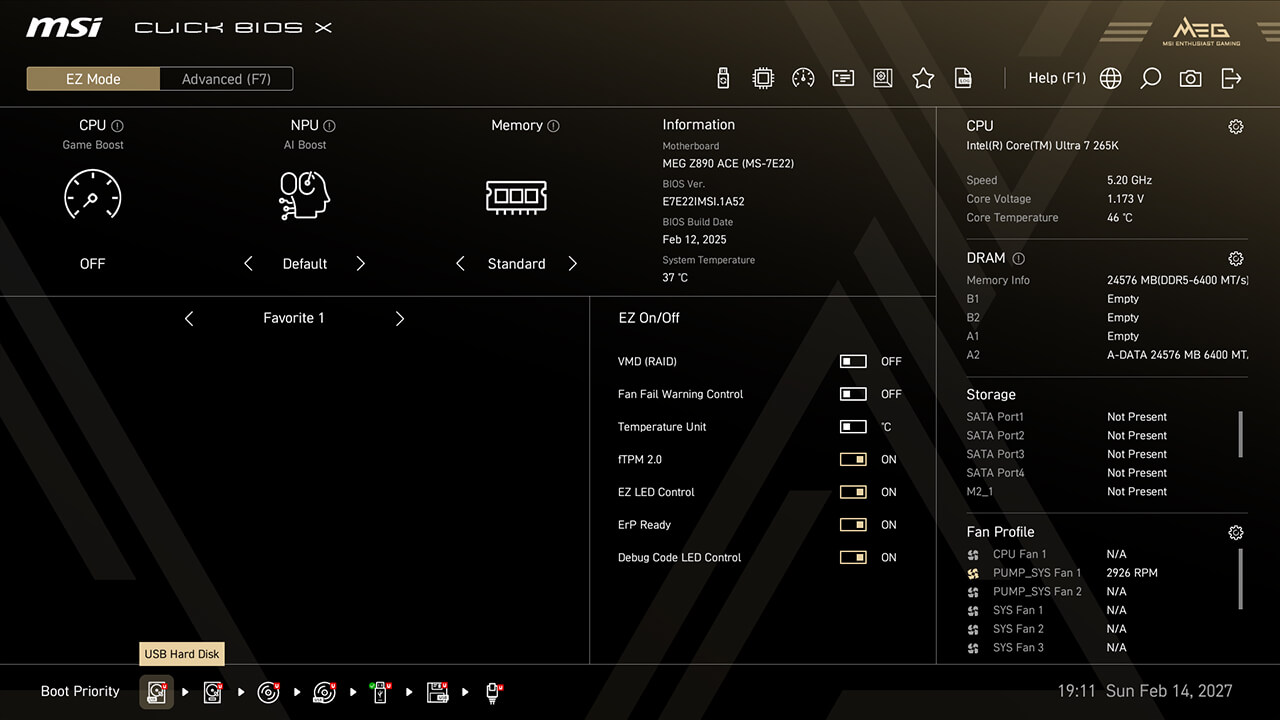
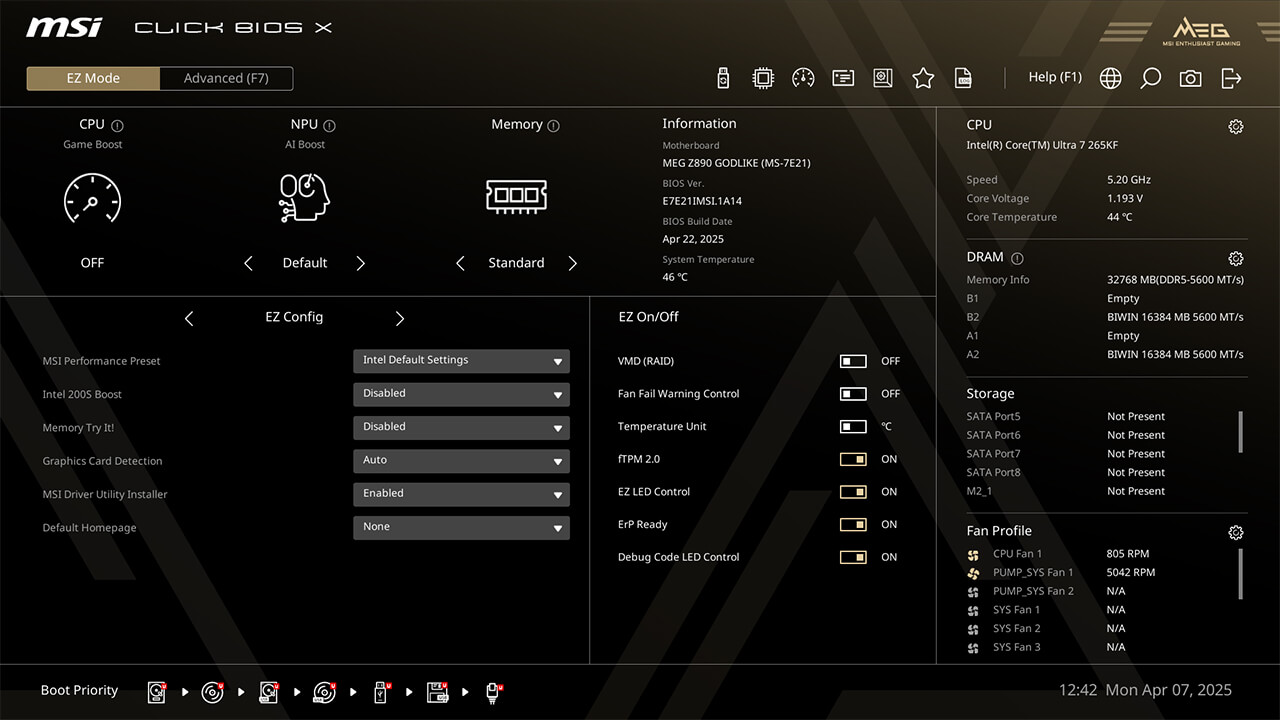
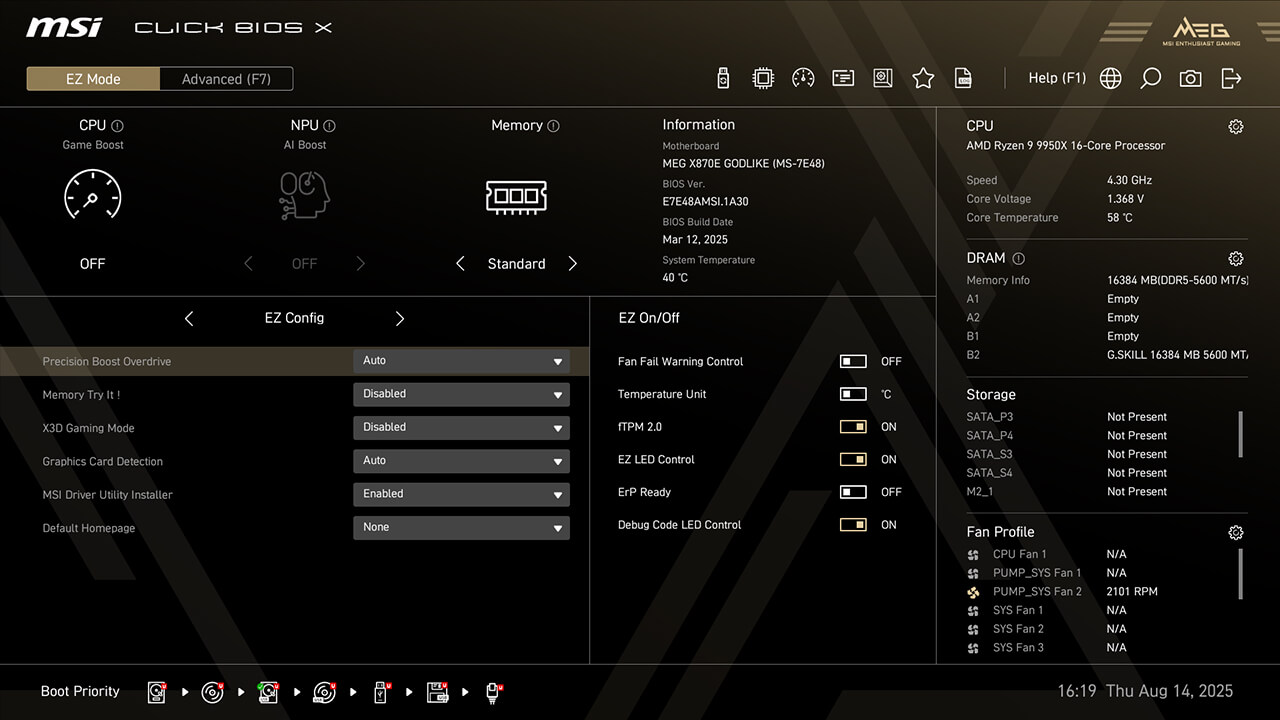
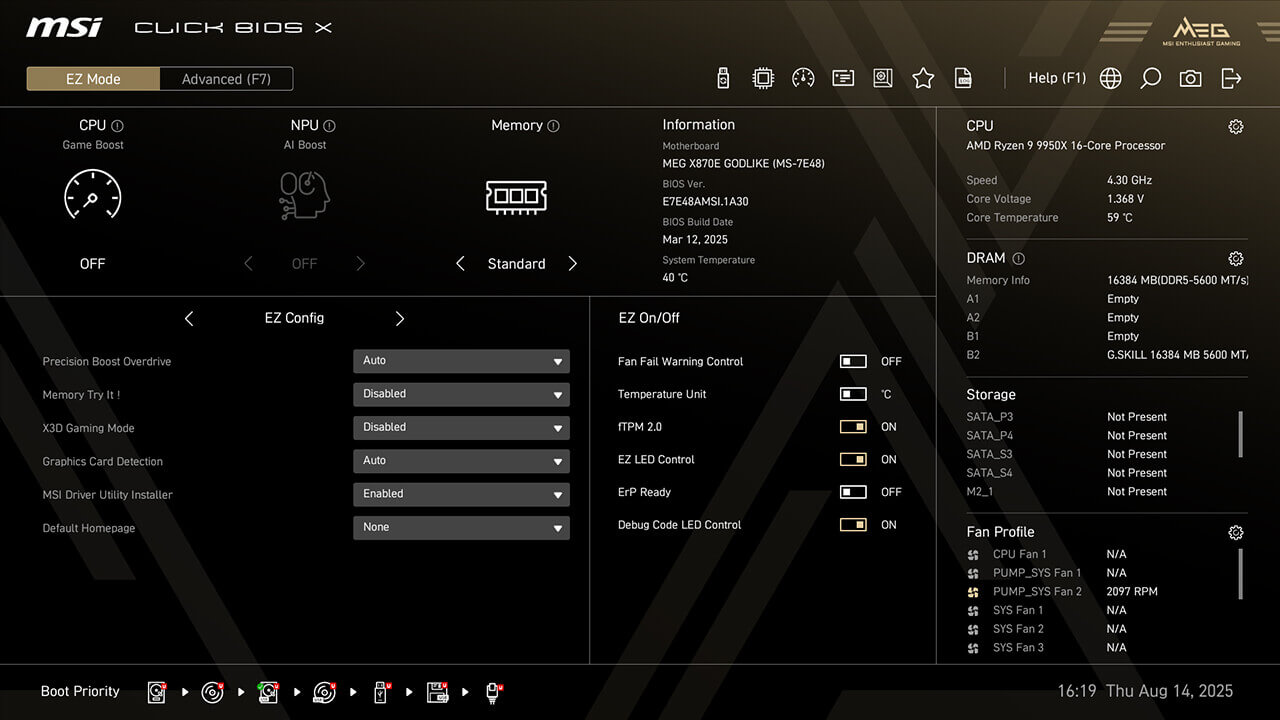
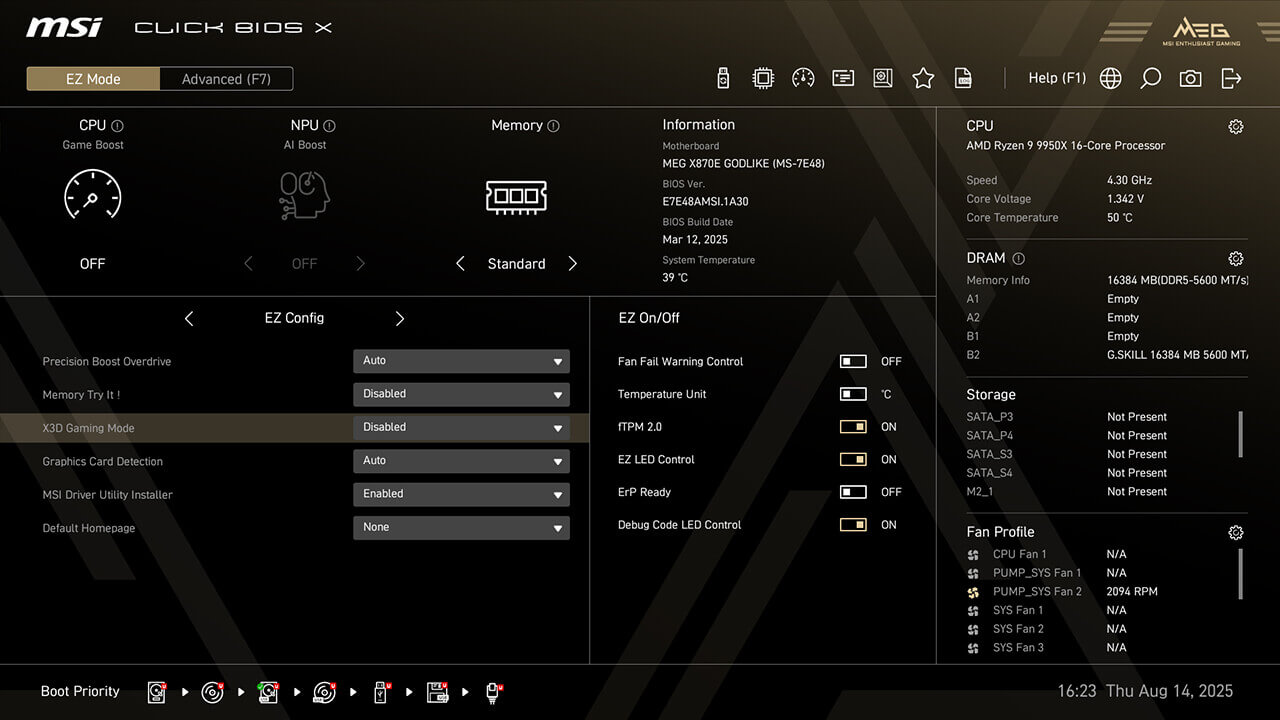
DESIGN DUAL MODE
CLICK BIOS X offre due modalità di configurazione: EZ Mode e Advanced Mode. EZ Mode semplifica l’interfaccia per un accesso rapido alle impostazioni essenziali, mentre Advanced Mode sblocca opzioni dettagliate pensate per gli utenti più esperti. Passa da una modalità all’altra in un istante con il tasto F7 e personalizza la tua esperienza BIOS come preferisci.
Easy Mode
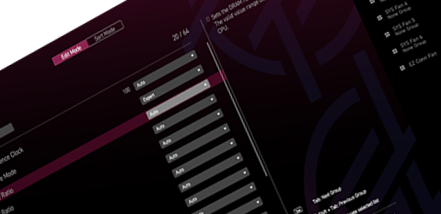
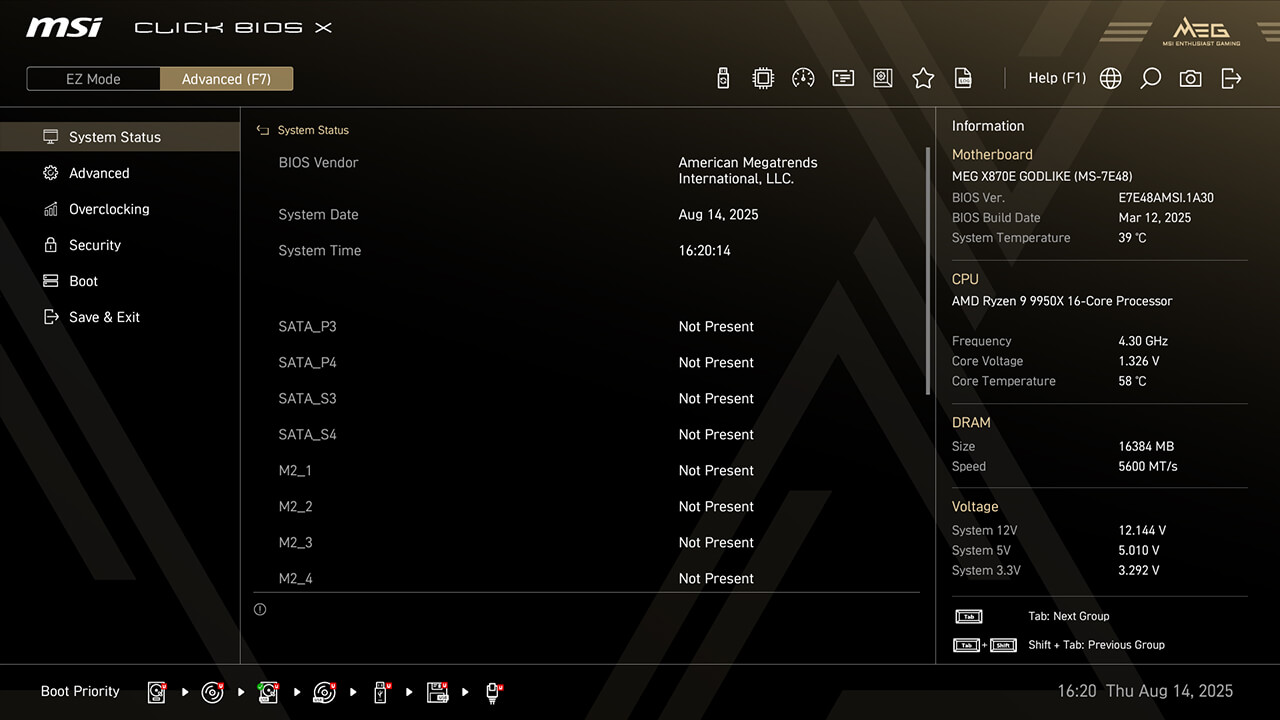
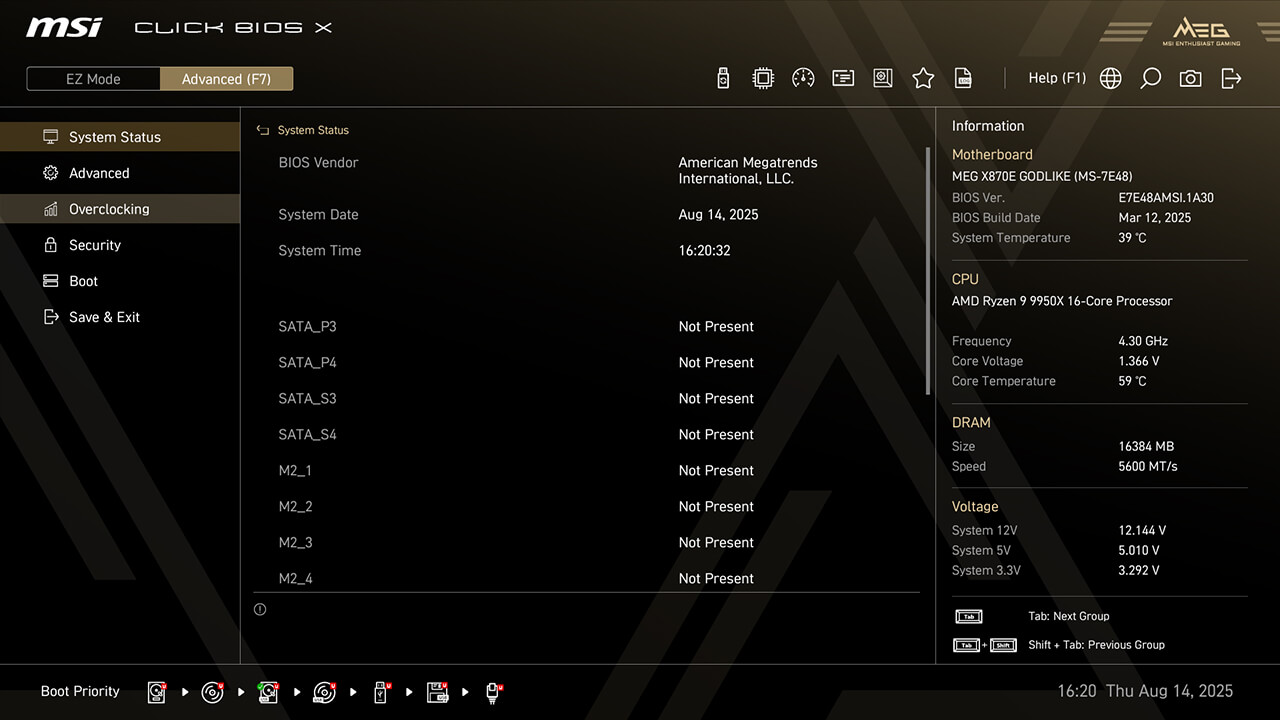
Advanced Mode


- Overclocking con un solo clic
- Informazioni BIOS
- Configurazione rapida e Preferiti
- Switch di configurazione rapida
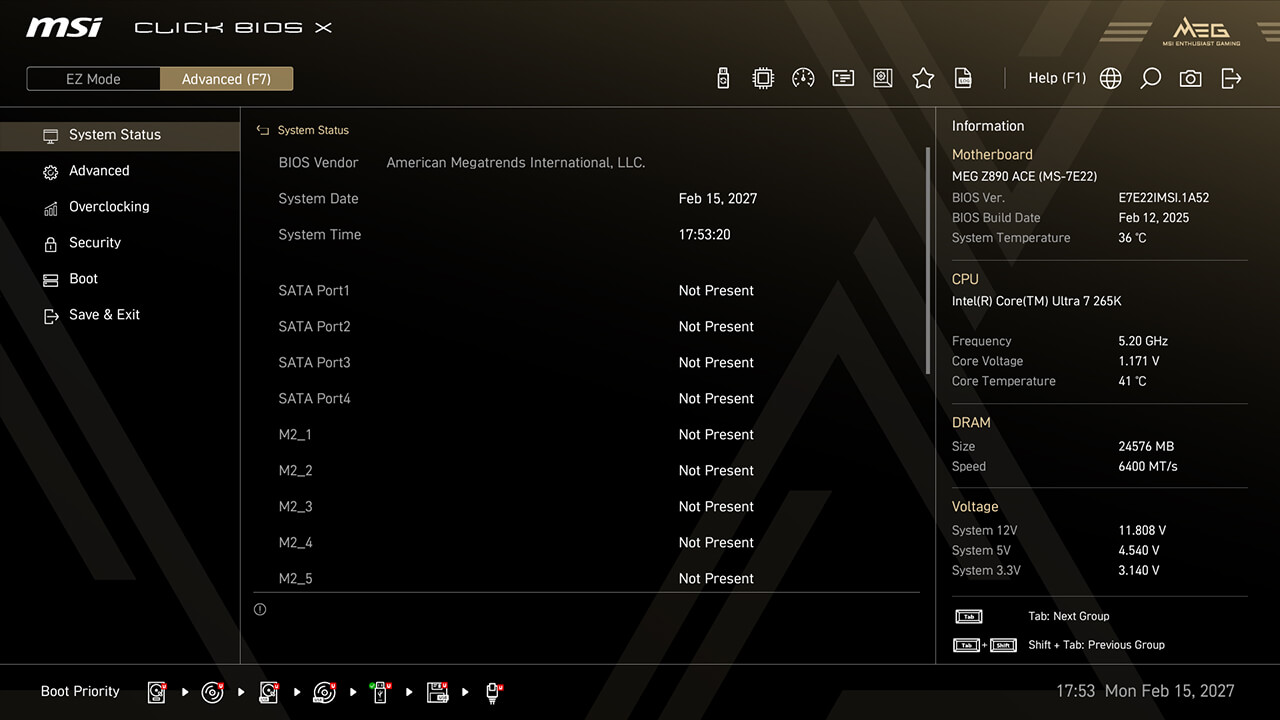
- Priorità di avvio
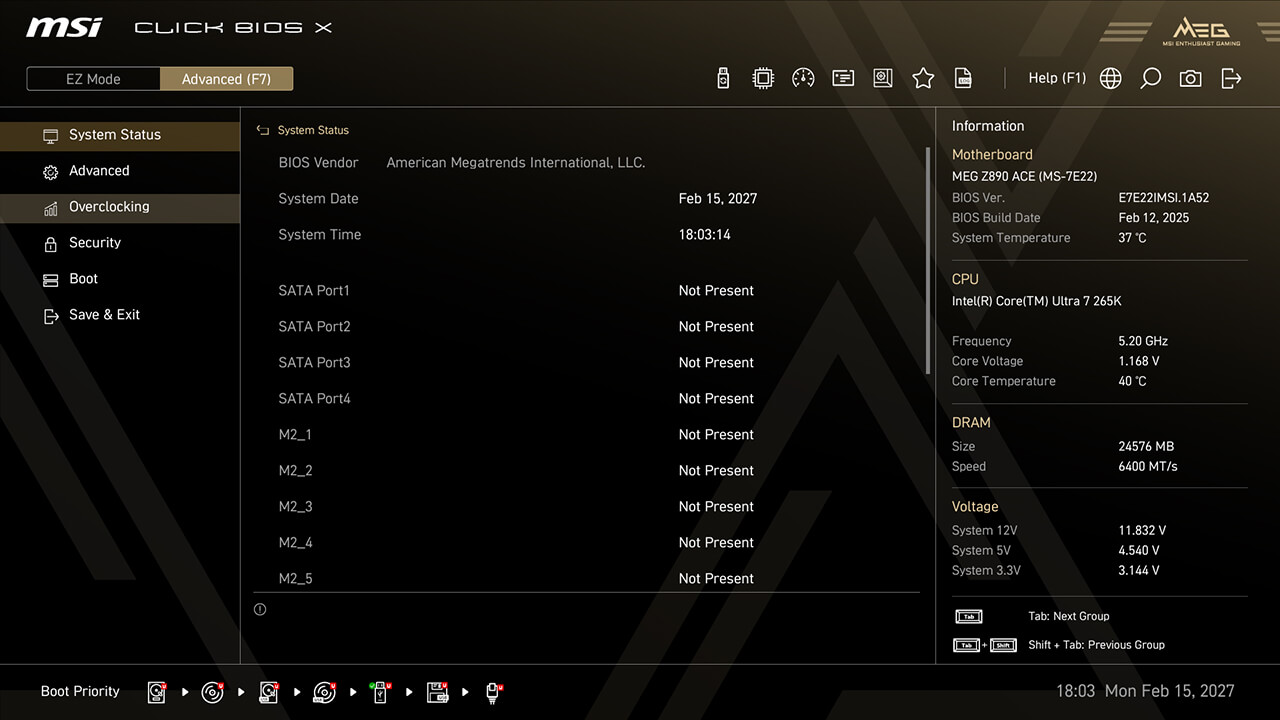
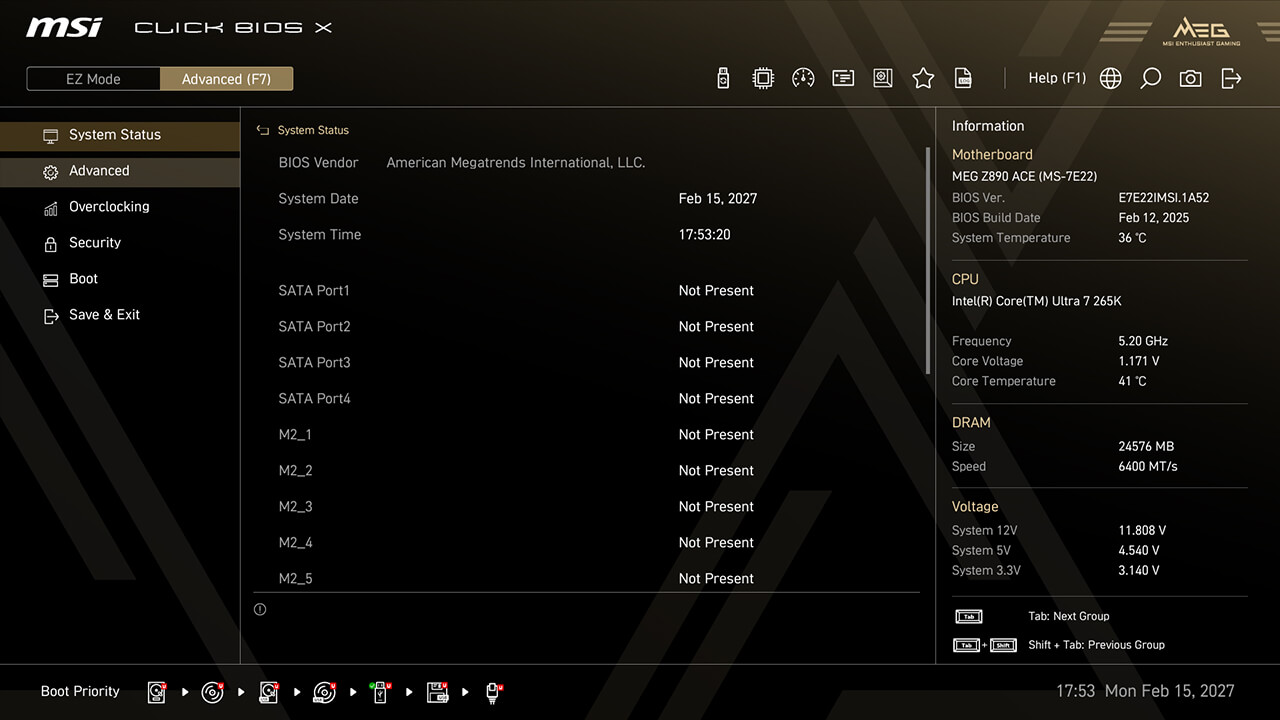
- Informazioni di sistema
- Tasti rapidi
- Switch modalità BIOS
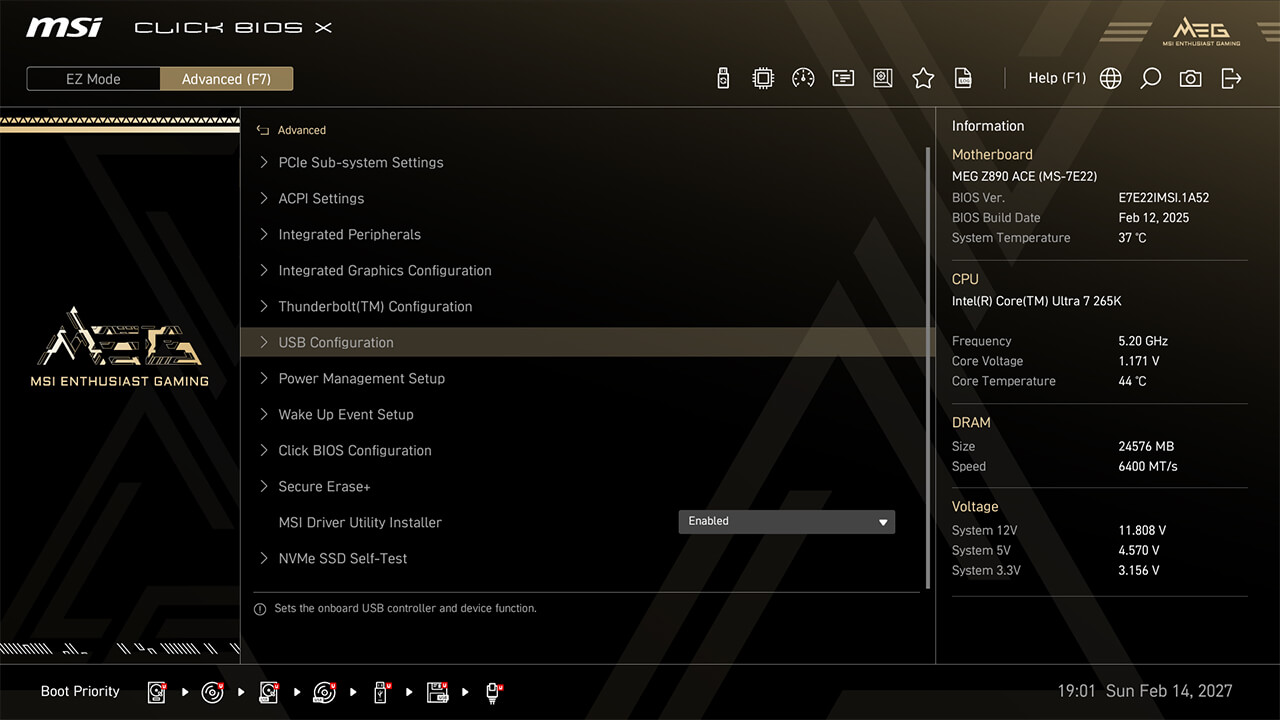
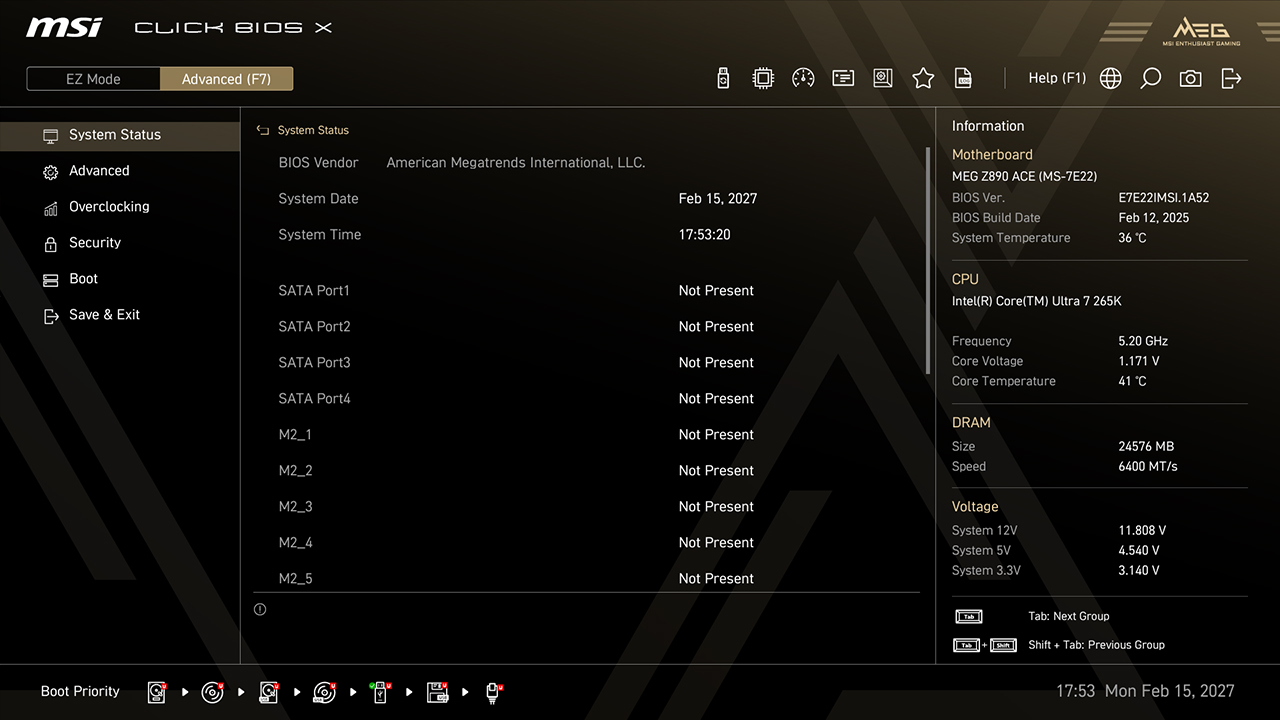
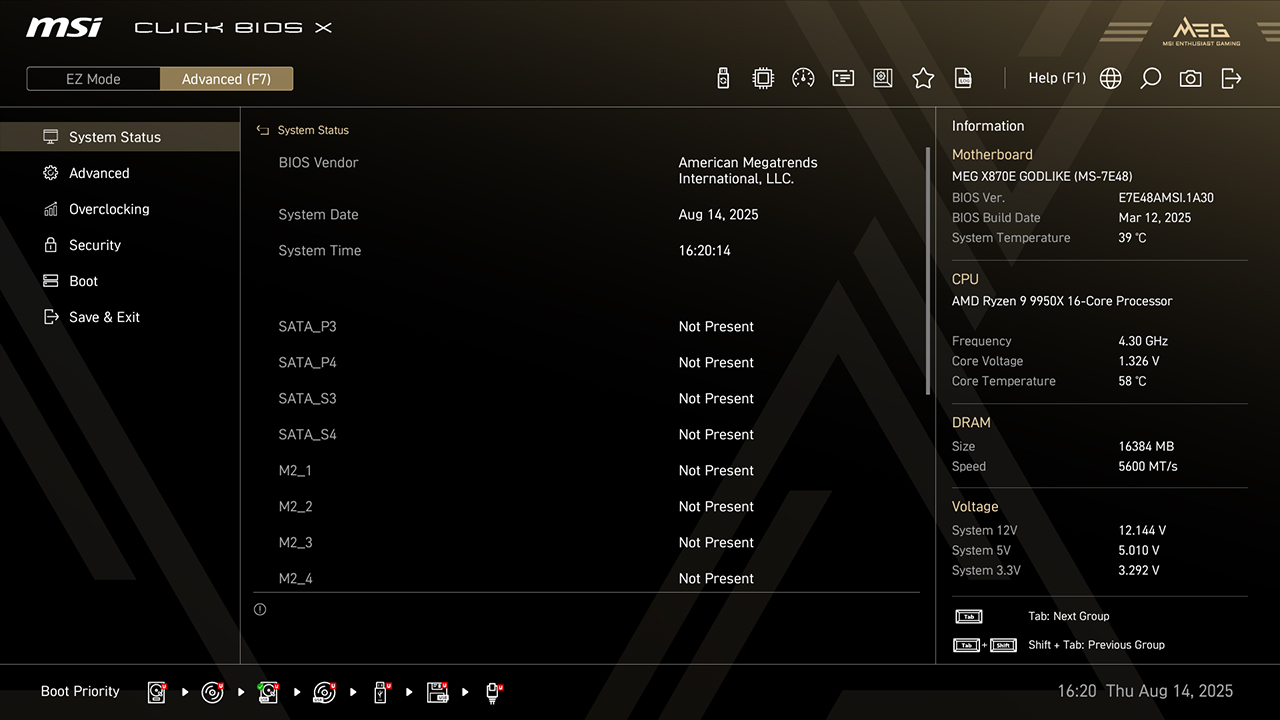
In Advance Mode, gli utenti possono accedere al BIOS per configurare nel dettaglio le impostazioni hardware e altri parametri di sistema. Ad esempio, puoi usare il BIOS per attivare o disattivare determinate funzionalità o periferiche, oppure ottimizzare le prestazioni del sistema... fino a puntare ai record mondiali!
- Strumenti

- One Click OC
- Tuning
- Ricerca
- Preferiti
- M-Flash
- Monitor Hardware
- Priorità di Avvio
- Profilo
- Pulsante Smart
- VMD (RAID)
- CPU Force 3
- Memory Force
-

- Game Boost
- AI Boost
- XMP & EXPO
- Intel 200S Boost
- Memory Try It!
- Dragon Alliance Mode
-
- MSI Performance Preset
- Modalità Estensione Memoria
- Controllo BCLK
- Controllo Carico CPU Lite
- Precision Boost Overdrive
- Performance Switch
- Modalità Gaming X3D
- Latency Killer
- Modalità Alta Efficienza
- Config TDP
- Configurazione PCIe
- Virtualizzazione Intel
- Re-size Bar
-
Ricerca
La funzione di ricerca consente di trovare rapidamente le voci del BIOS inserendo una parola chiave.
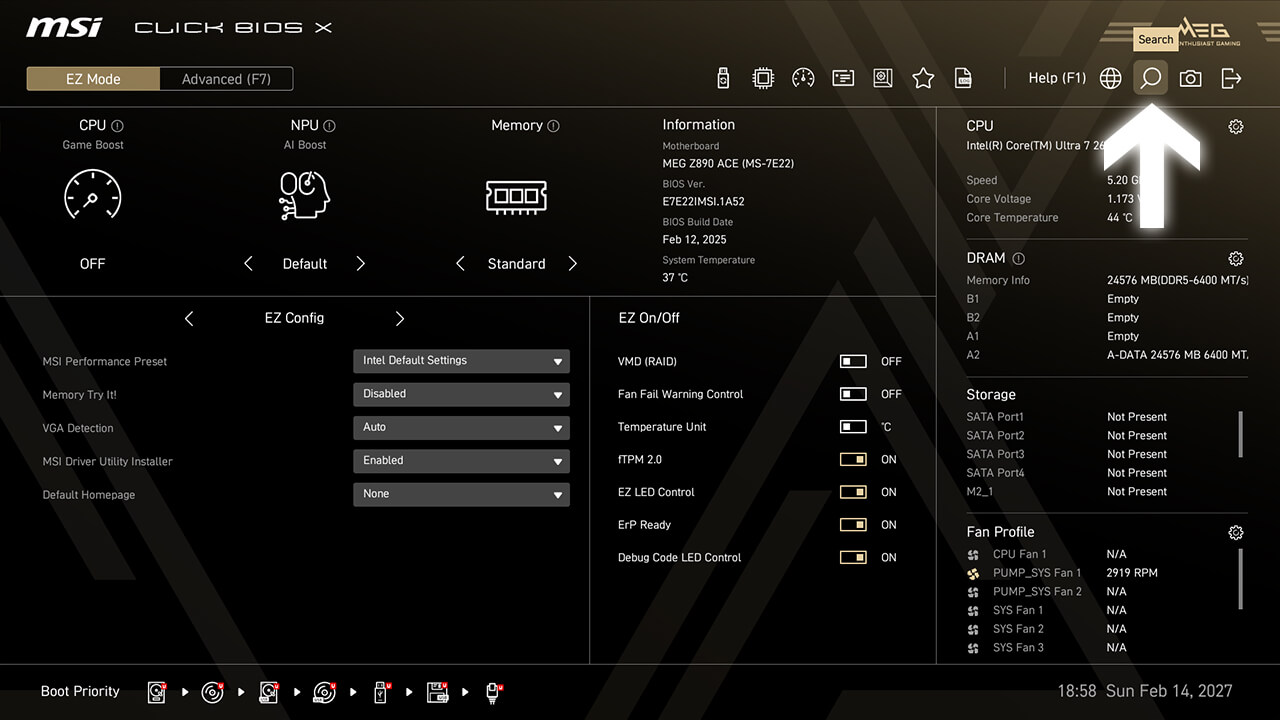
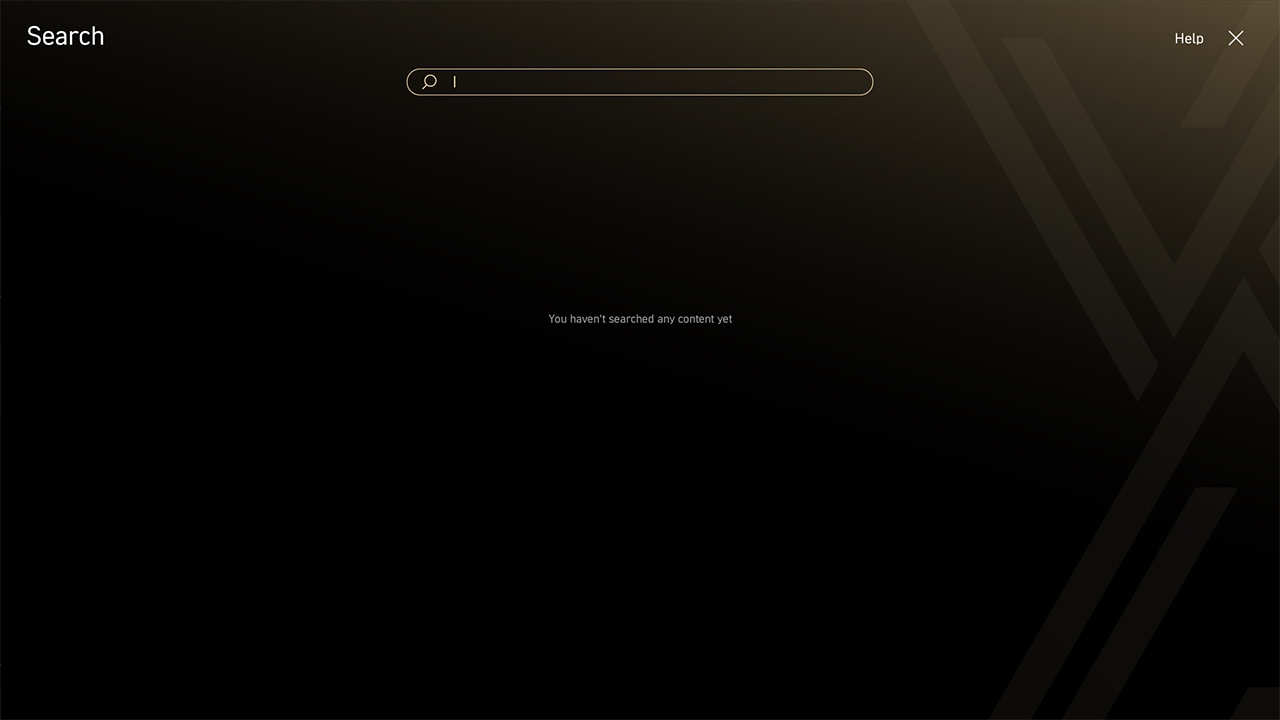
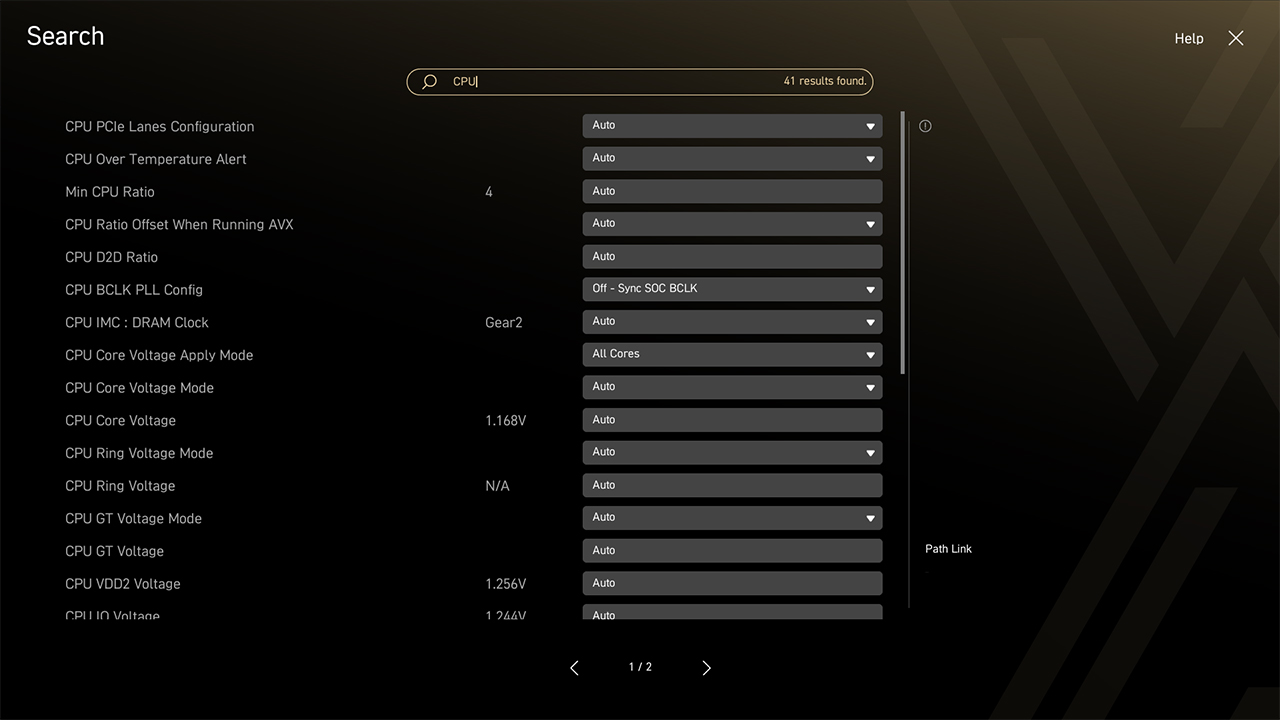
-
1. Fai clic sull’icona di ricerca in modalità semplice
-
2. Digita una parola chiave per trovare la funzione nella pagina di ricerca
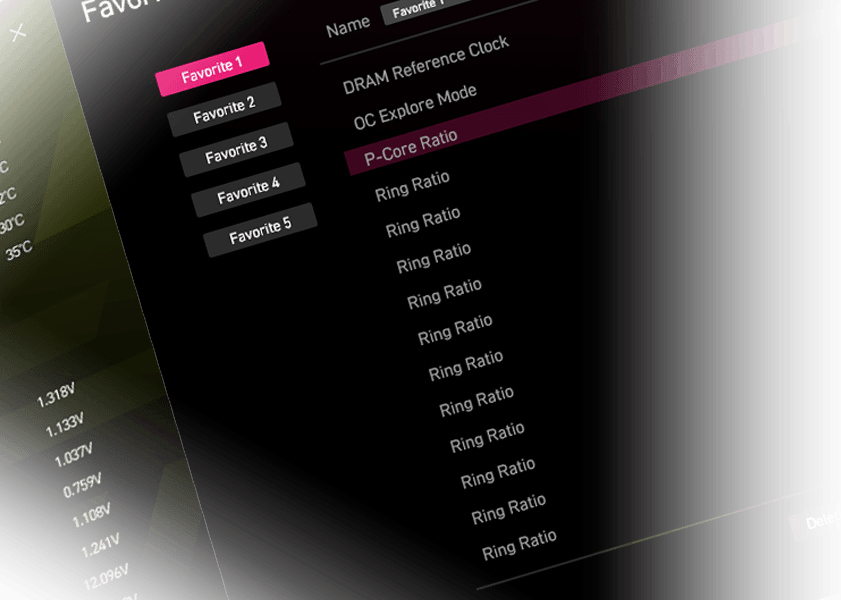
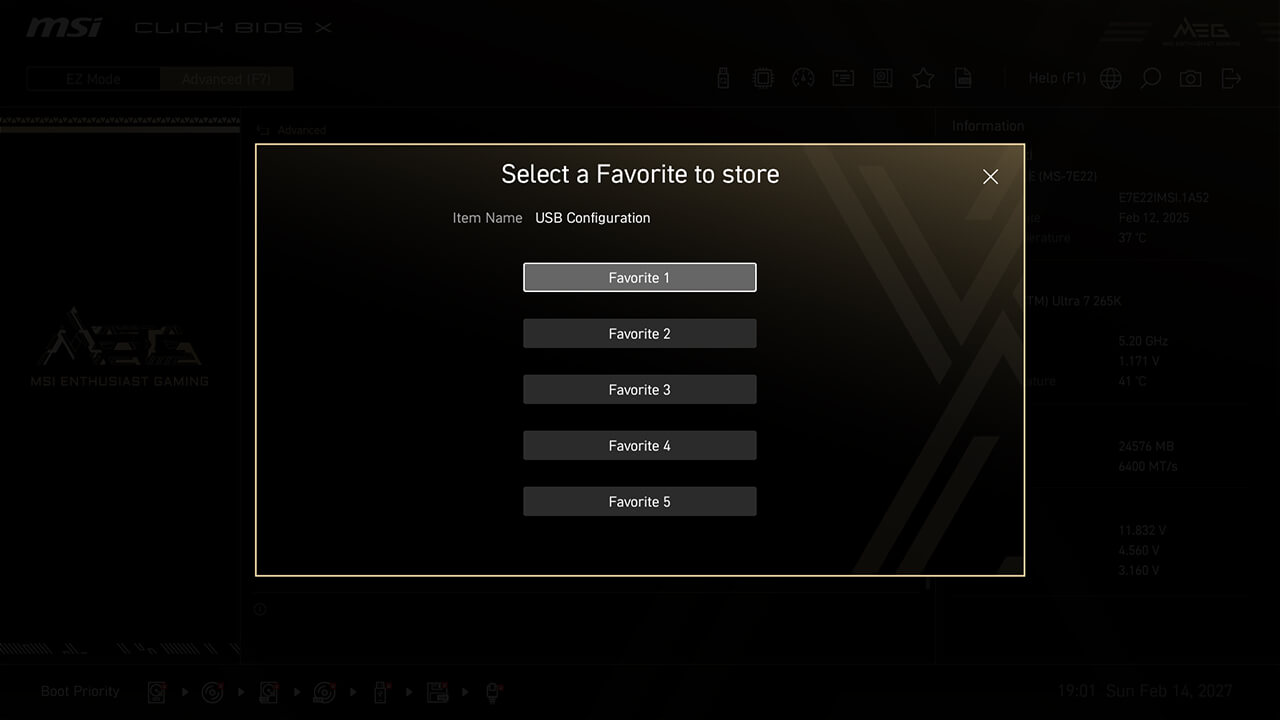
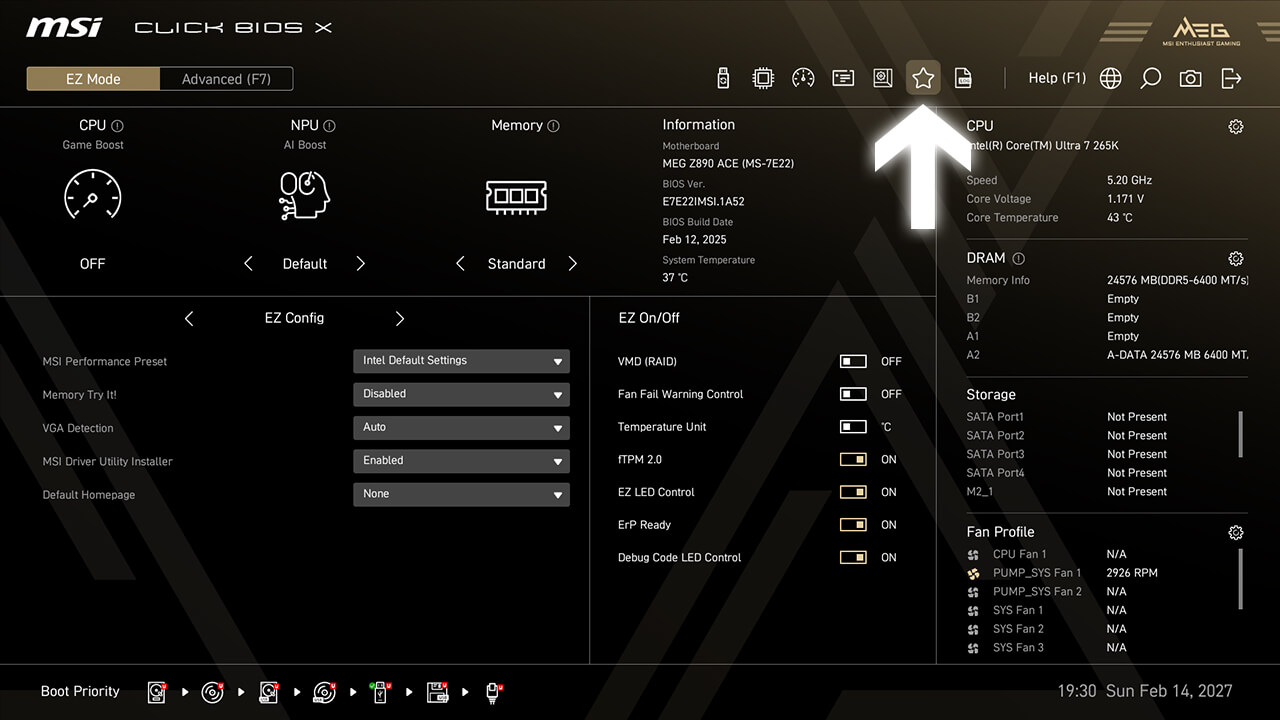
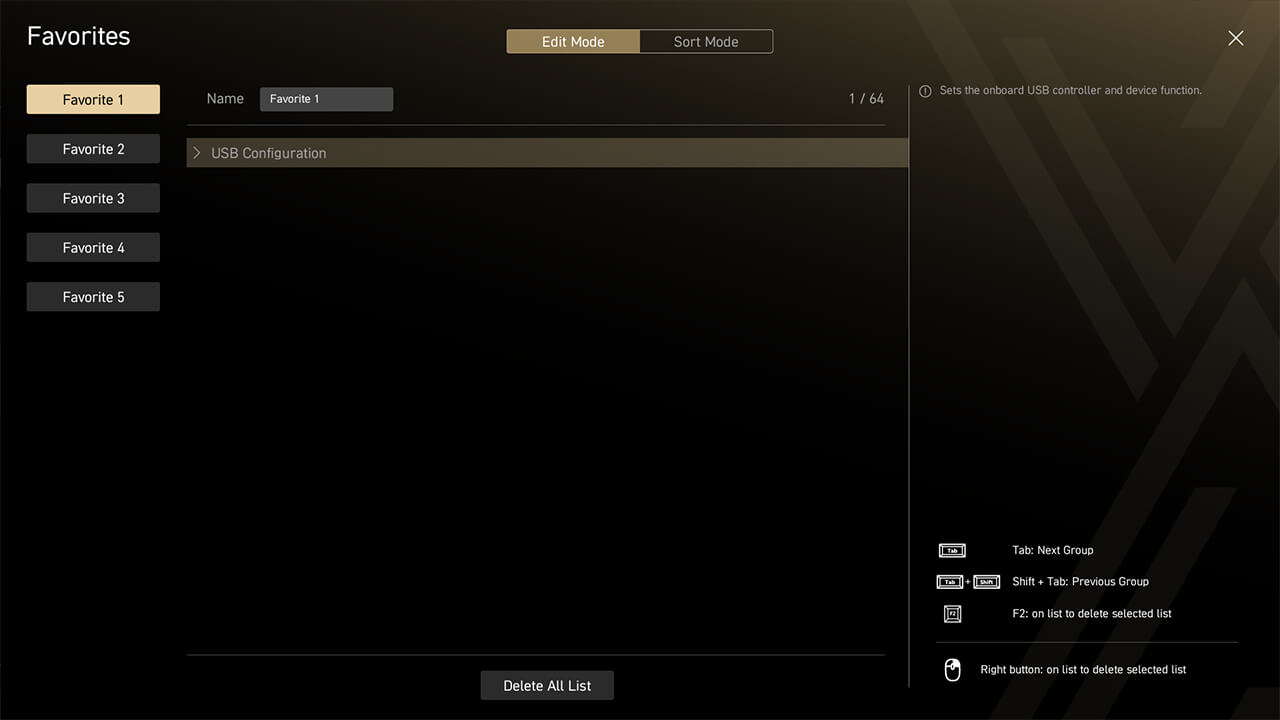
Preferiti
Il menu Preferiti ti consente di accedere rapidamente e facilmente alle funzioni del BIOS che usi più spesso.


-
1. Fai clic con il tasto destro o premi F2 su una voce del BIOS e scegli un menu preferito per aggiungerla
-
2. Clicca sull’icona Preferiti in modalità semplice per visualizzare la lista
-
3. Per rimuovere una voce, fai clic con il tasto destro o premi F2 all’interno del menu Preferiti
Preferiti
Il menu Preferiti ti consente di accedere rapidamente e facilmente alle funzioni del BIOS che usi più spesso.
-
1. Fai clic con il tasto destro o premi F2 su una voce del BIOS e scegli un menu preferito per aggiungerla
-
2. Clicca sull’icona Preferiti in modalità semplice per visualizzare la lista
-
3. Per rimuovere una voce, fai clic con il tasto destro o premi F2 all’interno del menu Preferiti
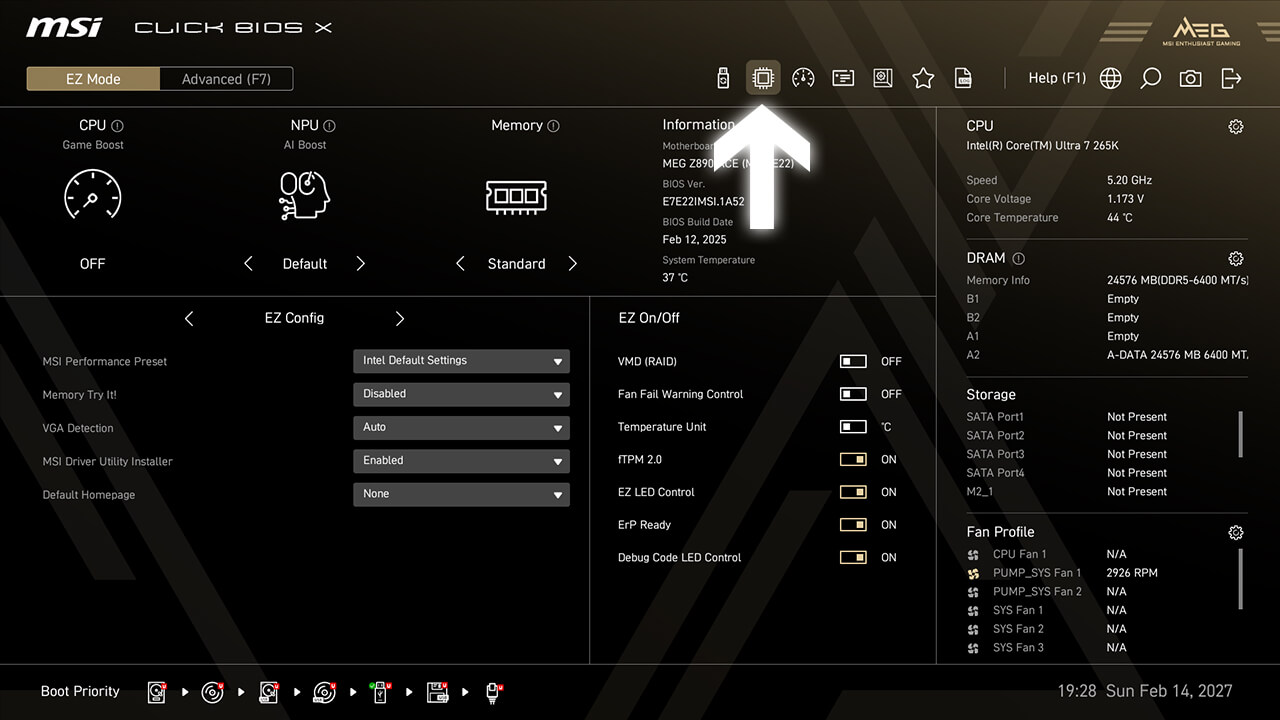
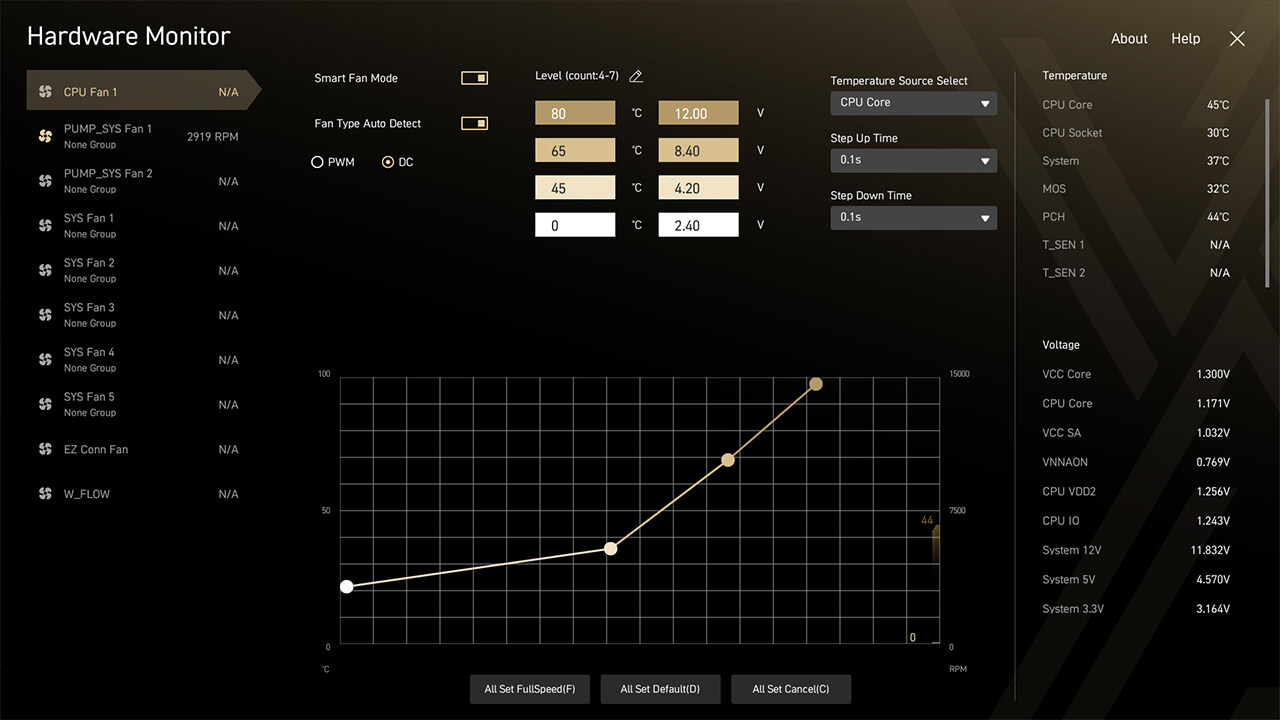
Hardware Monitor
Hardware Monitor enables real-time monitoring of temperature, voltage, and fan speed. In Smart Fan Mode, you can customize four points of the fan curve to optimize system performance.

-
1. Click the Hardware Monitor icon in easy mode
-
2. Check real-time hardware information. If you customize a fan curve, press F10 to save changes and exit BIOS
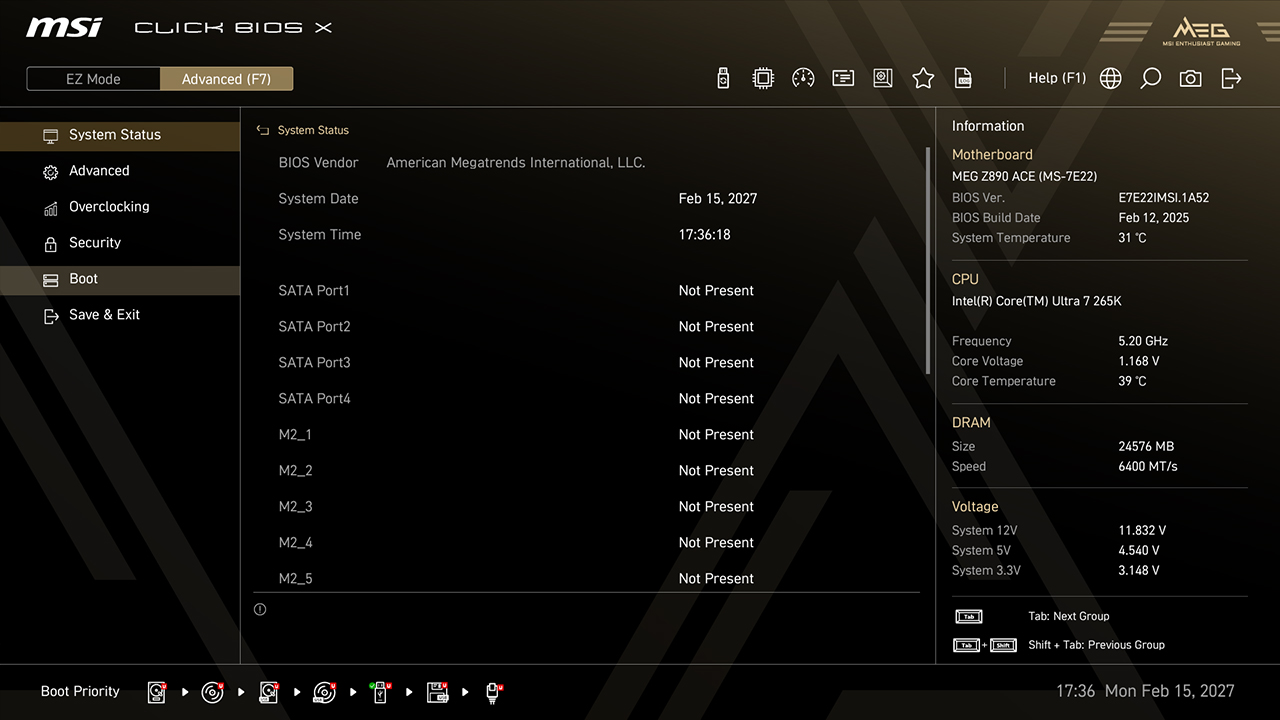
Boot Priority
Boot Priority setting allows you to choose which device the BIOS boot from first. For example, if you need to install a new operating system from a USB drive, you can easily change the order to prioritize the desired device.

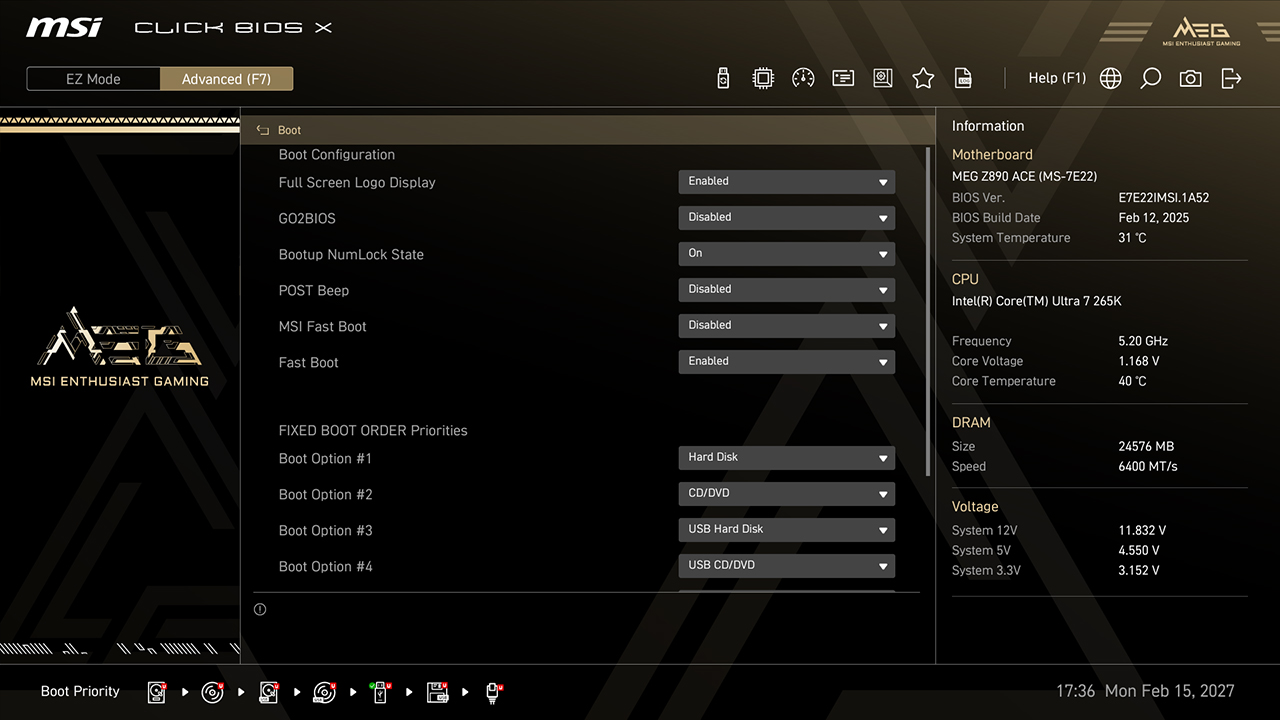
-
A. Click and drag the storage icon to adjust the boot priority in easy mode
-
B. In Advanced Mode, click Boot, adjust the boot order, then press F10 to save changes and exit BIOS
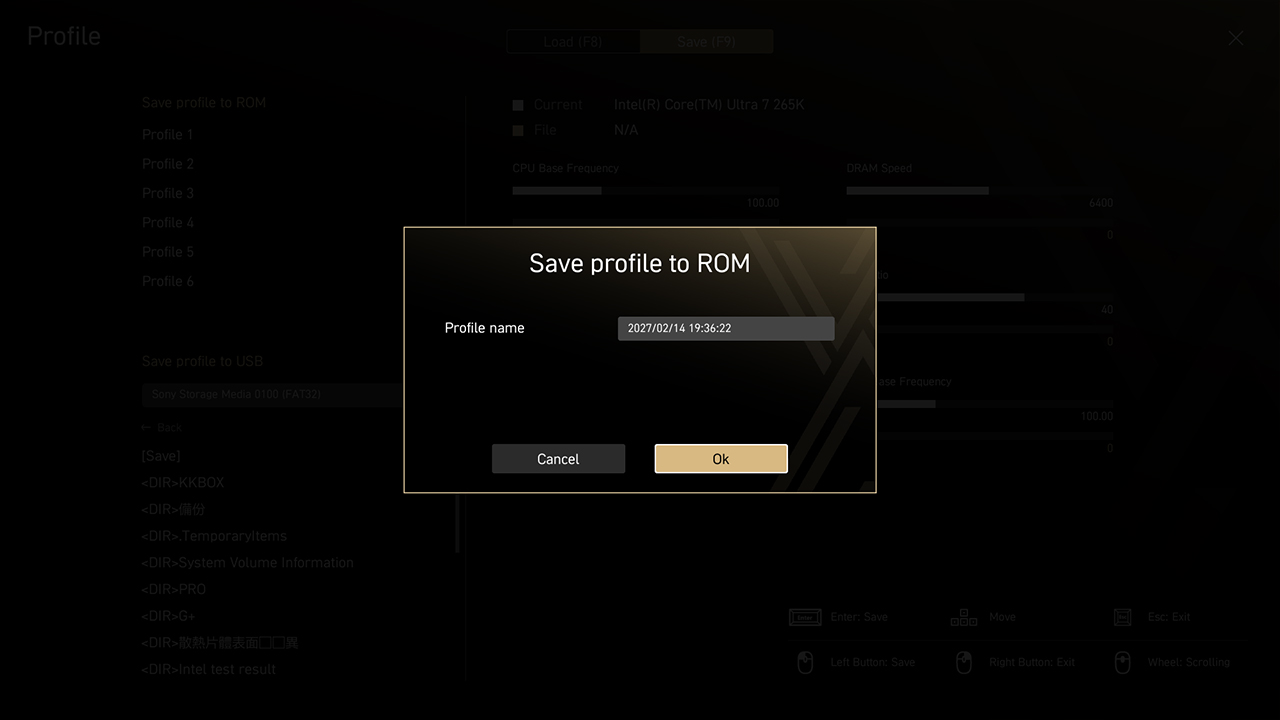
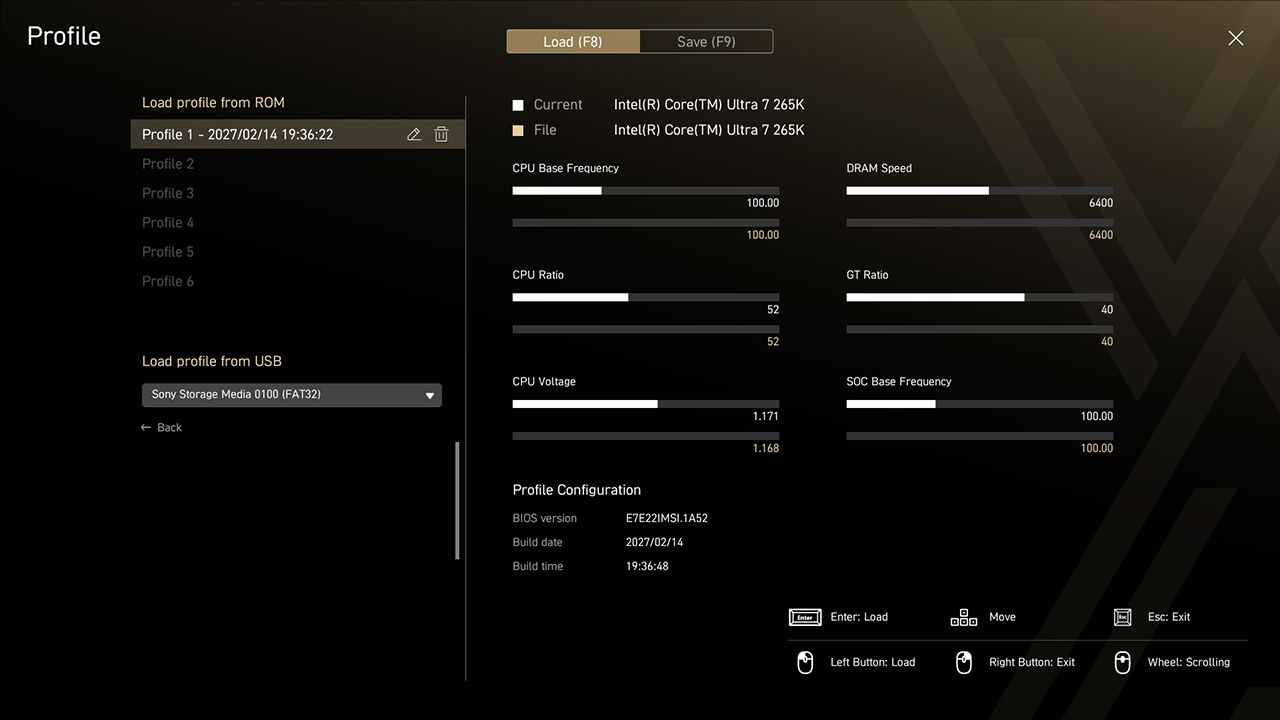
Profile
Profile function allows you to save or load the specific BIOS settings as a profile from the BIOS ROM or USB flash drive. This feature is ideal for those who frequently change BIOS settings for different configurations.

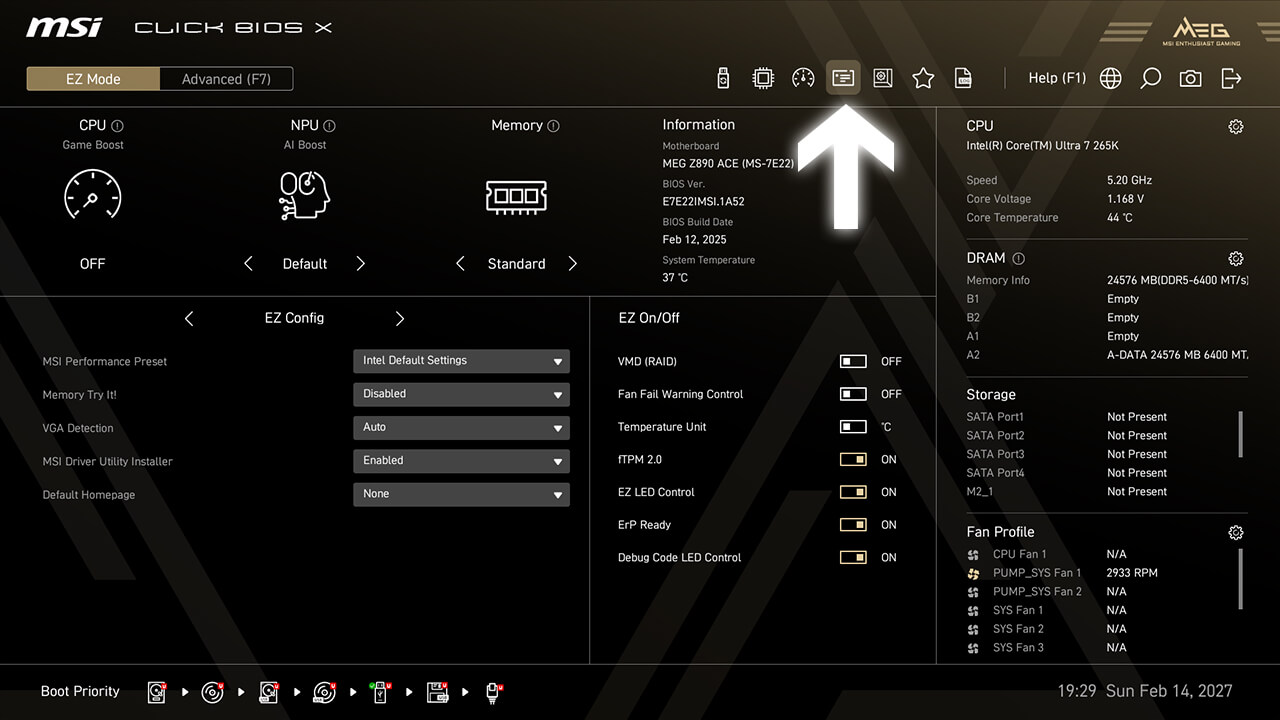

-
1. Click the Profile icon in easy mode
-
2. Save, load or clear BIOS profiles with a single click if needed
Smart Button
Smart Button allows you to set up the different functions to the rear I/O smart button or case reset button, including Reset Computer, Safe Boot, Turbo Fan, and EZ LED Control, all with a single click.

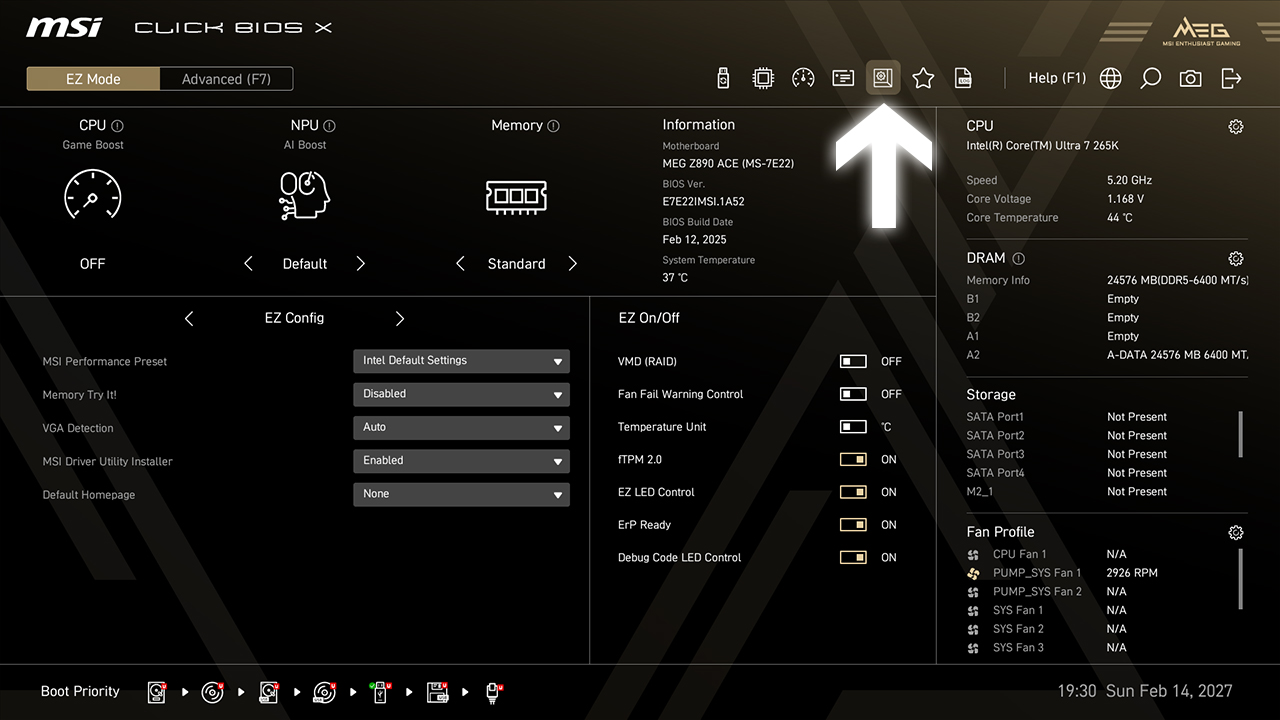
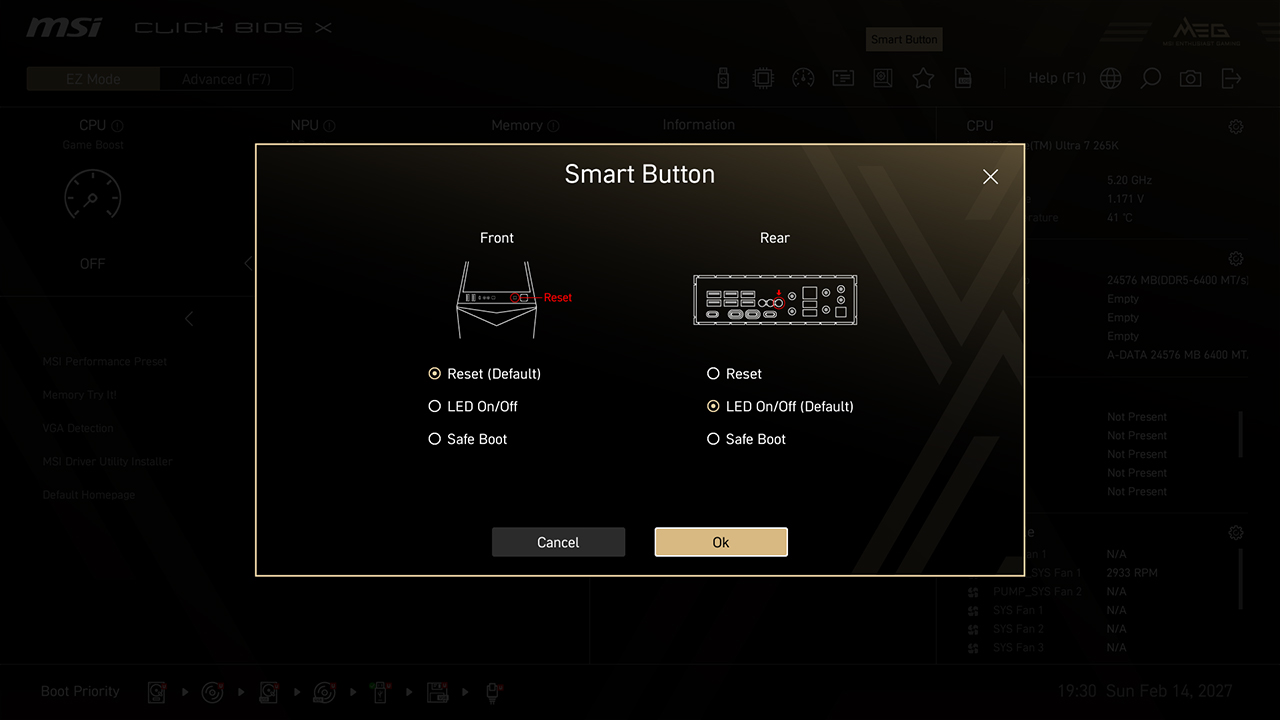
-
1. Click the Smart Button icon in easy mode
-
2. Choose the preferred option, then press F10 to save changes and exit BIOS
VMD (RAID)
VMD (Volume Management Device) allows you to configure and manage NVMe-based storage devices. The main benefit is improved storage performance by enabling multiple NVMe devices to be used in parallel through RAID configurations.


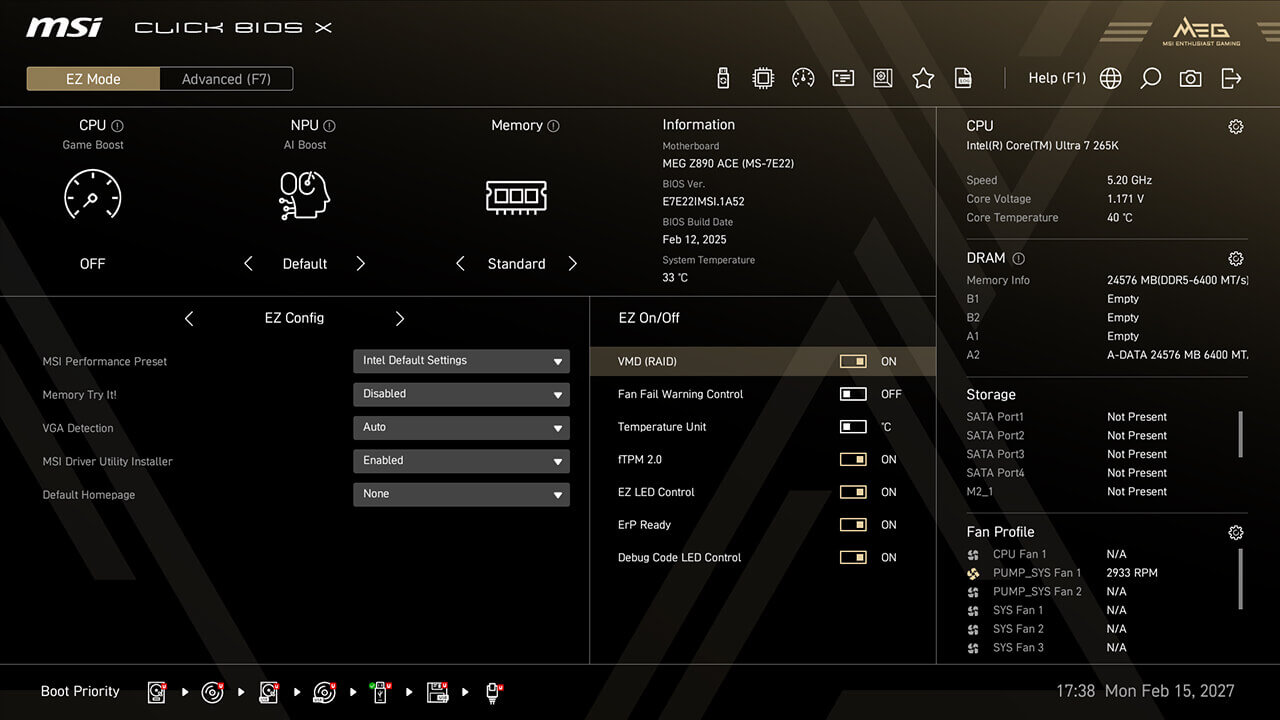
-
1. Click the VMD (RAID) icon in EZ Setup Switches under easy mode
-
2. Enable VMD (RAID) function, then press F10 to save changes and exit BIOS
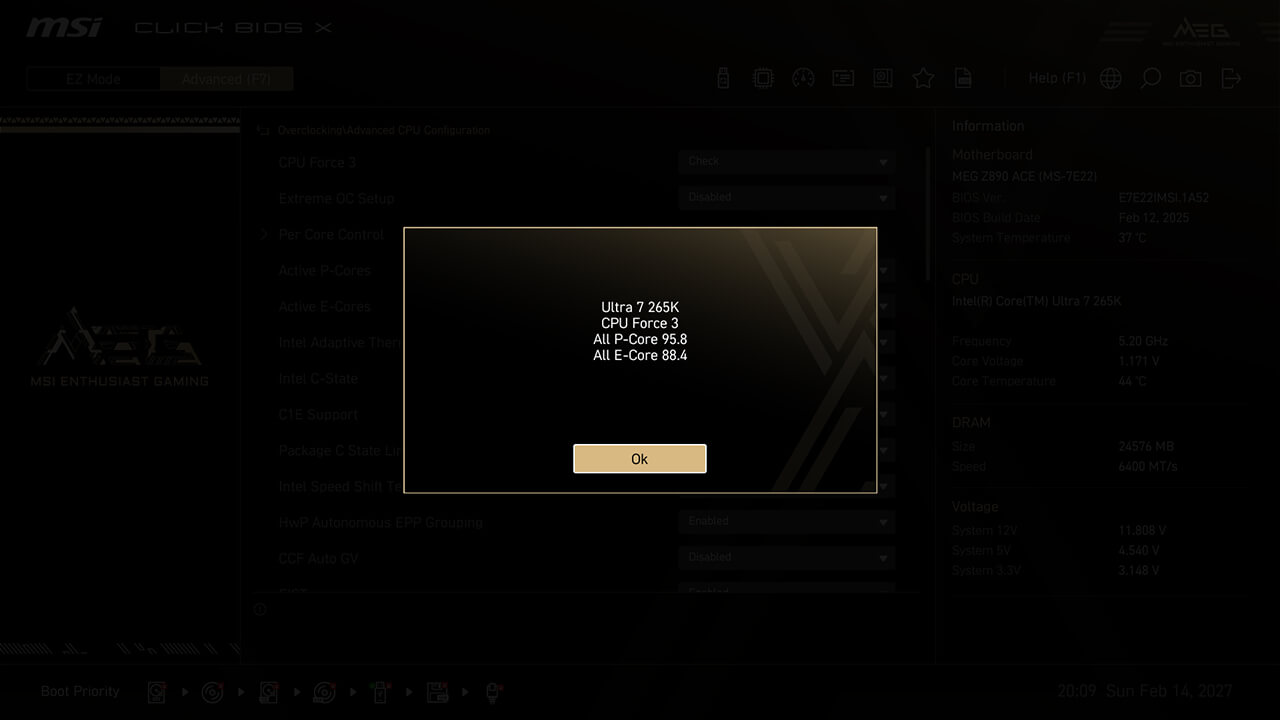
CPU Force 3
CPU Force 3 allows you to assess the processor's quality by providing a detailed performance score, helping evaluate overclocking potential and system stability.

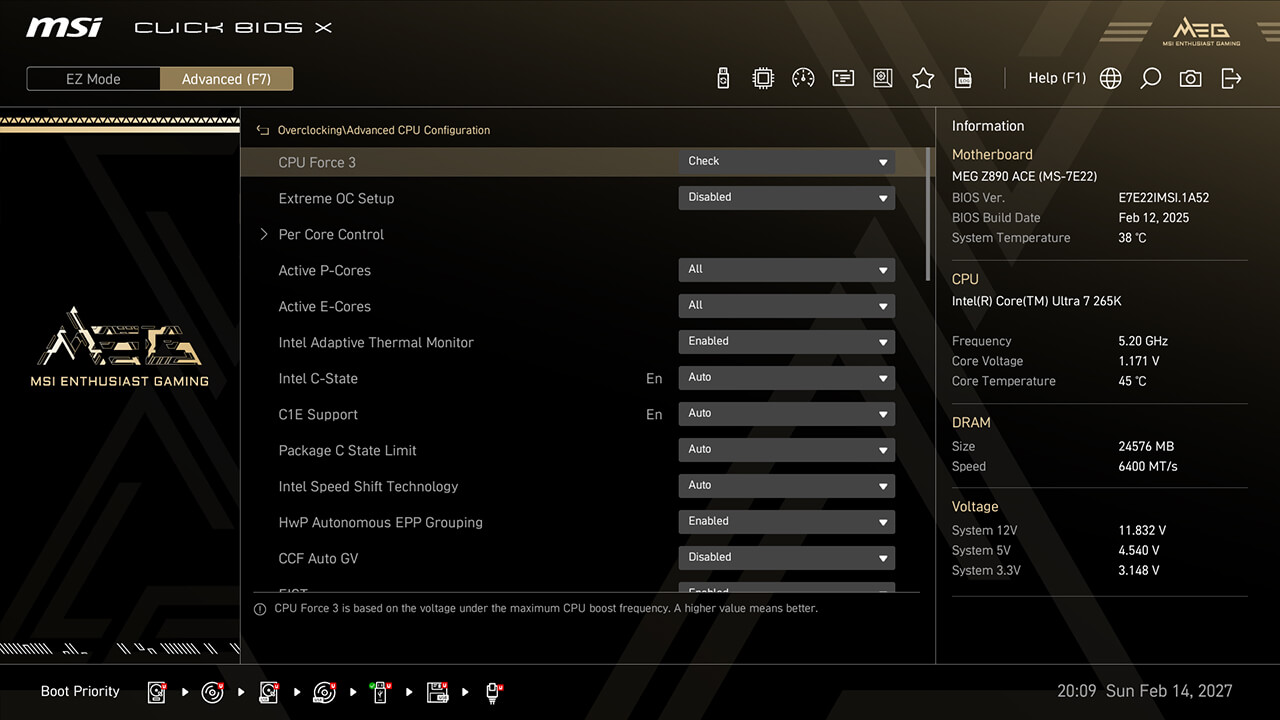

-
1. In Advanced Mode
-
2. Click Overclocking\Advanced CPU Configuration\CPU Force 3
-
3. The CPU Force 3 score represents the processor's quality, with a higher score generally indicating better overclocking capabilities
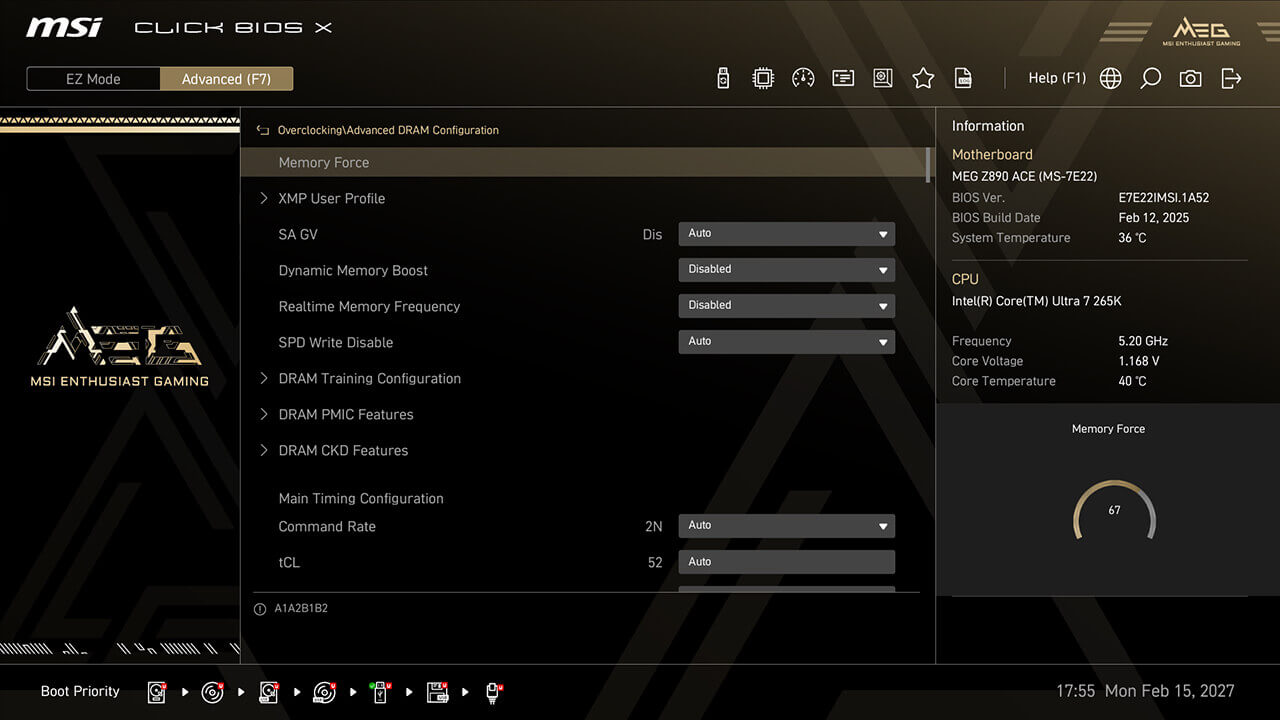
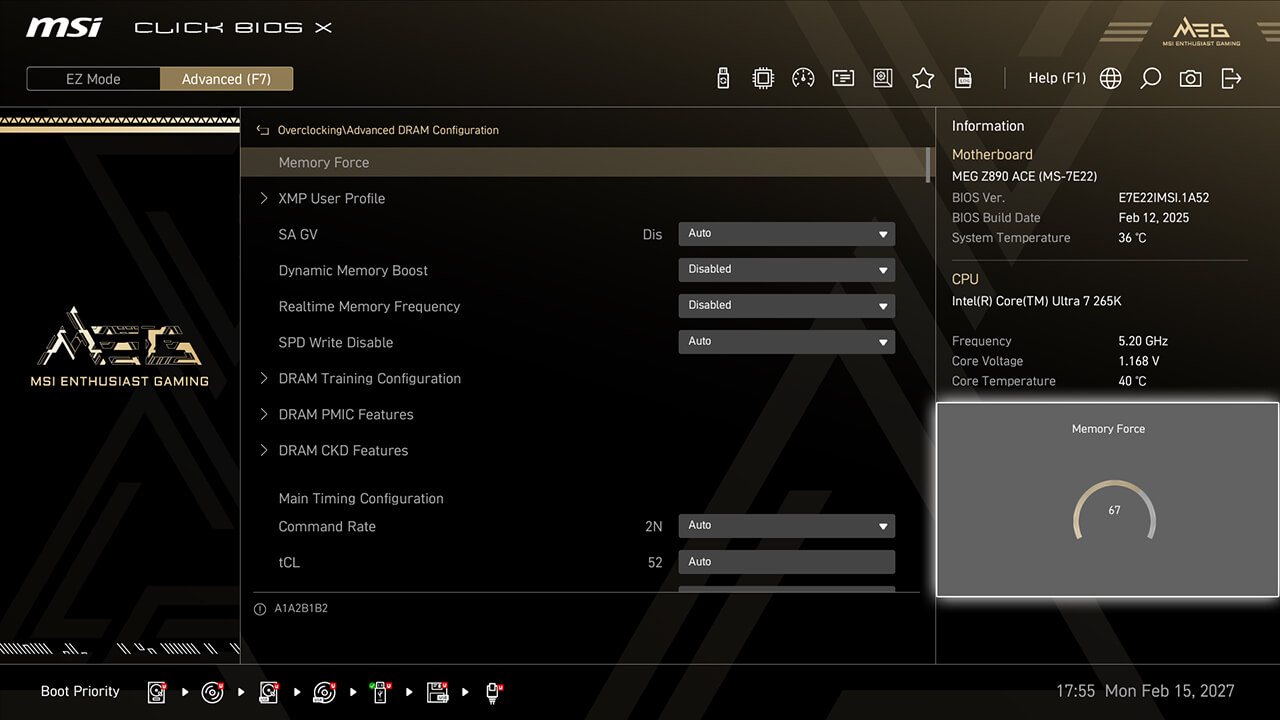
Memory Force
Memory Force chart shows your memory's current overclocking capability, helping guide memory overclocking without redundant reboots or testing.

-
1. In Advanced Mode
-
2. Click Overclocking\Advanced DRAM Configuration\Memory Force
-
3. The Memory Force score indicates the memory's current overclocking status. A higher score generally indicates more overclocking potential, while the score drops as performance improves
Game Boost
Game Boost function allows you to quickly configure the CPU for optimal overclocking, enabling higher performance and more FPS with a single button.
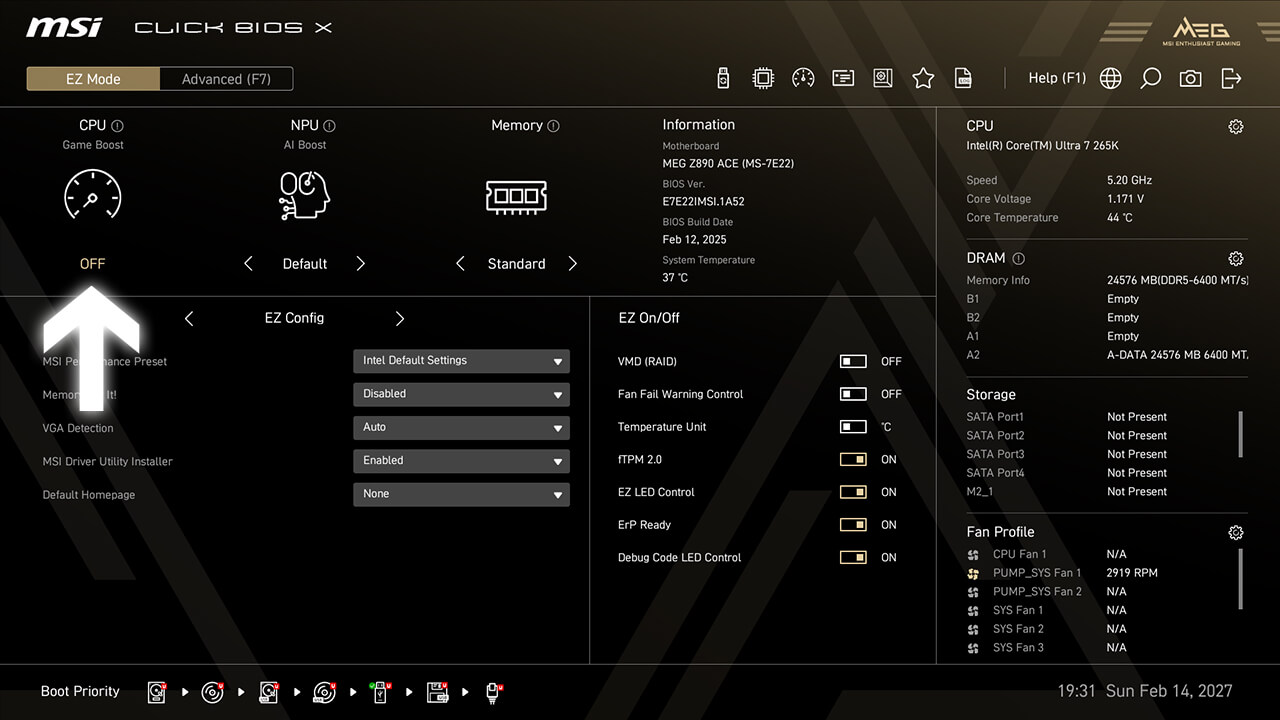
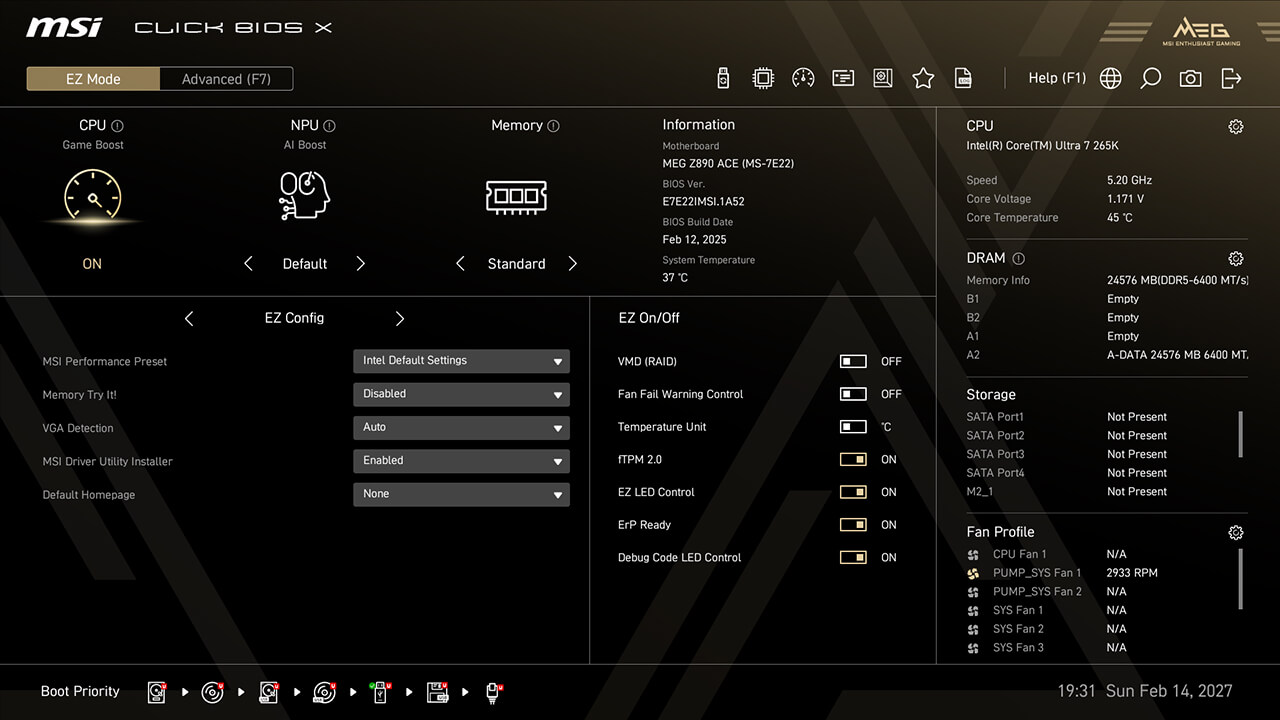
-
1. Click the Game Boost icon in easy mode, then press F10 to save changes and exit BIOS
AI Boost
AI Boost function allows you to enhance NPU performance, delivering maximum AI processing power when additional performance is needed.
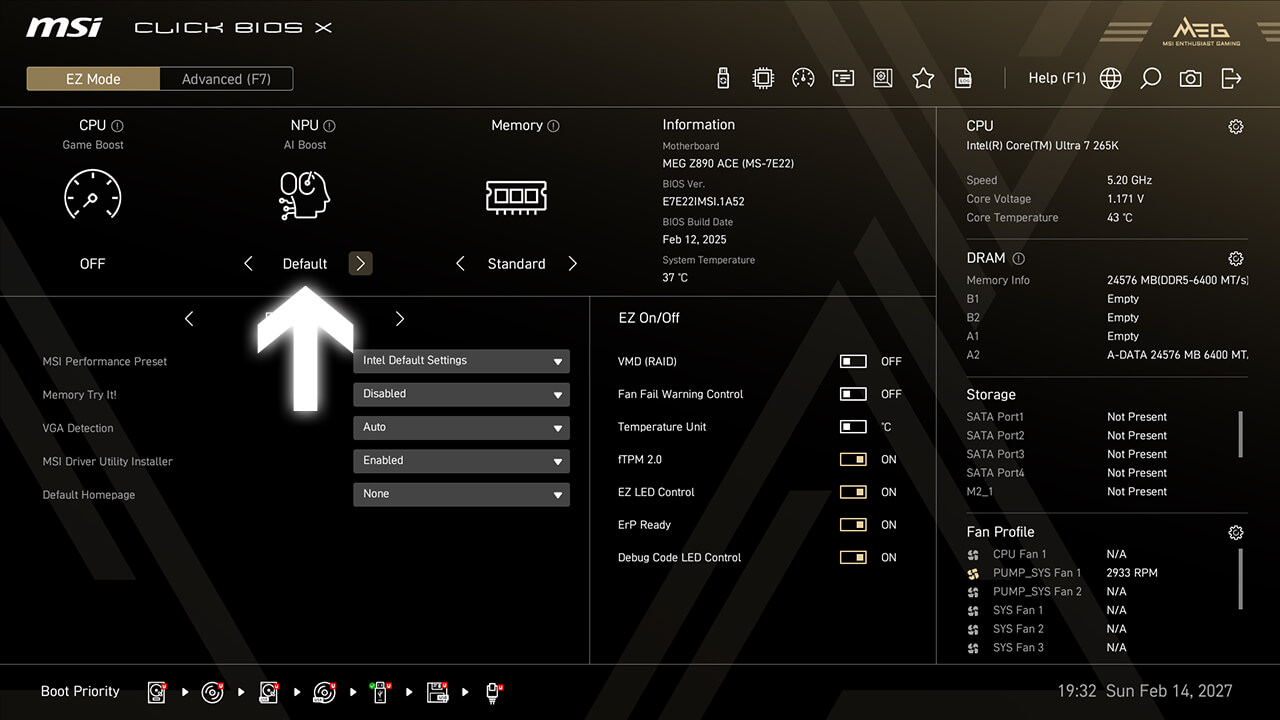
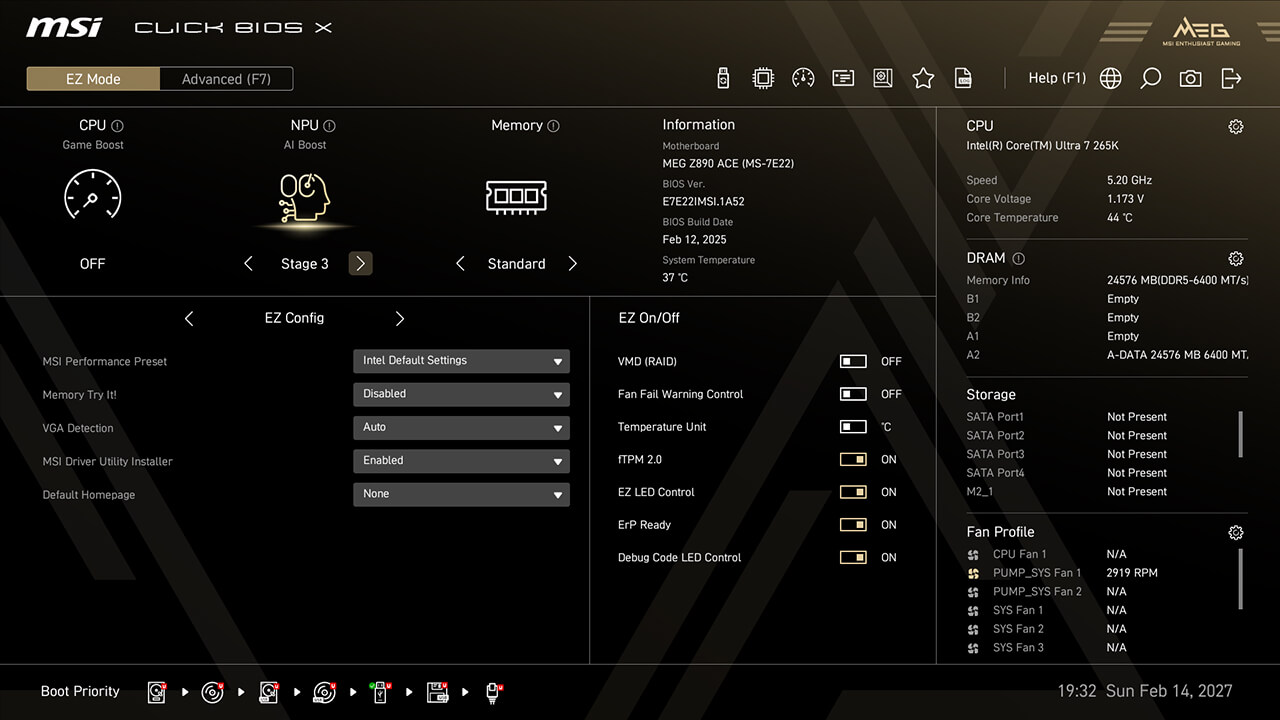
-
1. Click the AI Boost icon in easy mode, then press F10 to save changes and exit BIOS
XMP & EXPO
XMP (Extreme Memory Profiles) allows you to easily enable automatic power settings for optimal memory speed and stability. Additionally, A-XMP, EXPO, and iEXPO profiles are available for different platforms and memory types.


-
1. Click the XMP / EXPO icon in easy mode, then press F10 to save changes and exit BIOS
Intel 200S Boost
Intel 200S Boost allows you to enhance both memory performance (XMP) and CPU performance (NGU and D2D) simultaneously.
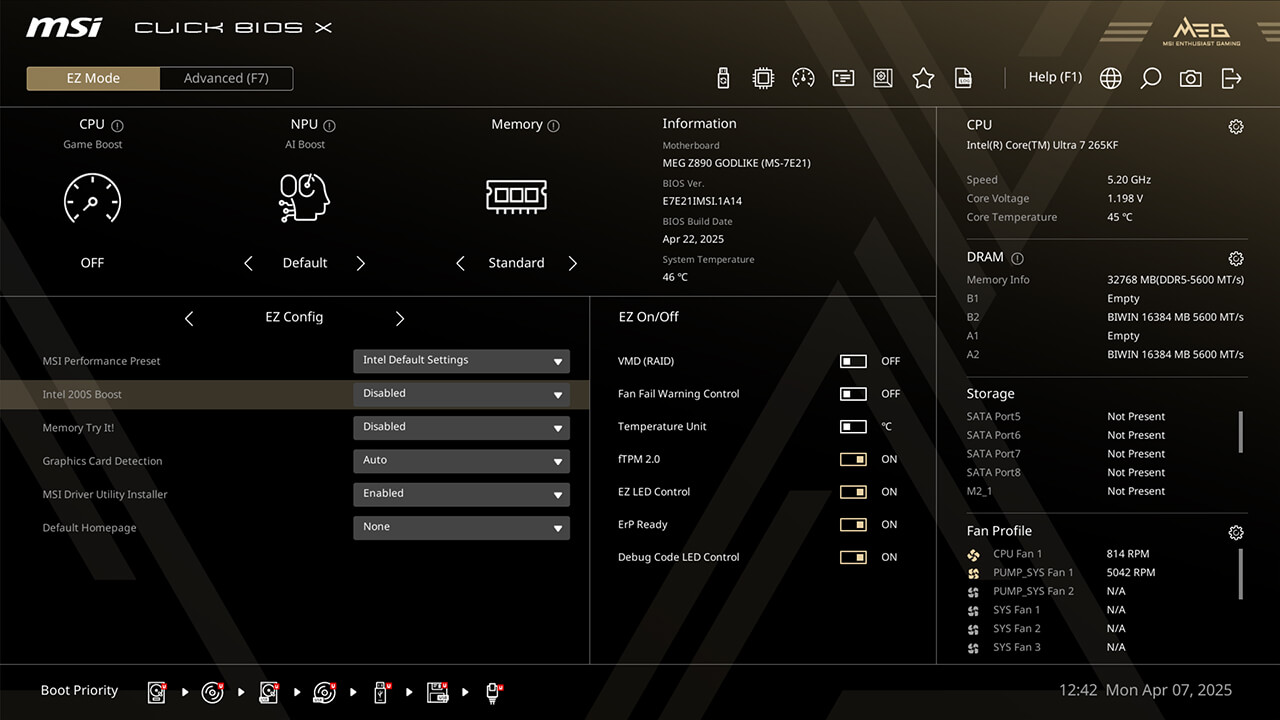
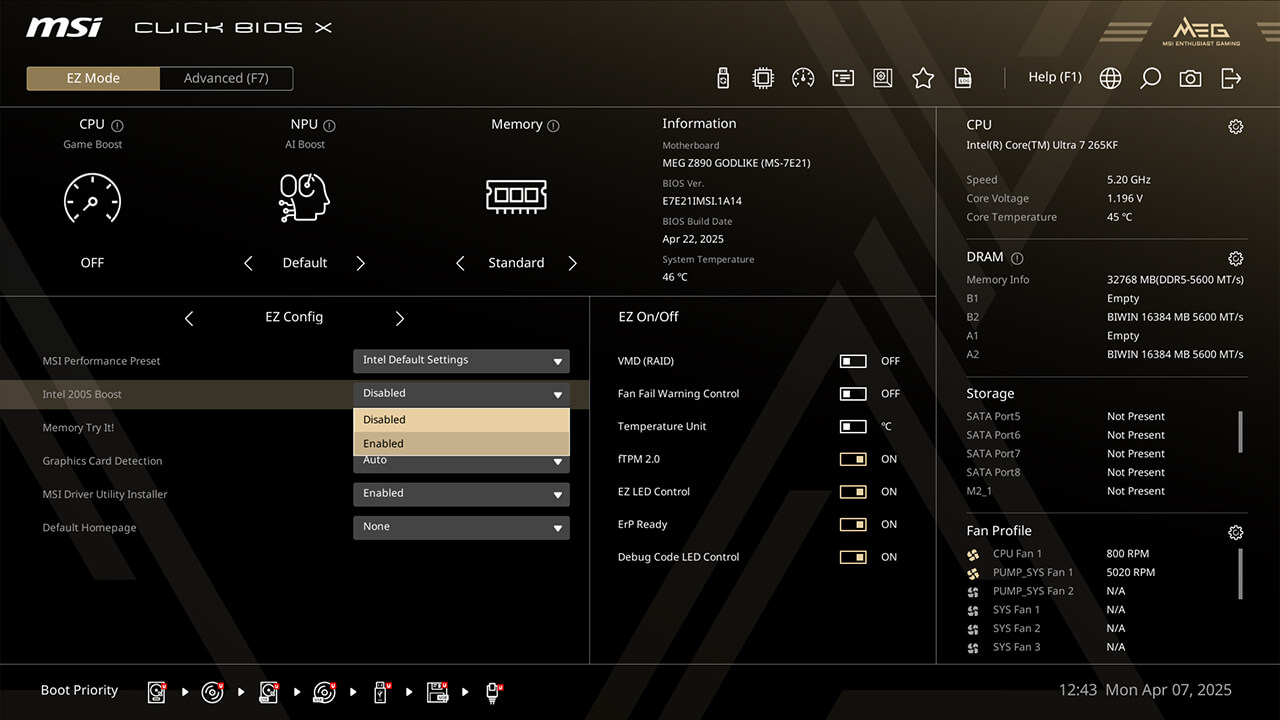
-
1. Click the Intel 200S Boost in EZ Config under easy mode
-
2. Enable Intel 200S Boost function, then press F10 to save changes and exit BIOS
Memory Try It!
Memory Try It! provides more memory overclocking profiles than XMP and EXPO. Simply select a profile from the dropdown menu and test its stability.

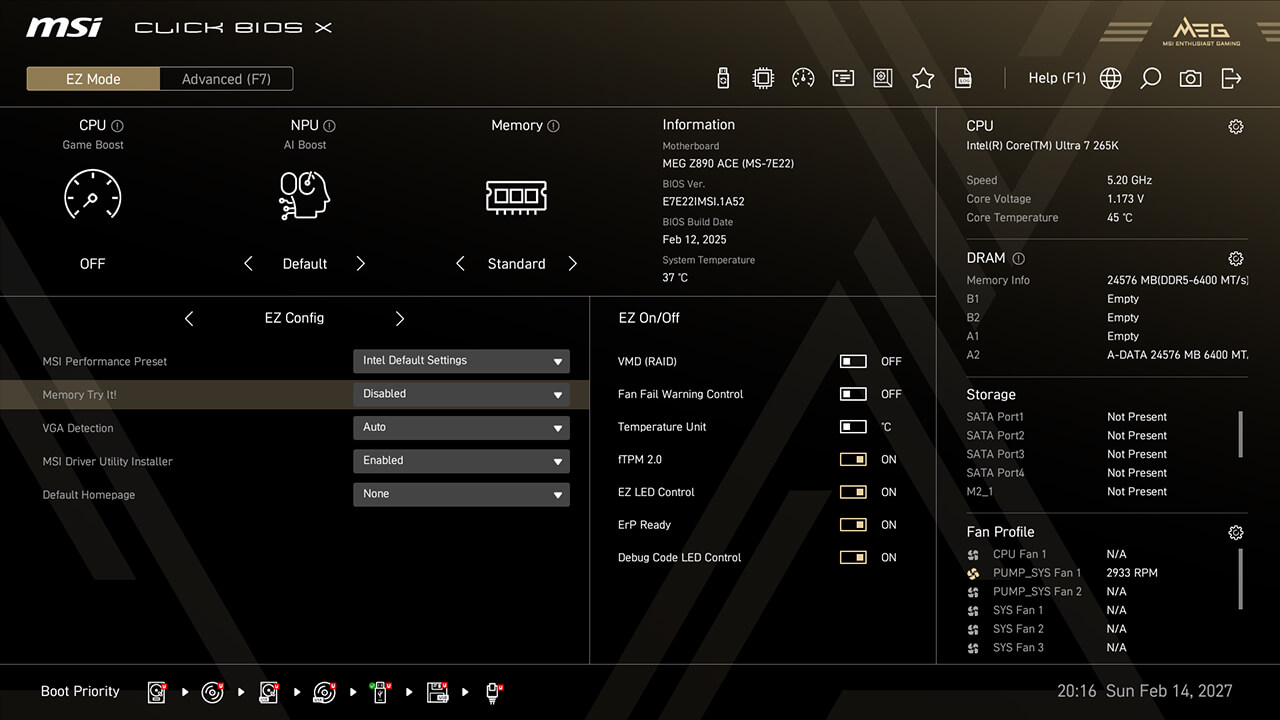
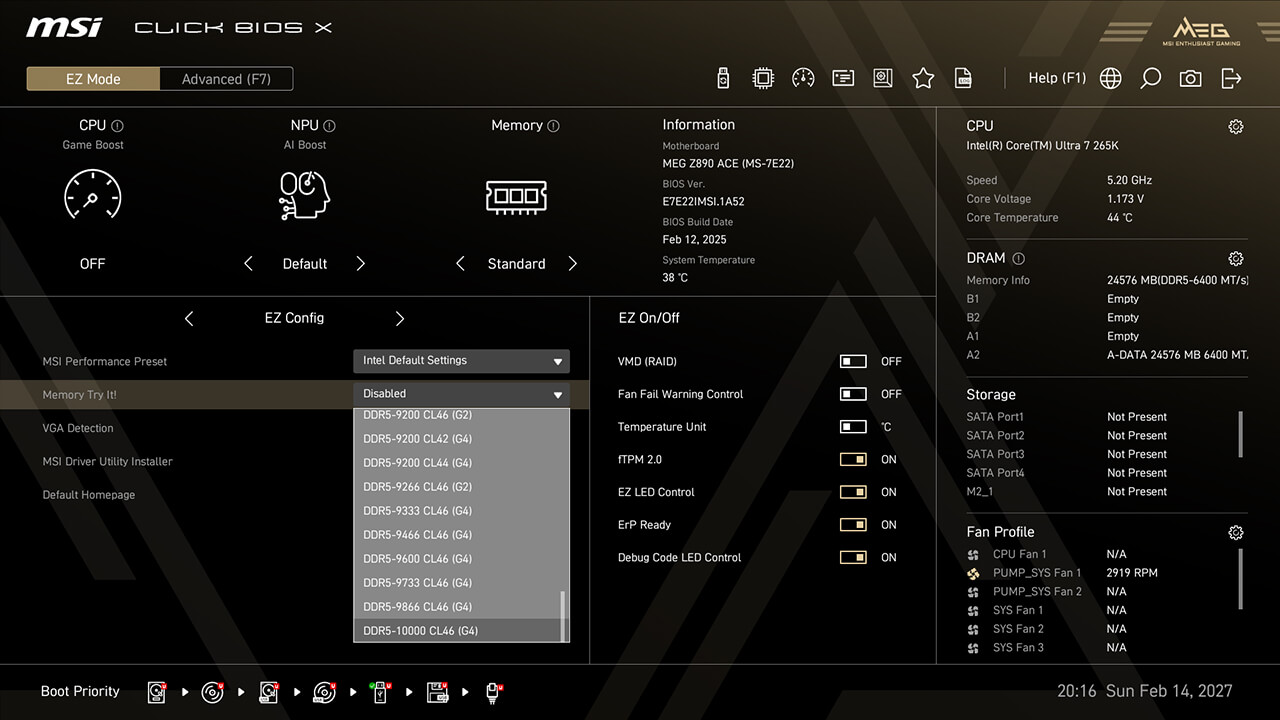
-
1. Click the Memory Try It! in EZ Config under easy mode
-
2. Choose the preferred profile, then press F10 to save changes and exit BIOS
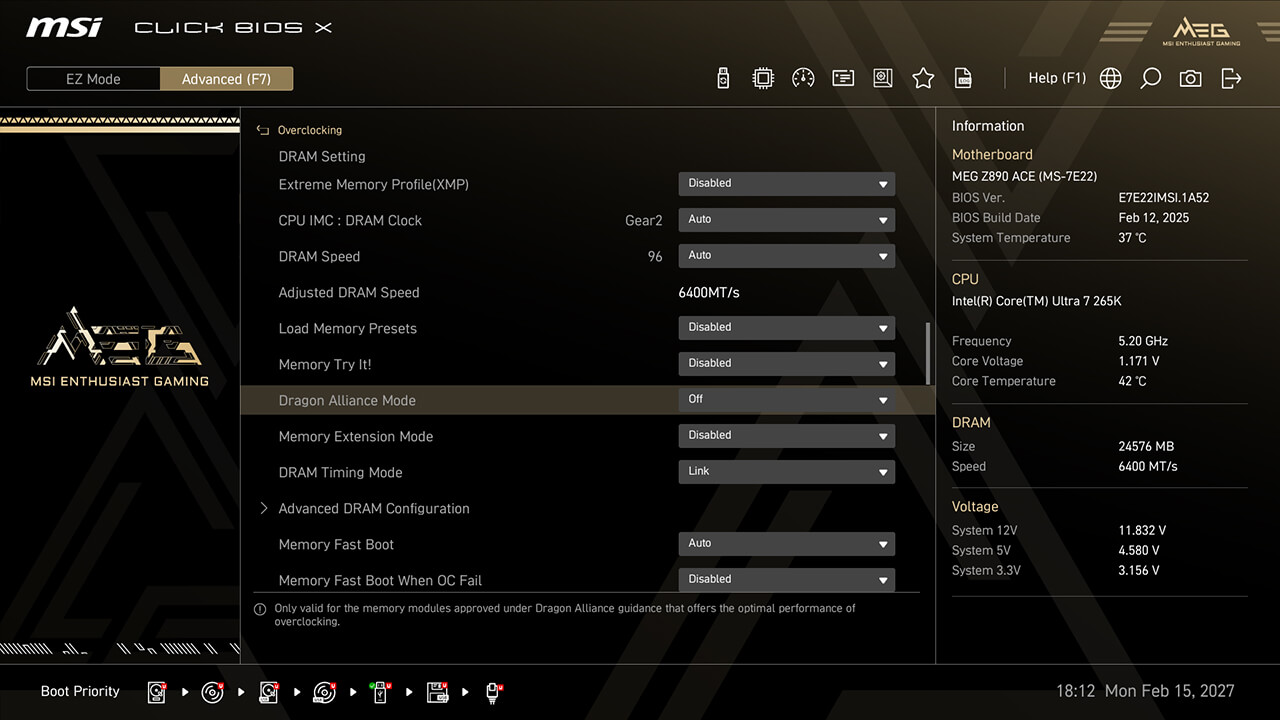
Dragon Alliance Mode
Dragon Alliance Mode offers one-click extreme memory overclocking for compatible memory modules with dedicated BIOS parameters, making high memory frequencies more accessible to enthusiasts.


-
1. In Advanced Mode
-
2. lick Overclocking\Dragon Alliance Mode
-
3. Enable Dragon Alliance Mode function, then press F10 to save changes and exit BIOS
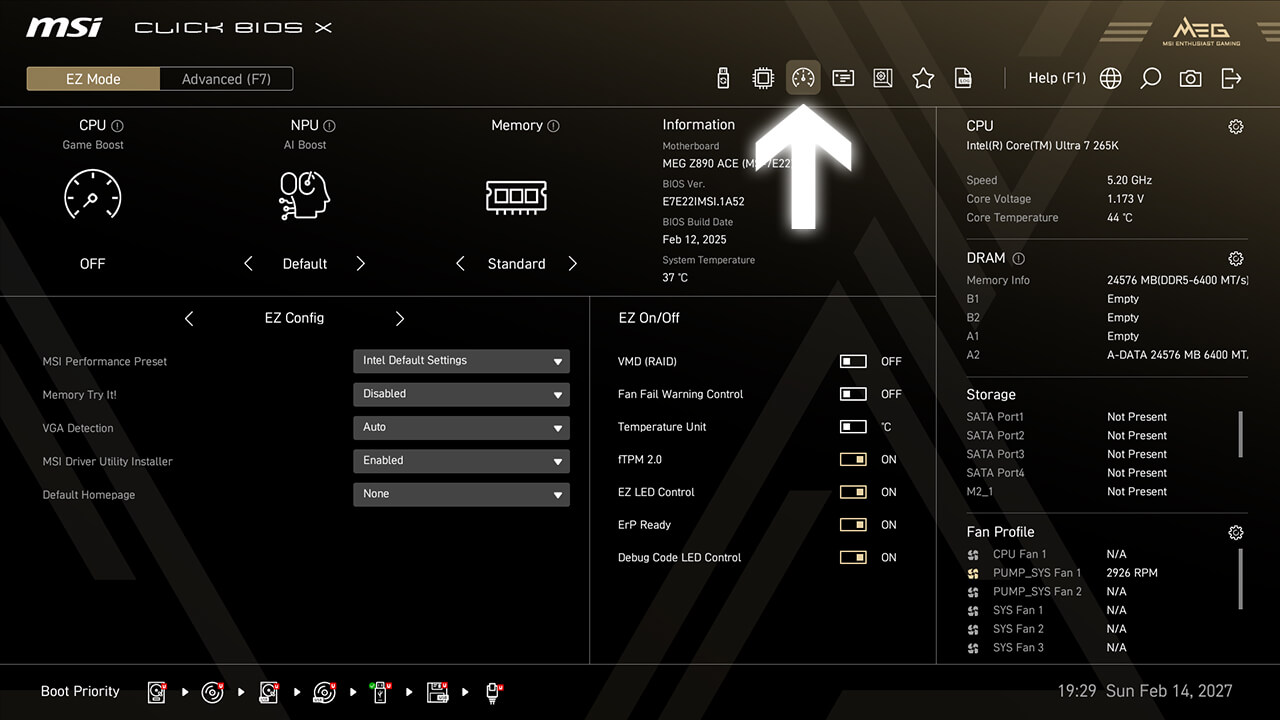
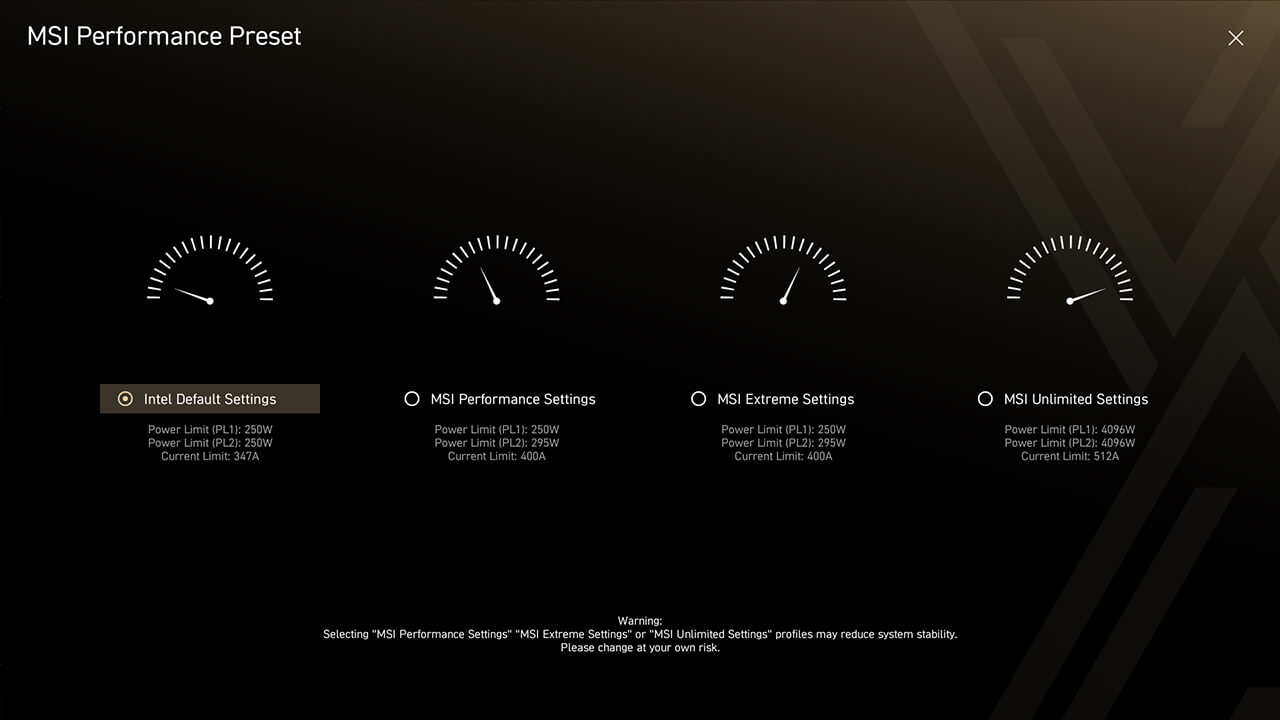
MSI Performance Preset
MSI Performance Preset is an intuitive way to boost CPU performance by setting the power limitation as your preference. There are multiple level settings for different significant scenarios.

-
1. Click the MSI Performance Preset icon in easy mode
-
2. Choose the preferred option, then press F10 to save changes and exit BIOS
Memory Extension Mode
Memory Extension Mode reduces memory latency and enhances performance at the same frequency. It also allows combining XMP profiles to find the best configuration.

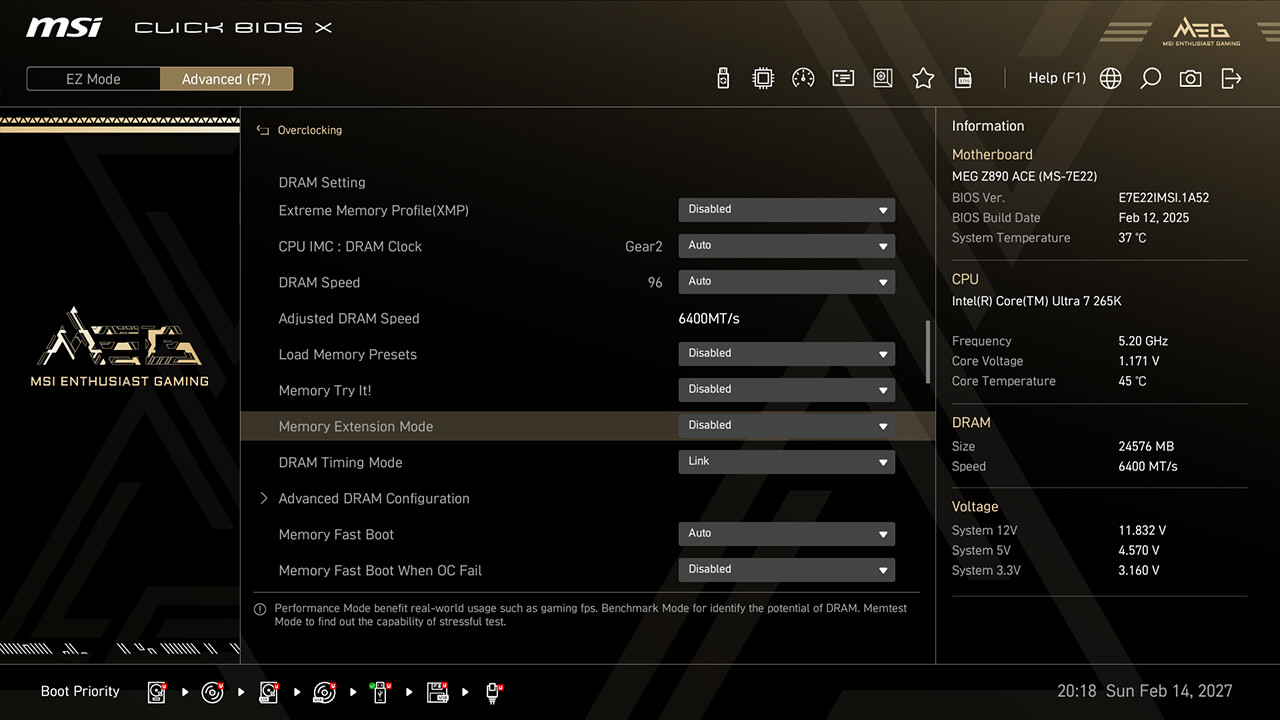

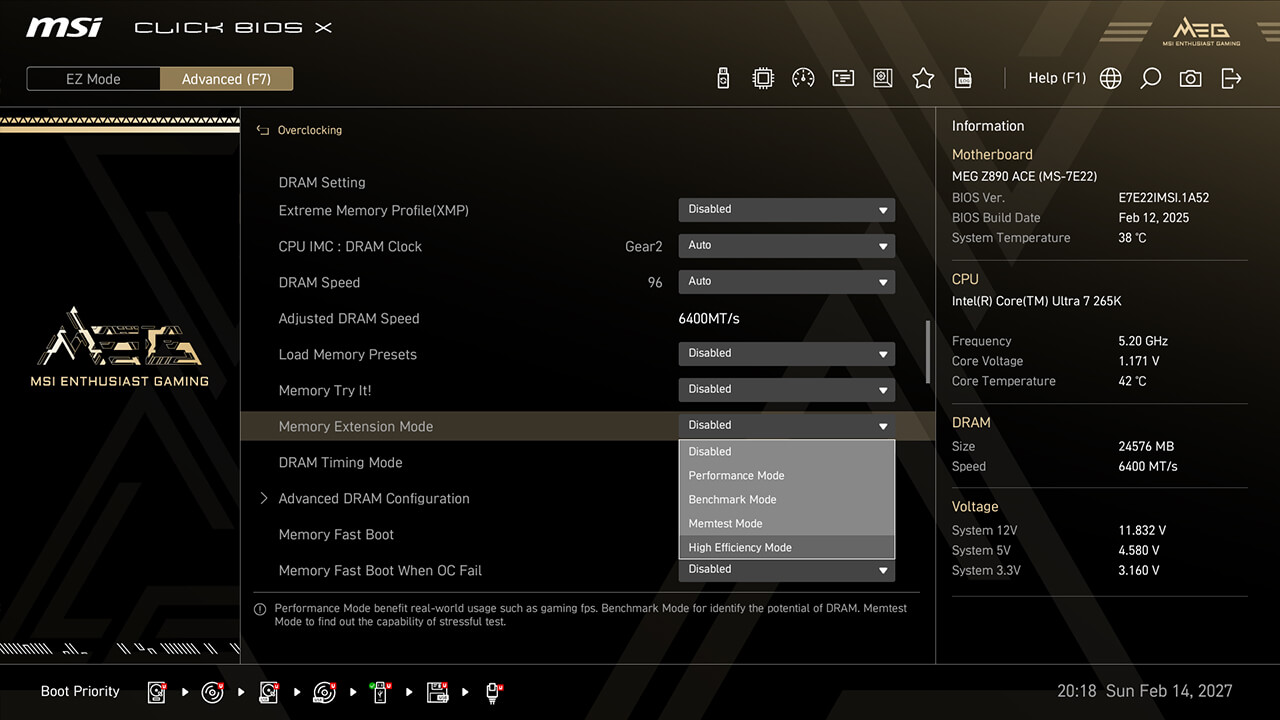
-
1. In Advanced Mode
-
2. Click Overclocking\Memory Extension Mode
-
3. Choose the preferred option, then press F10 to save changes and exit BIOS
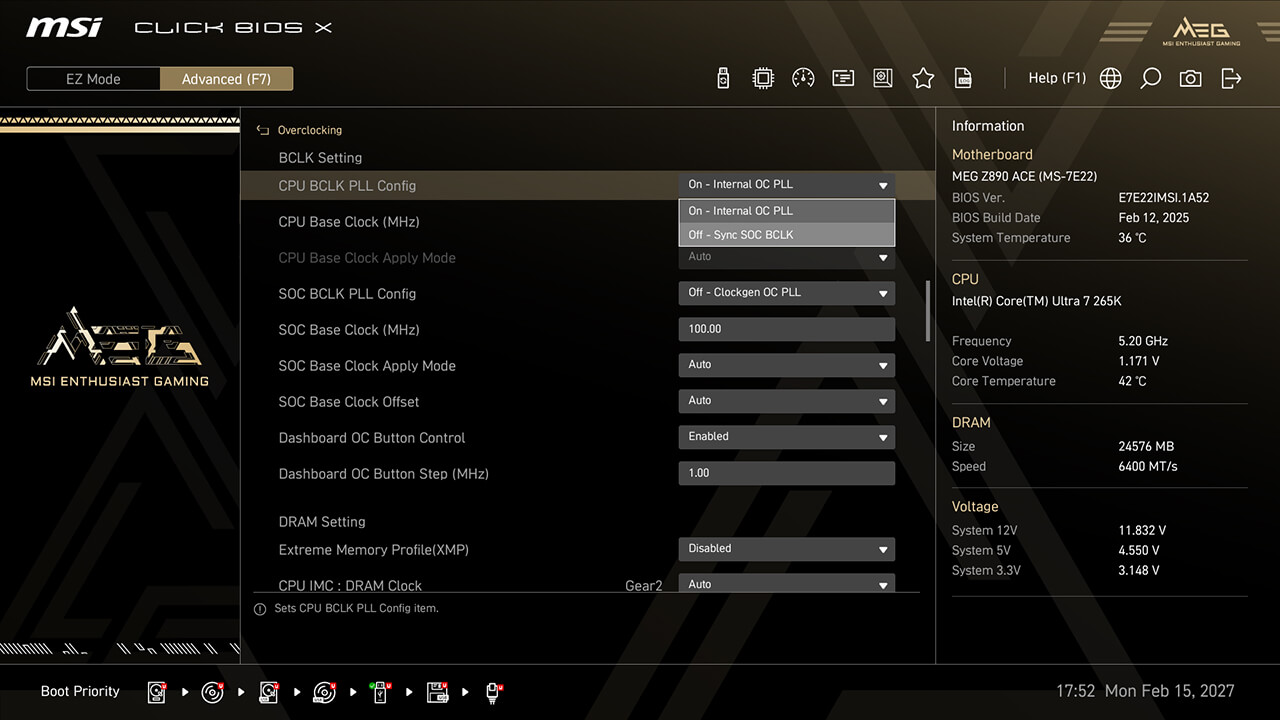
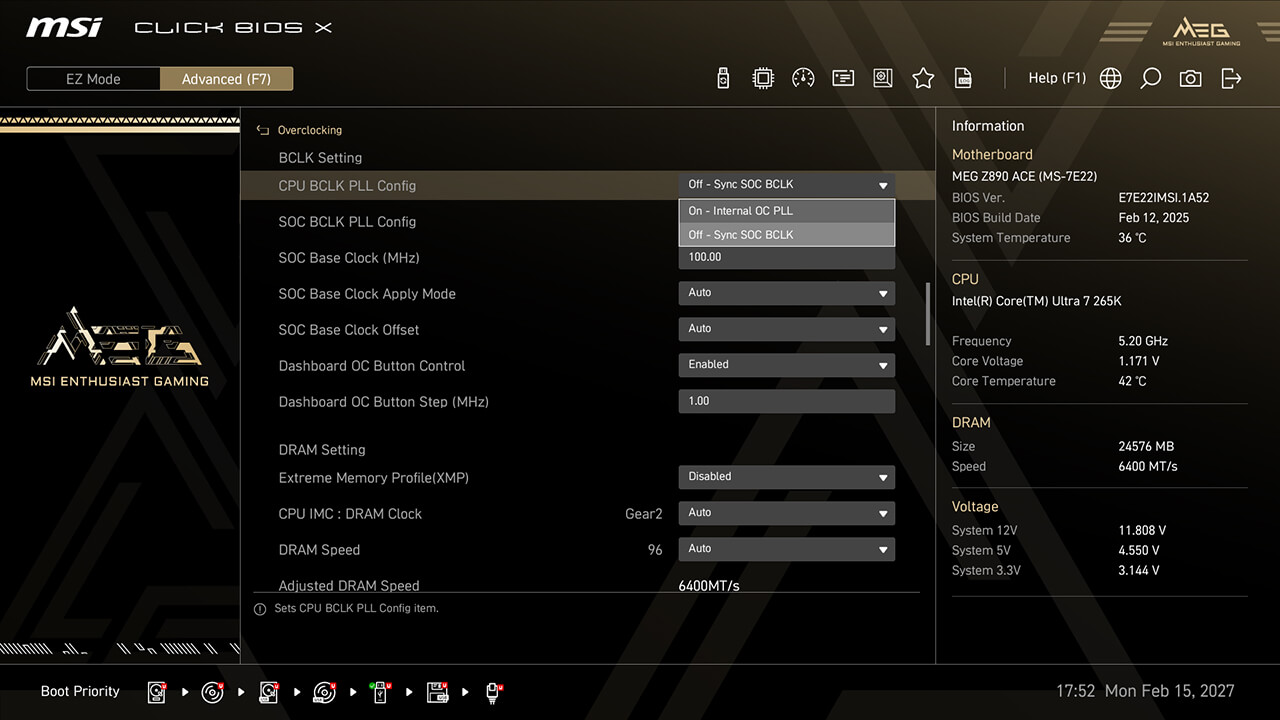
BCLK Control
MSI OC Engine(clock generator) motherboards allow flexible BCLK overclocking. You can sync CPU and SOC BCLK or adjust them separately for optimal performance.

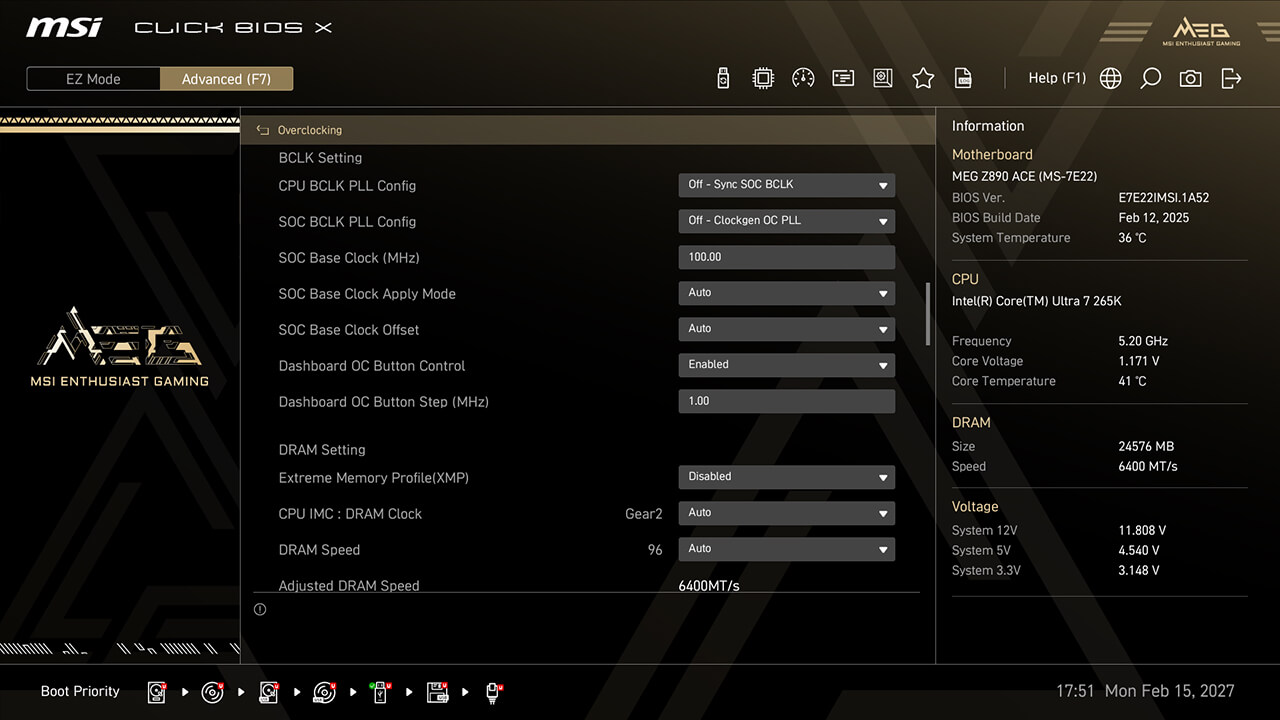
-
1. In Advanced Mode
-
2. Click Overclocking\BCLK Setting
-
3. Set the preferred option and parameters, then press F10 to save changes and exit BIOS
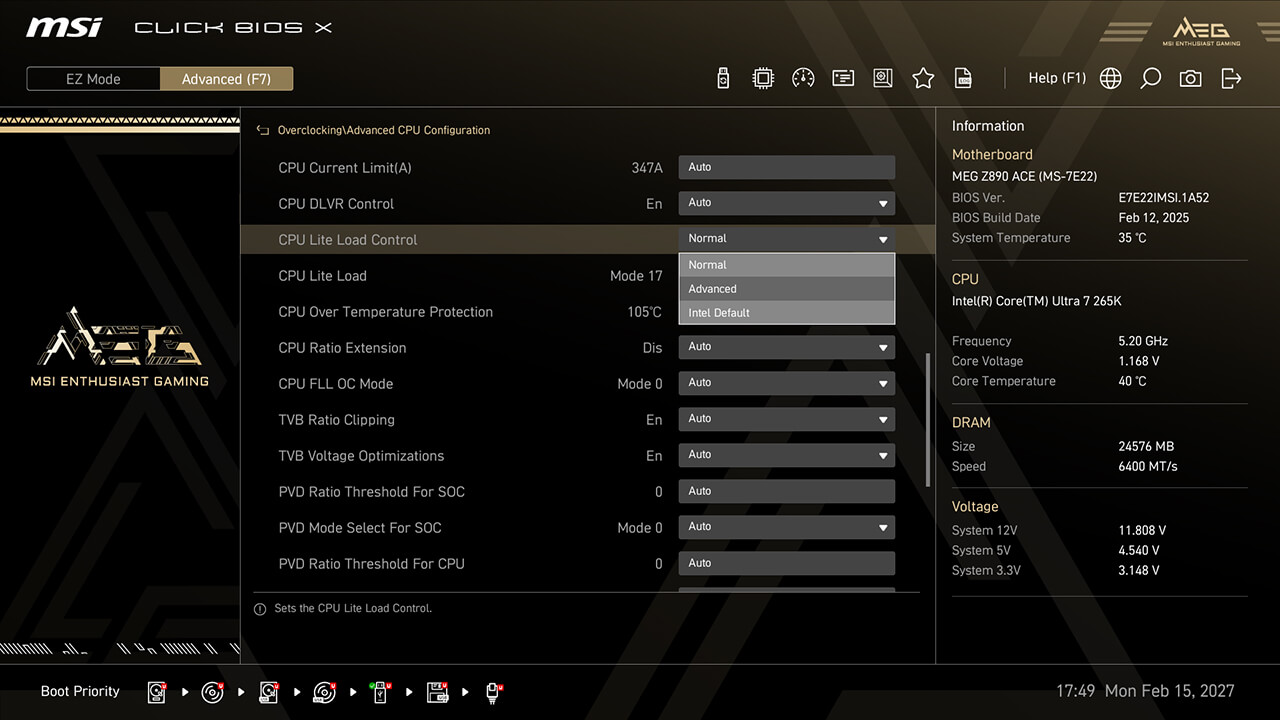
CPU Lite Load Control
CPU Lite Load Control allows easy AC/DC loadline adjustment, optimizing power consumption and thermal performance for stability and energy efficiency.


-
1. In Advanced Mode
-
2. Click Overclocking\Advanced CPU Configuration\CPU Lite Load Control
-
3. Choose the preferred option, then press F10 to save changes and exit BIOS
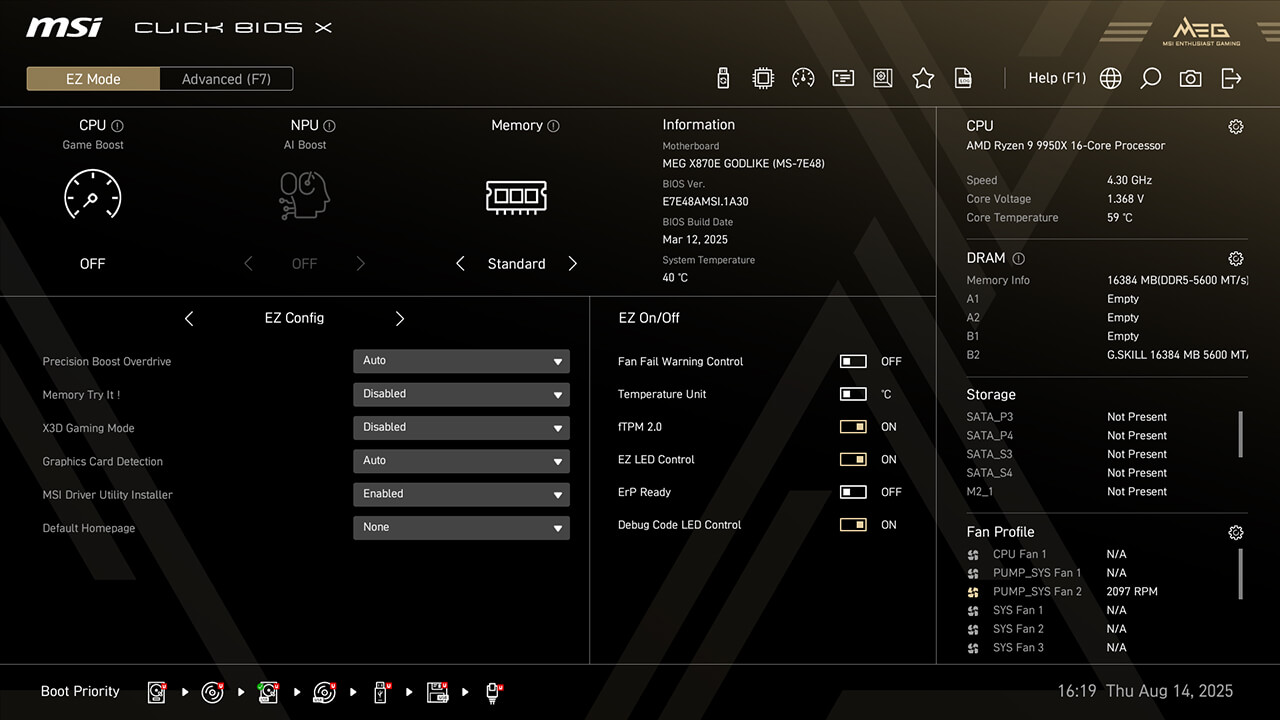
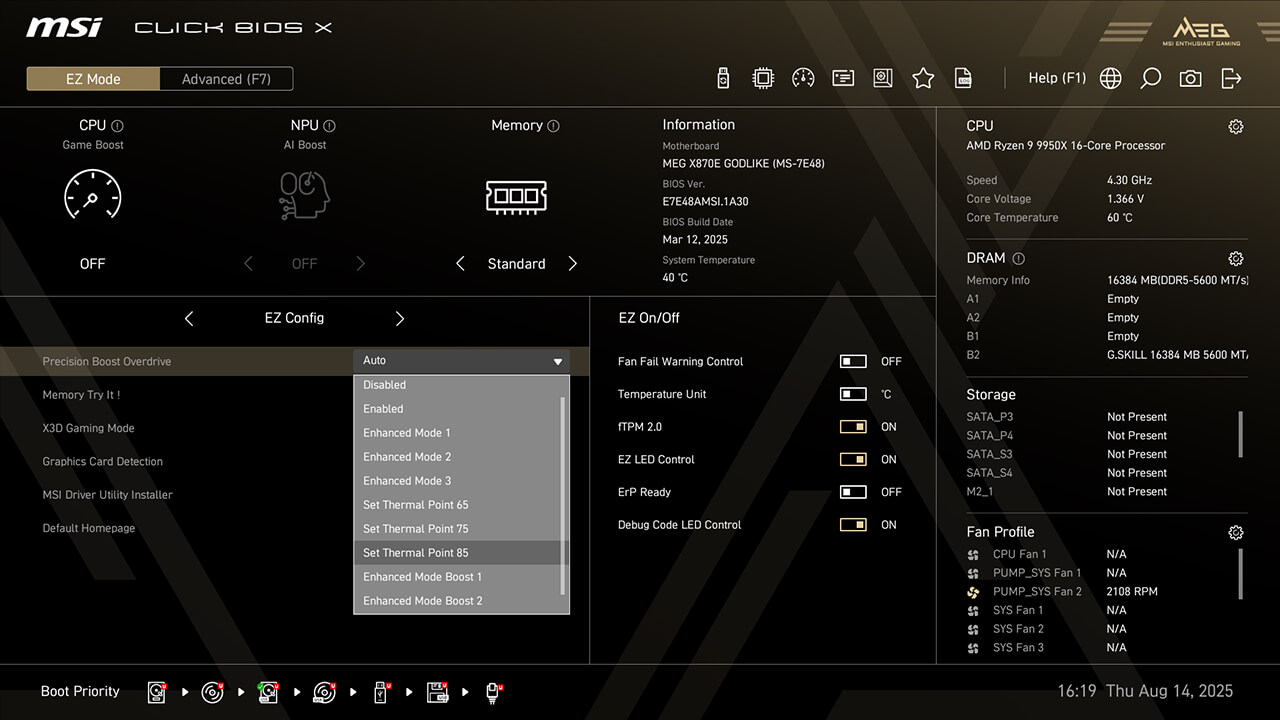
Precision Boost Overdrive
Precision Boost Overdrive (PBO) allows your Ryzen CPU to dynamically boost clock speeds beyond the base frequency. MSI offers additional options like Thermal Point settings or Enhanced Mode to maximize performance for different scenarios.
-
1. Click the Precision Boost Overdrive in EZ Config under easy mode
-
2.Choose the preferred profile, then press F10 to save changes and exit BIOS
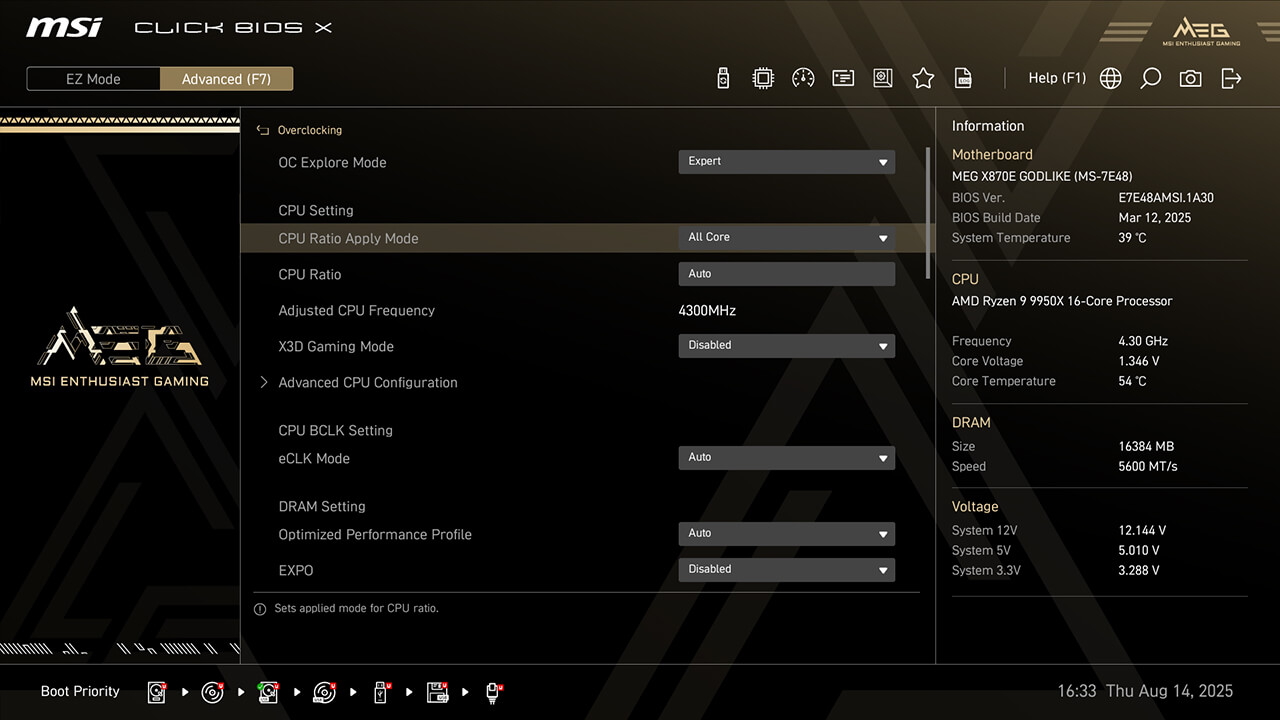
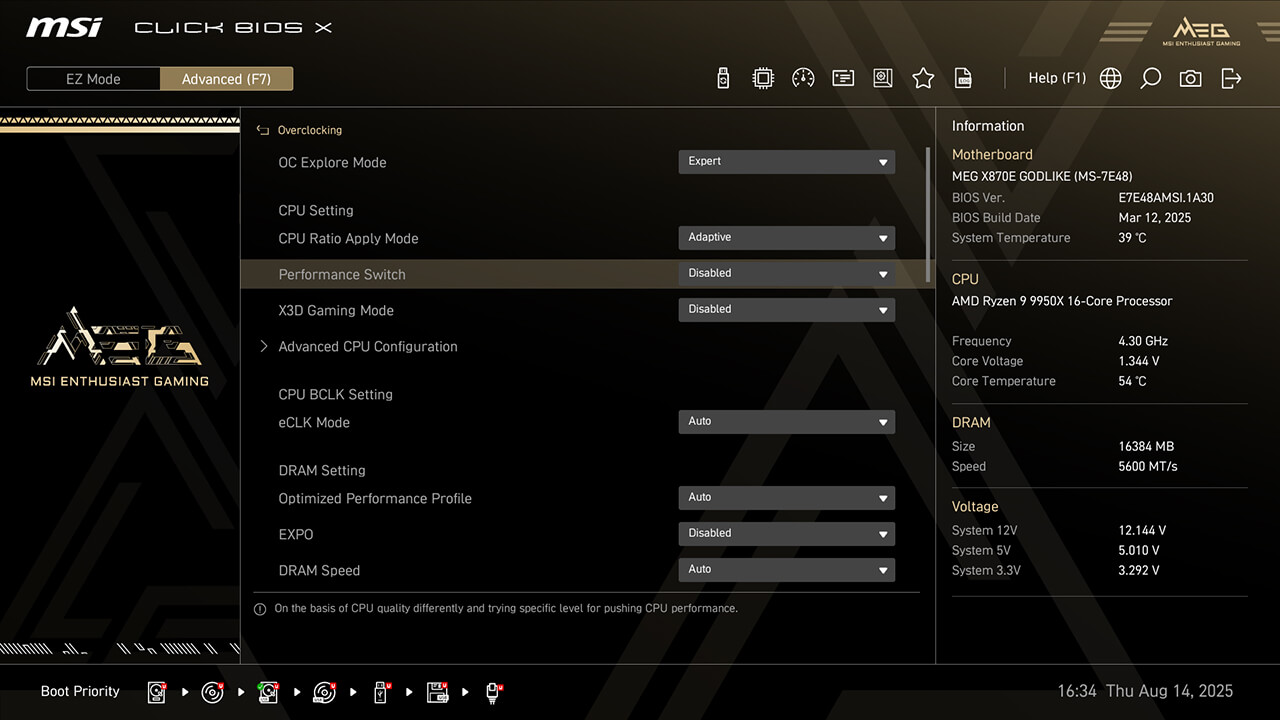
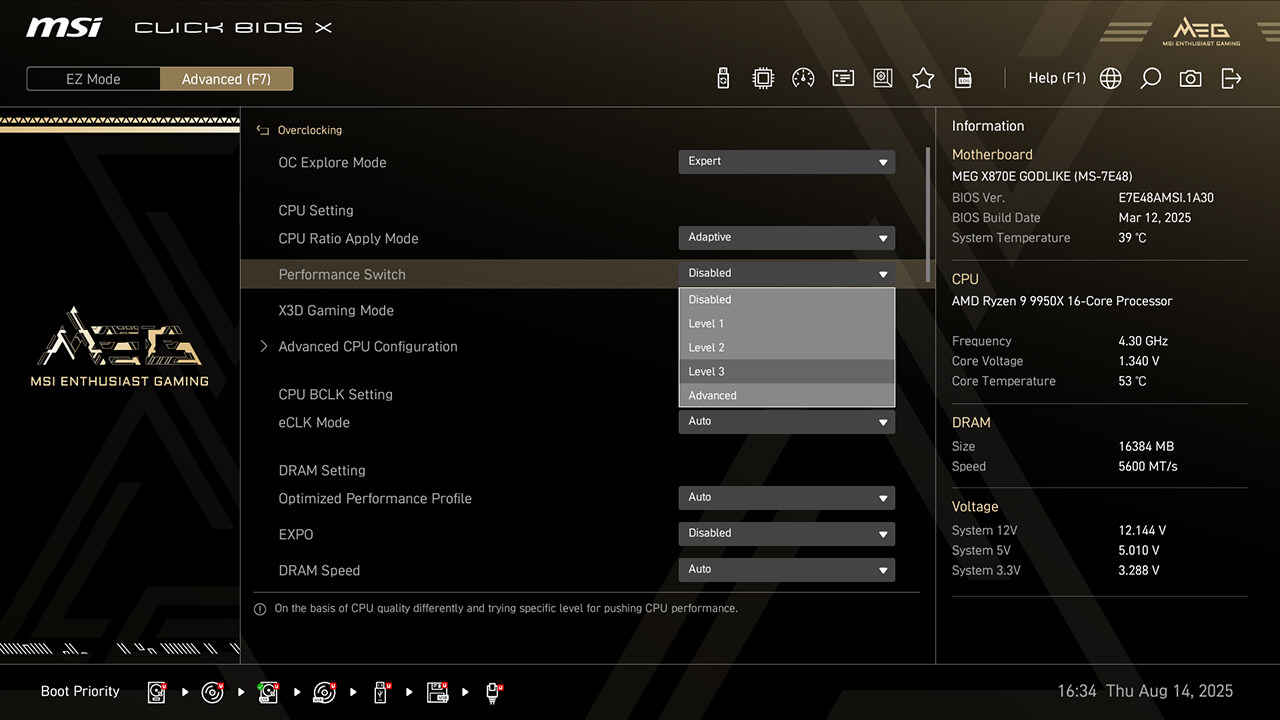
Performance Switch
Performance Switch combines AMD’s Precision Boost Overdrive (PBO) and MSI’s custom OC settings, delivering higher CPU performance in both status of single-core and multi-core workloads.

-
1. In Advanced Mode
-
2. Click Overclocking\CPU Ratio Apply Mode
-
3. Select Adaptive in CPU Ratio Apply Mode, choose the preferred profile in Performance Switch, then press F10 to save changes and exit BIOS
X3D Gaming Mode
X3D Gaming Mode optimizes Ryzen CPU’s core and Simultaneous Multithreading (SMT) settings, enhancing multi-core performance in CPU-intensive applications to boost gaming performance.

-
1. Click the X3D Gaming Mode in EZ Config under easy mode
-
2. Enable X3D Gaming Mode function, then press F10 to save changes and exit BIOS
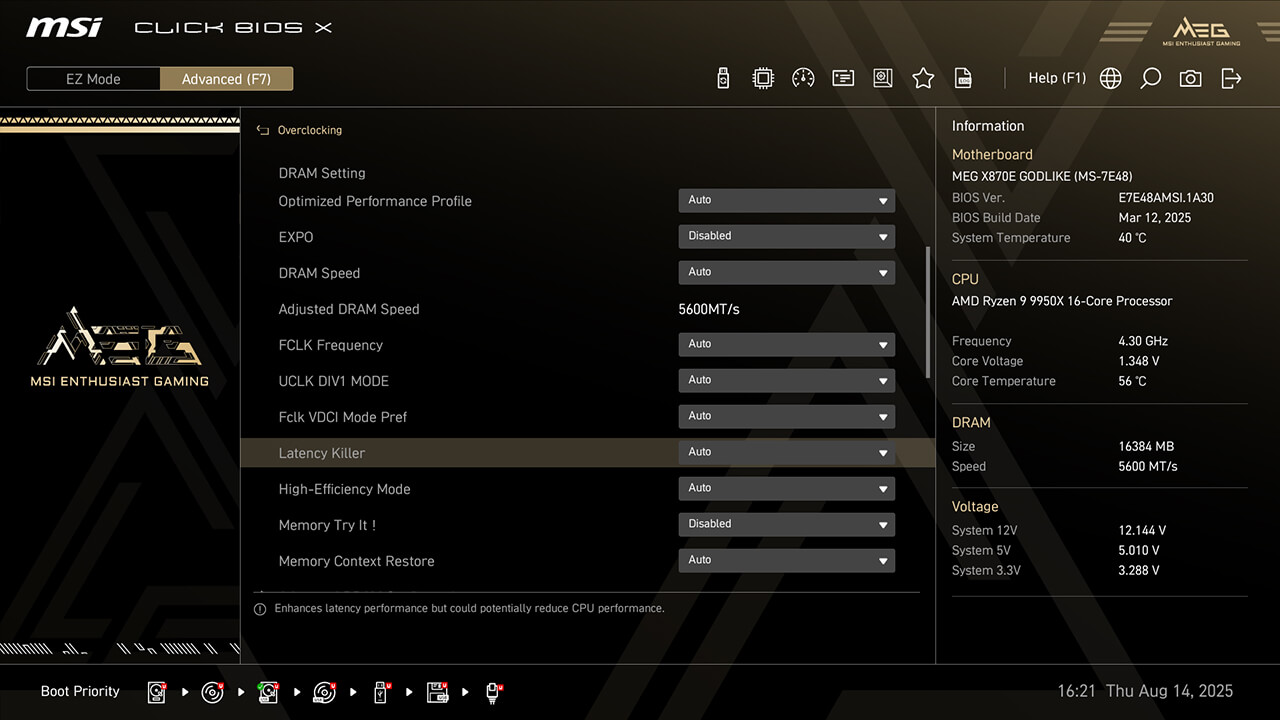
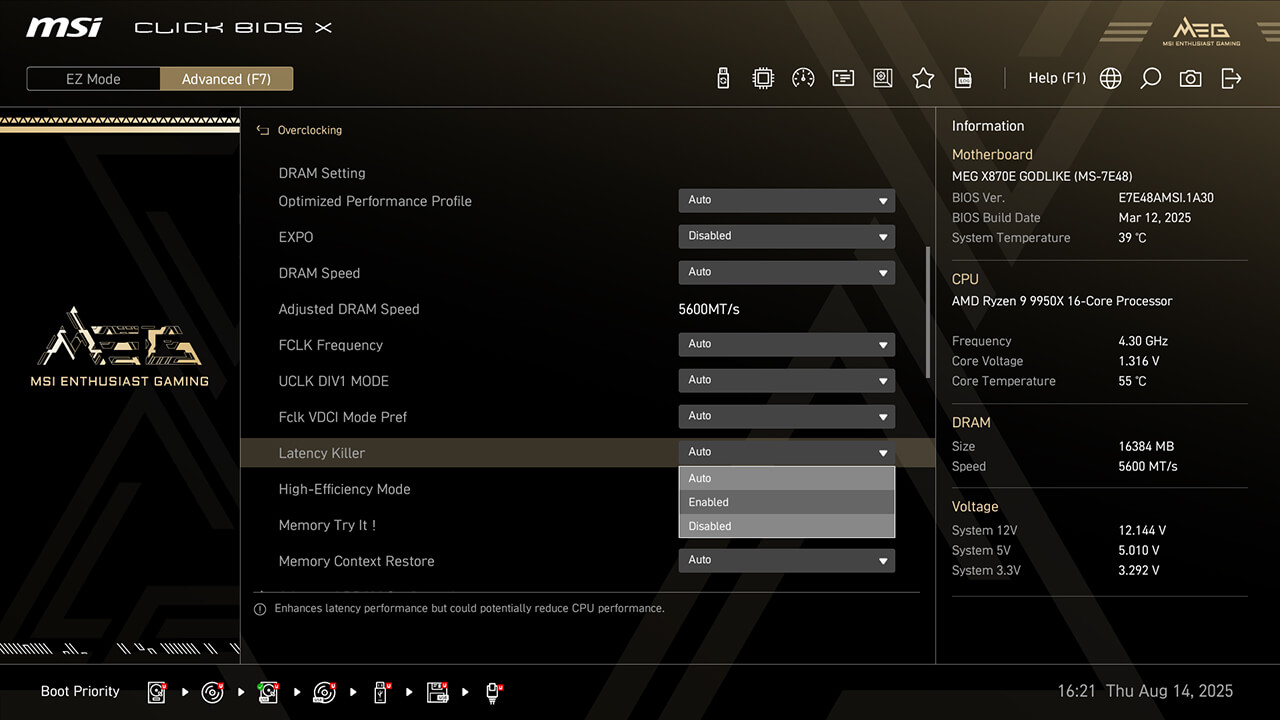
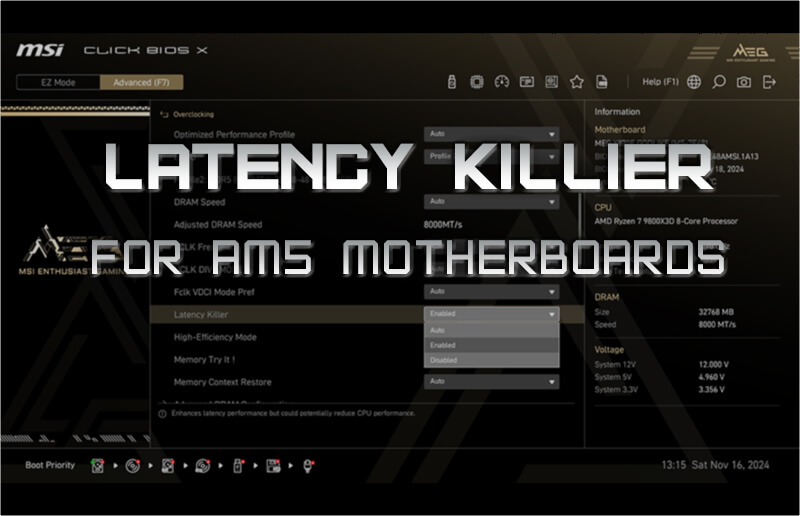
Latency Killer
Latency Killer reduces memory latency and boosts performance. It also allows combining exclusive BIOS functions like EXPO, A-XMP profiles, Memory Try It, High-Efficiency Mode, or manual overclocking settings.


-
1. In Advanced Mode
-
2. Click Overclocking\Latency Killer
-
3. Enable Latency Killer function, then press F10 to save changes and exit BIOS
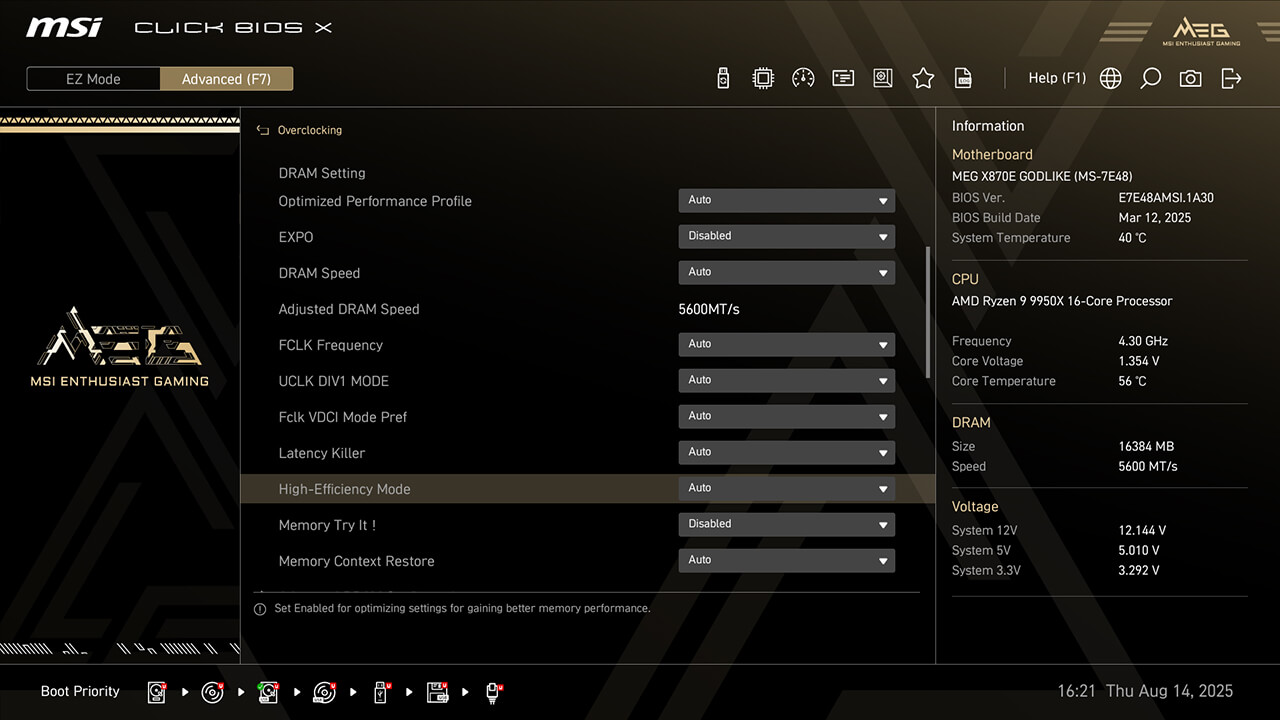
High-Efficiency Mode
High-Efficiency Mode enhances memory performance by increasing bandwidth and reducing latency. MSI provides four RAM timing presets to help you find the optimal configuration based on memory module quality.


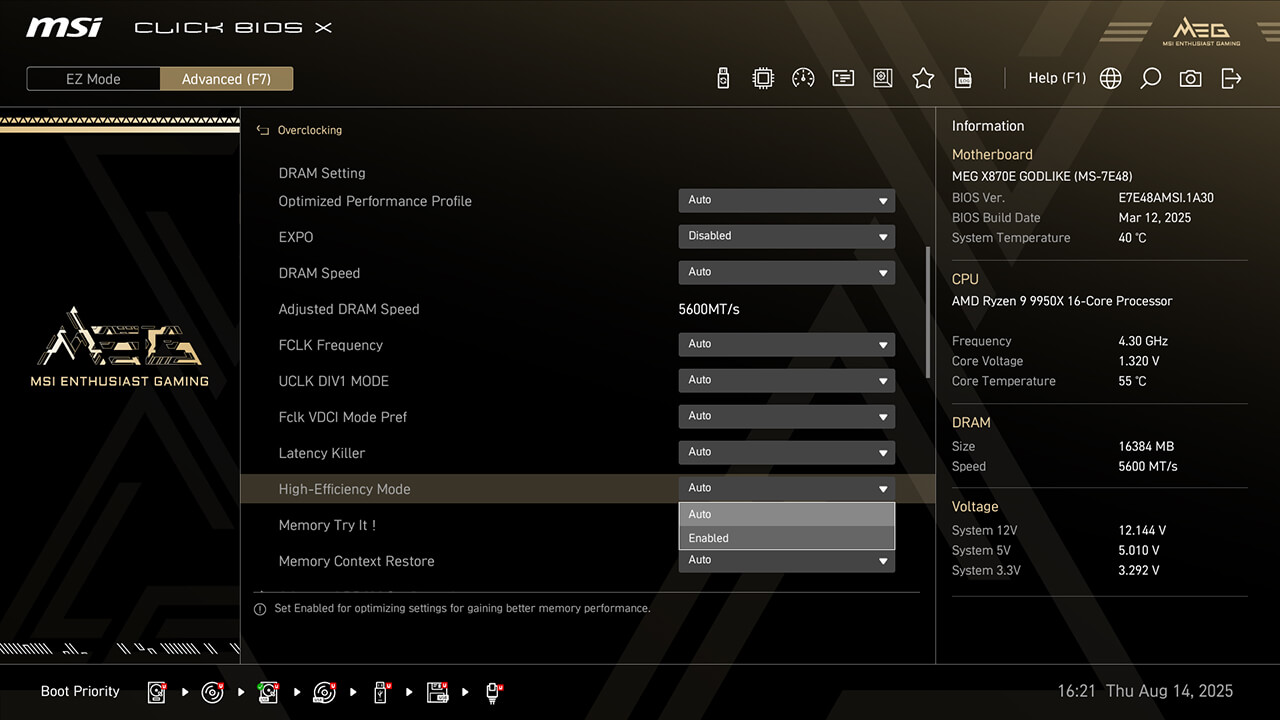
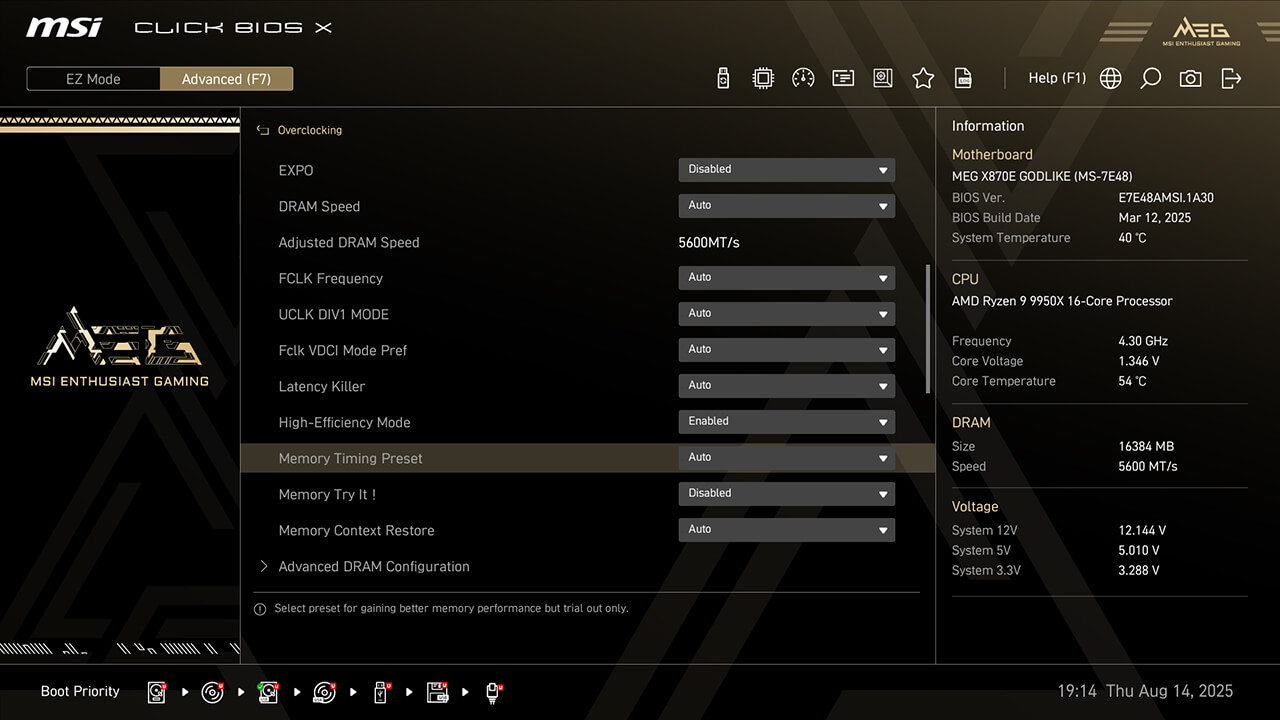
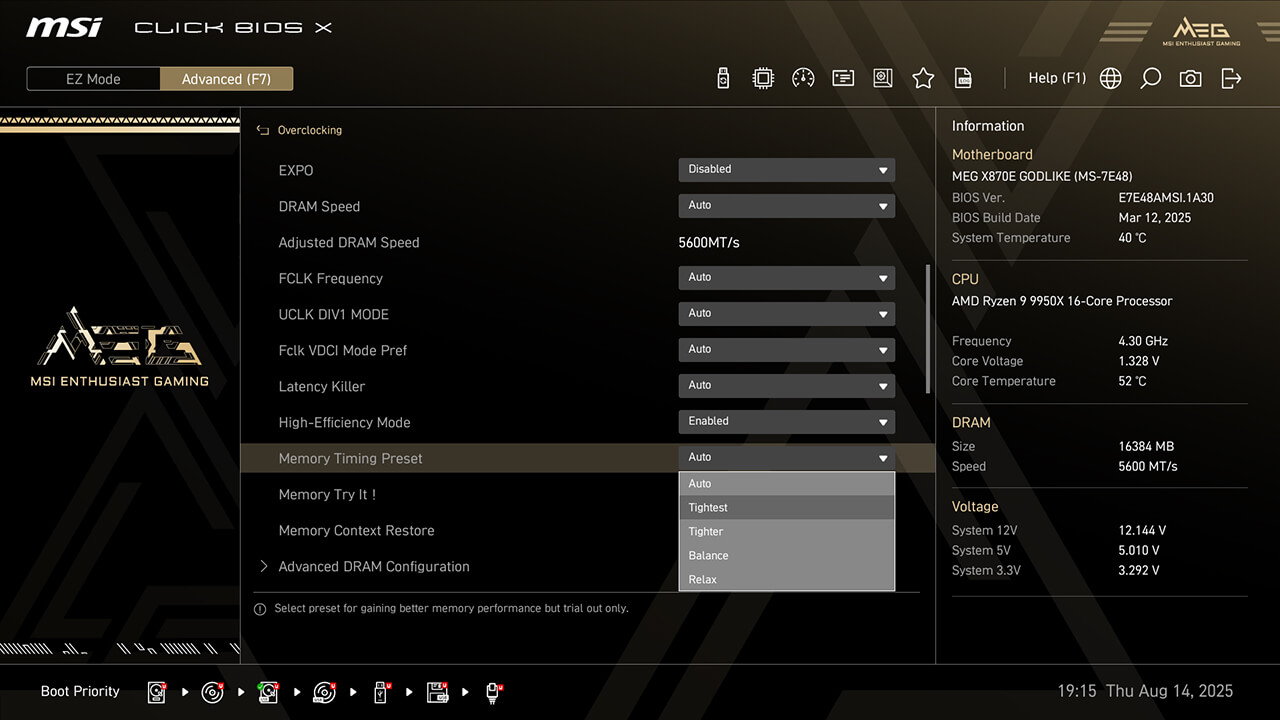
-
1. In Advanced Mode
-
2. Click Overclocking\High-Efficiency Mode
-
3. Enable High-Efficiency Mode, choose the preferred profile in Memory Timing Preset function, then press F10 to save changes and exit BIOS
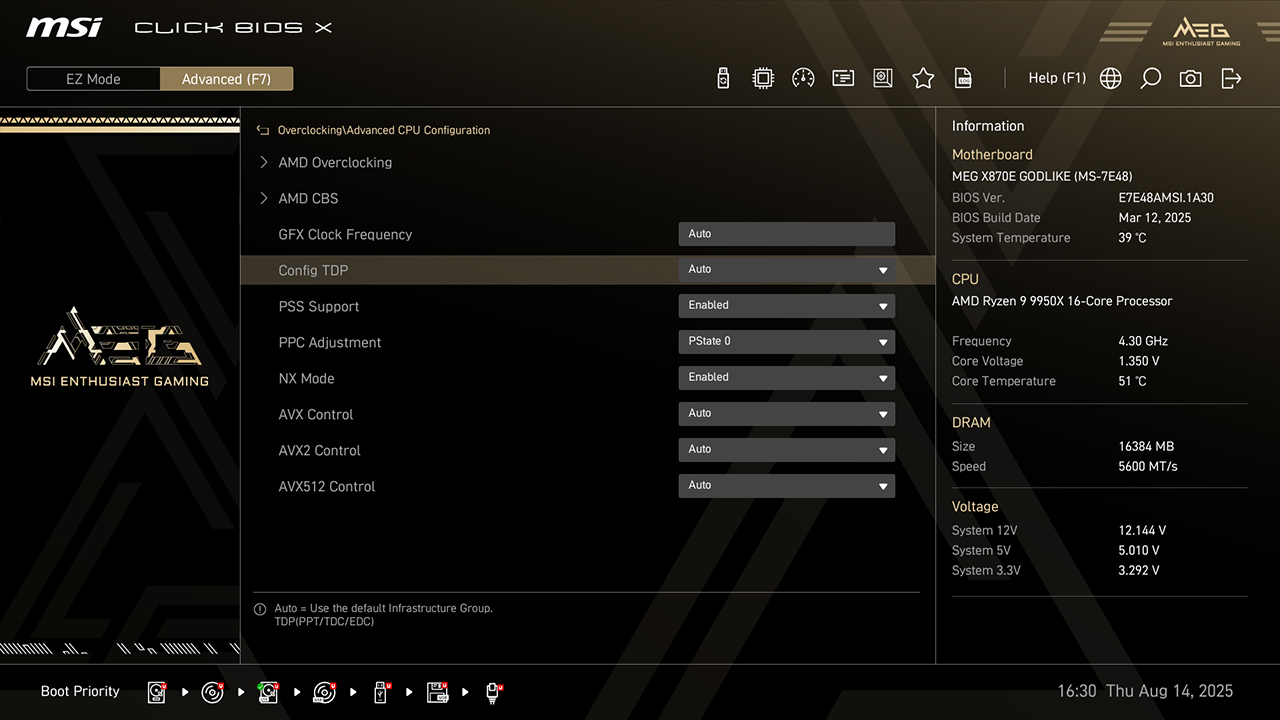
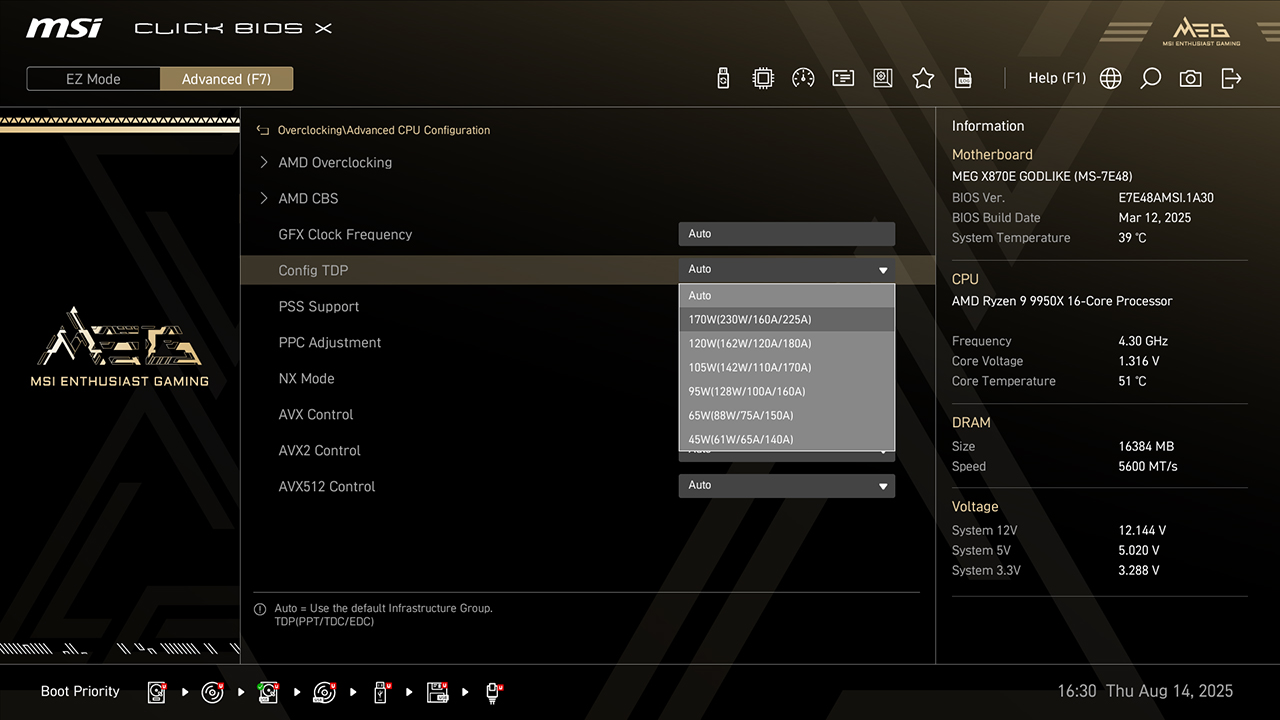
Config TDP
Config TDP offers several profiles for different TDP settings, makes setting process easier and don’t need to modify settings manually for each TDP.

-
1. In Advanced Mode
-
2. Click Overclocking\Config TDP
-
3. Choose preferred option, then press F10 to save changes and exit BIOS
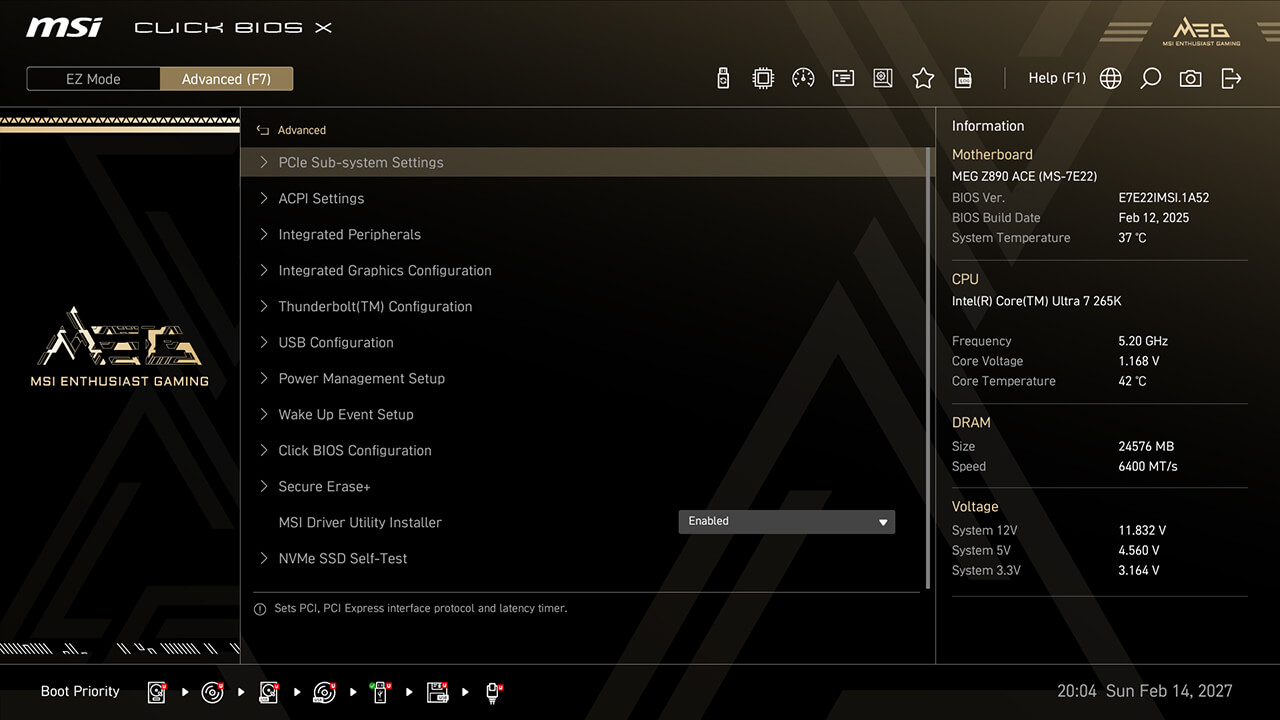
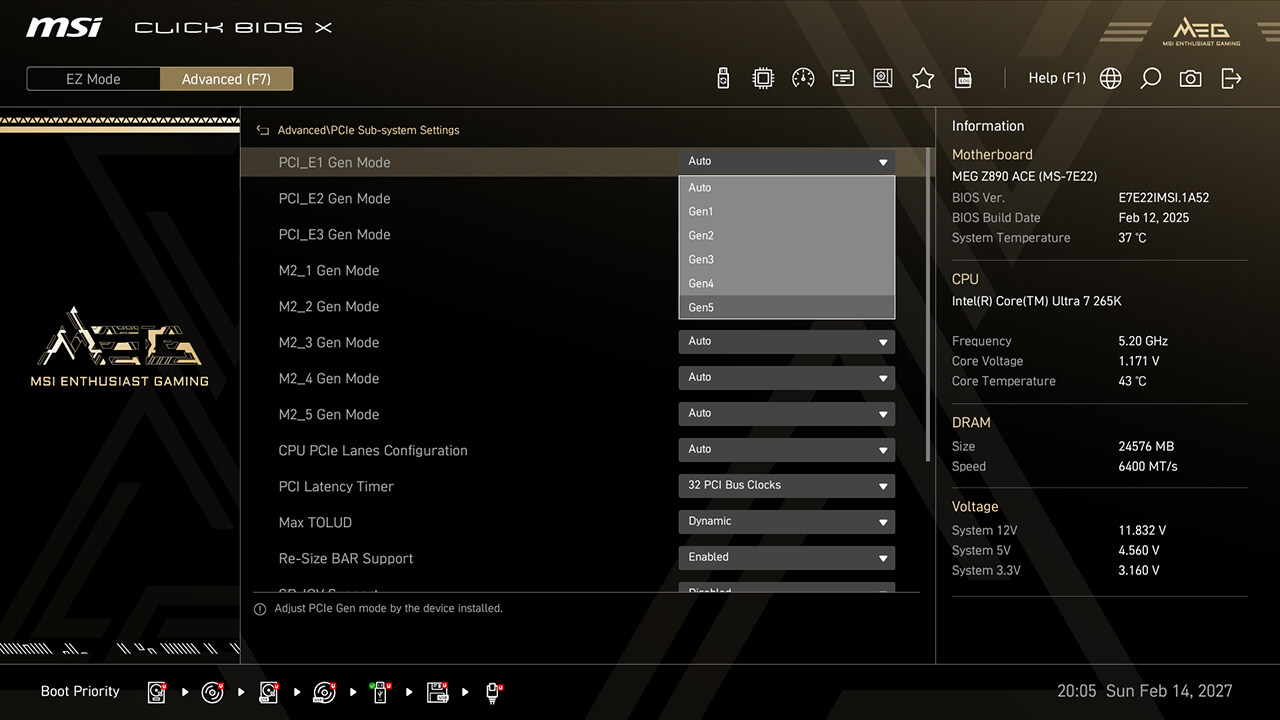
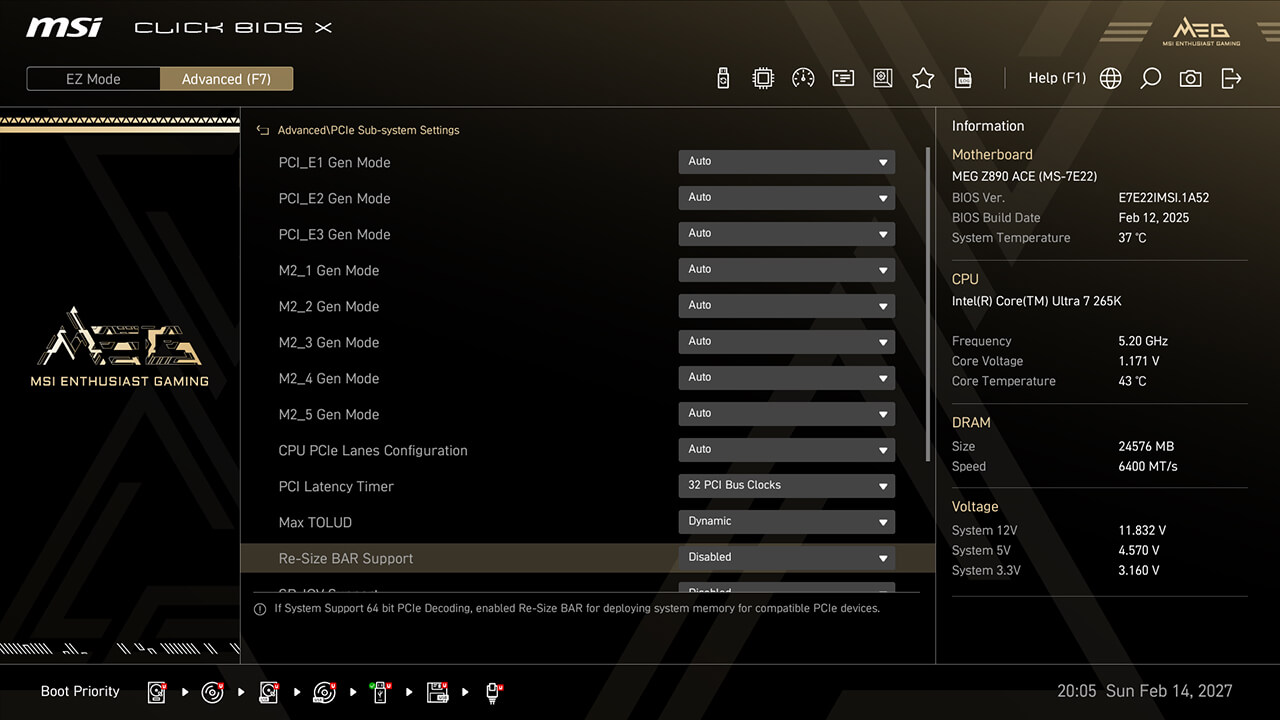
PCIe Configuration
PCIe Configuration allows you to adjust settings related to the PCIe interface, optimizing performance and compatibility for connected devices such as graphics cards, and storage devices.


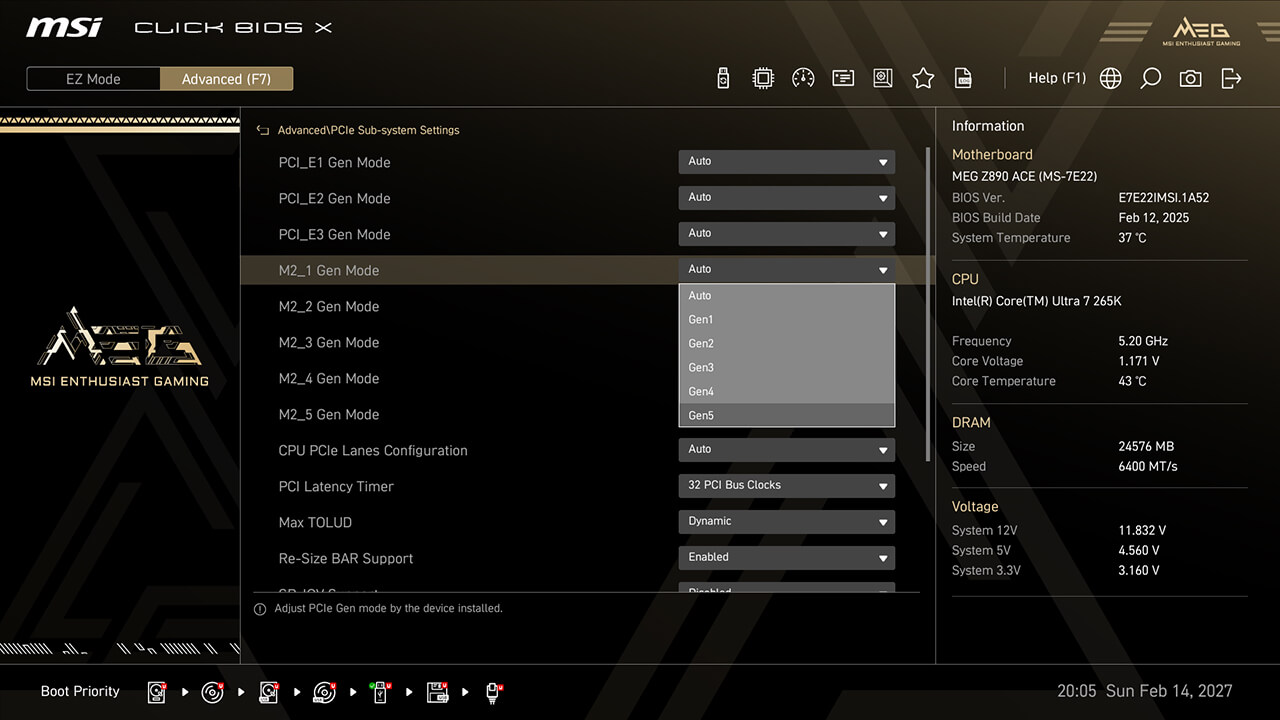
-
1. In Advanced Mode
-
2. Click Advanced\PCIe Sub-system Settings
-
3. Set preferred PCIe Speed and Lane Configuration for different PCIe or storage devices, then press F10 to save changes and exit BIOS
Intel Virtualization
Intel Virtualization enables a platform to run multiple operating systems in independent partitions, allowing the CPU to efficiently manage multiple VMs while enhancing security through isolation.

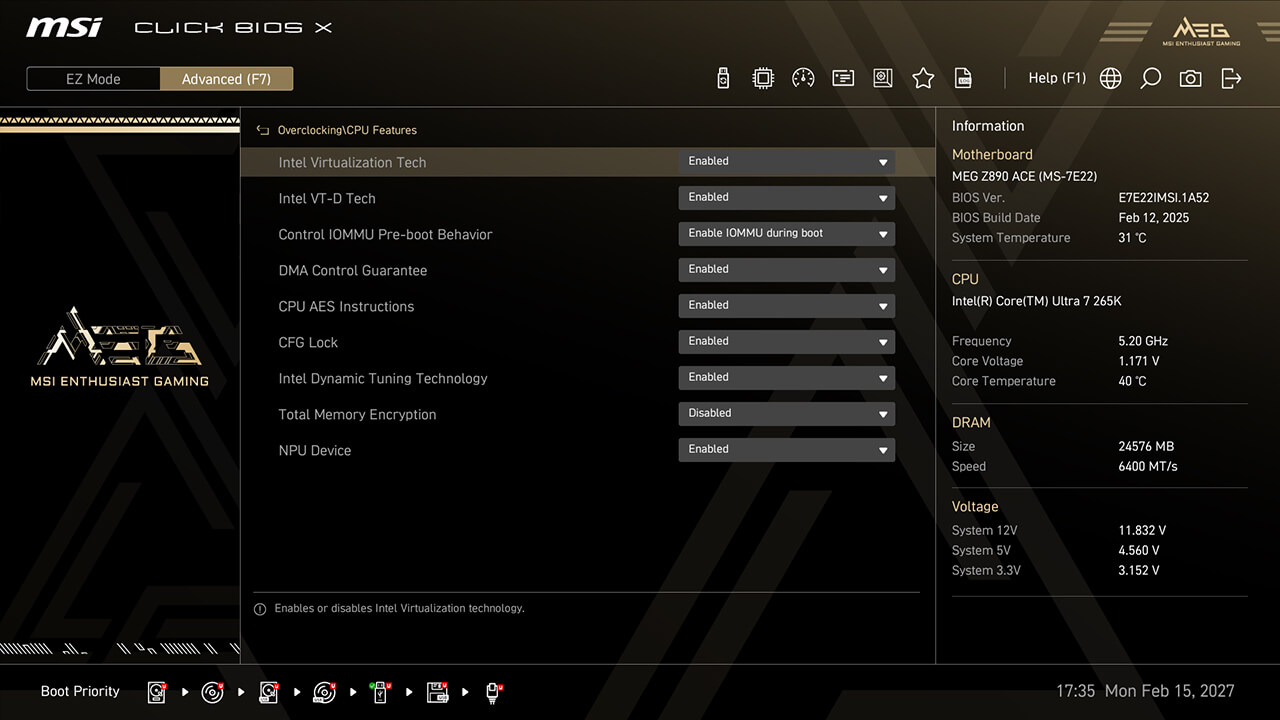

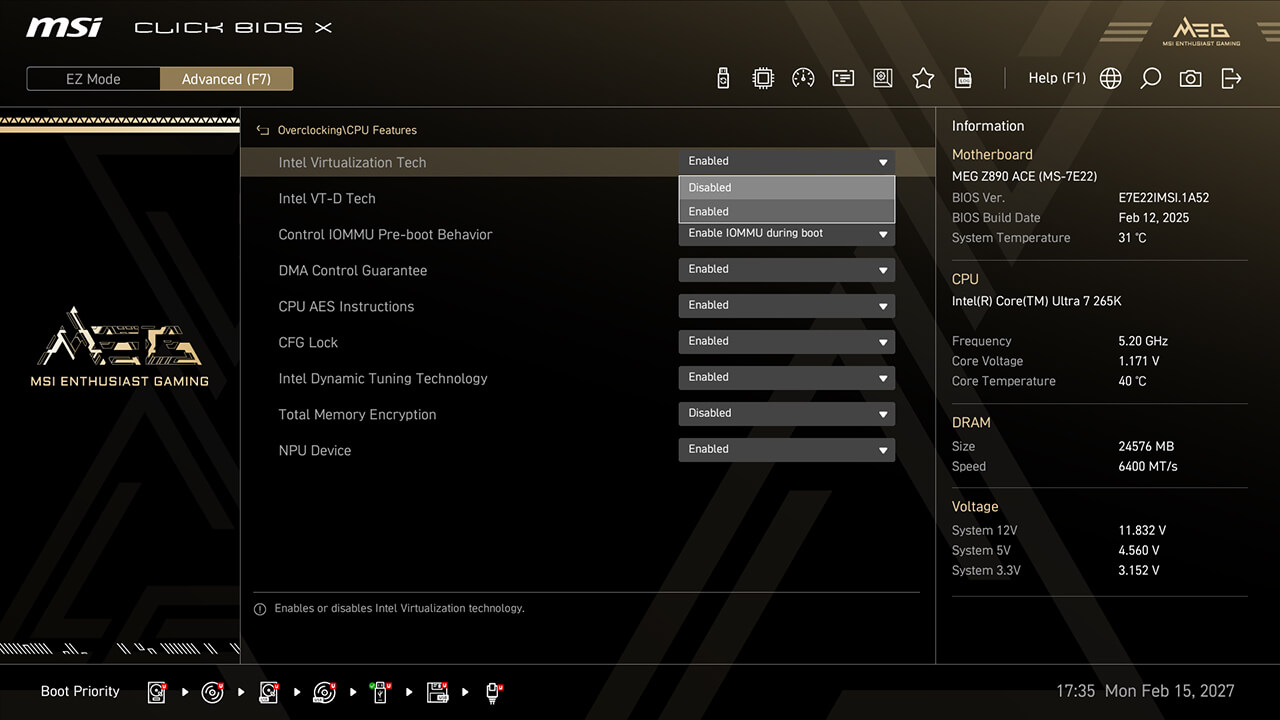
-
1. In Advanced Mode
-
2. Click Overclocking\CPU Features\Intel Virtualization Tech
-
3. Enable Intel Virtualization Tech and Intel VT-D Tech, then press F10 to save changes and exit BIOS
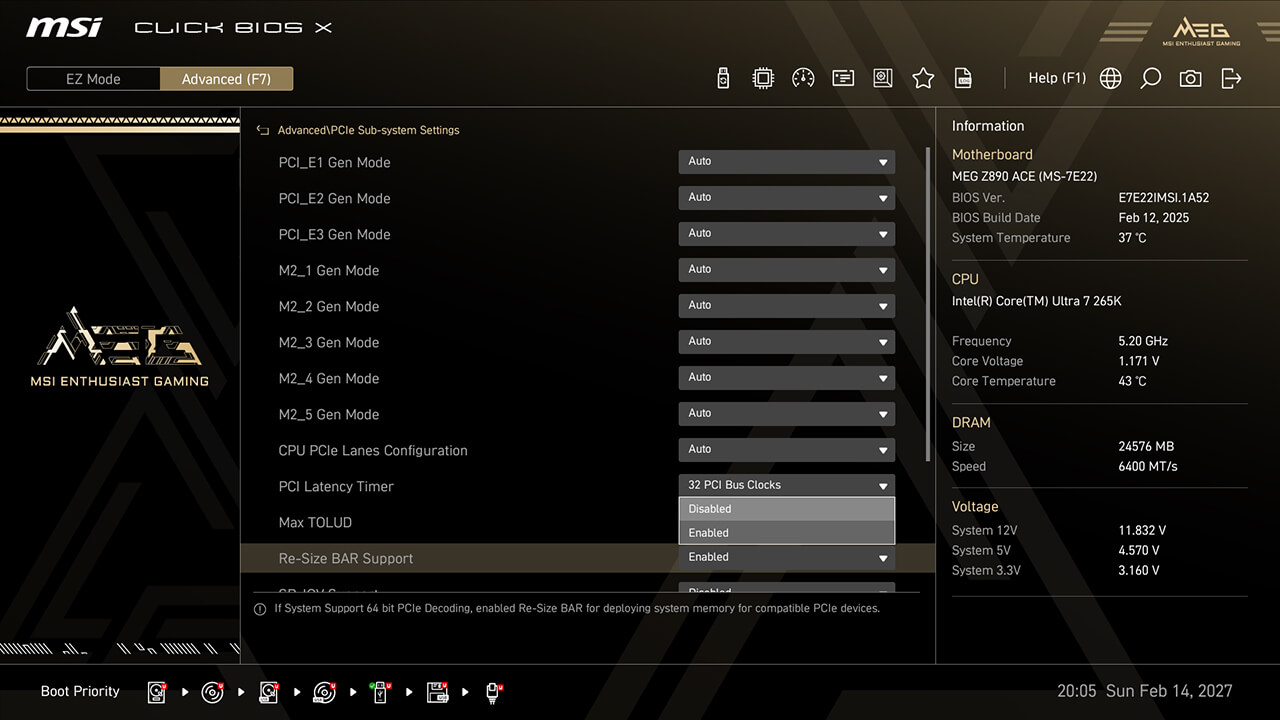
Re-size Bar
Re-Size BAR (Resizable BAR) allows the CPU to access the entire GPU frame buffer at once, enhancing performance.
-
1. In Advanced Mode
-
2. Click Advanced\PCIe Sub-system Settings\Re-size Bar Support
-
3. Enable Re-size Bar Support, then press F10 to save changes and exit BIOS
Prodotti
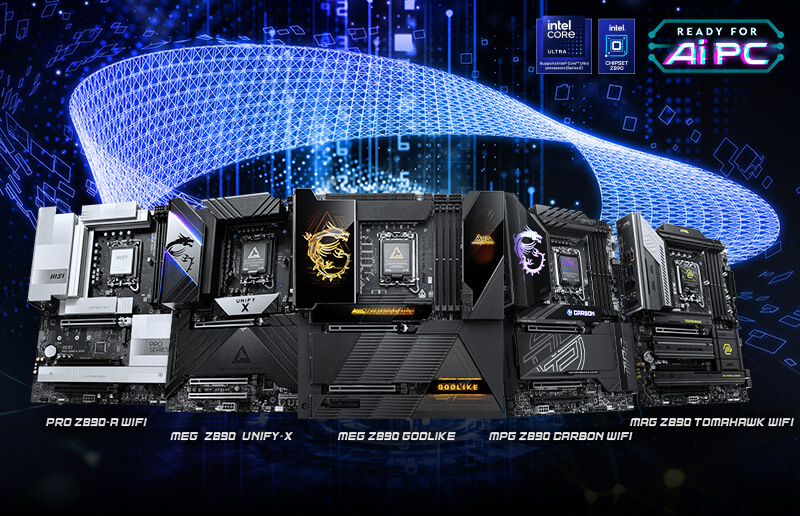
INTEL SERIE 800


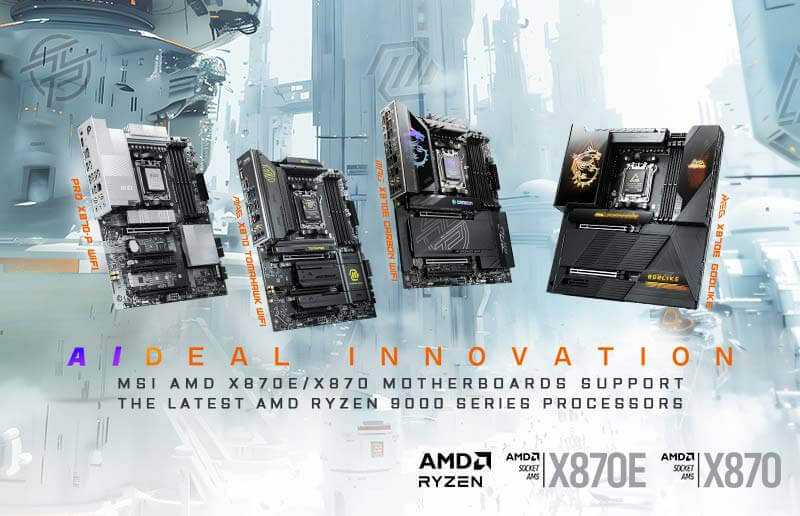
AMD SERIE 800


ARTICOLI DI APPROFONDIMENTO
MSI Click BIOS X: overclock semplificato, nuovo look e controllo senza rivali

Come migliorare le prestazioni gaming di AMD Ryzen 9 9950X3D
Latency Killer – Riduci la latenza DDR5 sulle piattaforme AM5
MSI X3D Gaming Mode migliora le prestazioni sui processori AMD Ryzen

MSI lancia il nuovo BIOS X870: supporta 192GB (48GB x4) a 6400MT/s
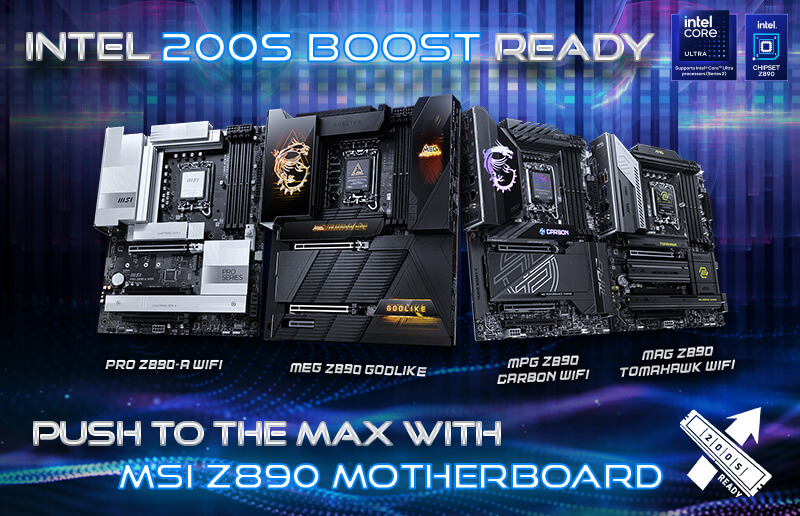
Come attivare Intel 200S Boost sulle Z890 e massimizzare le prestazioni con la memoria
MSI AI Boost migliora le performance AI di Intel Core Ultra 9 285K del 17%

Migliora il gaming con Intel Core Ultra 9 285K grazie a Memory Extension Mode
MSI Memory Extension Mode spinge le prestazioni gaming di Intel Core Ultra 9 285